


Front Suspension Adjustments
108
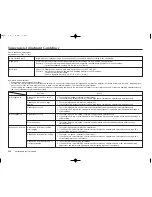
Adjustments for Competition
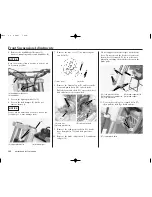
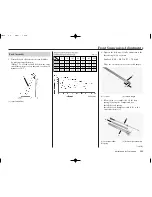
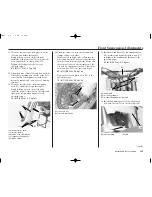
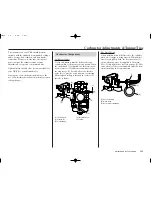
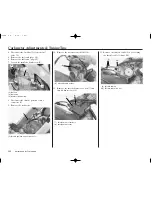
14.Check that the O-ring (12) on the fork damper
assembly (4) is in good condition. Apply the
recommended fork oil to the O-ring.
15.Pull up the outer tube (1) slowly and install
the fork damper assembly (4) into the outer
tube.
(1) outer tube/slider
(12) O-ring
(4) fork damper assembly
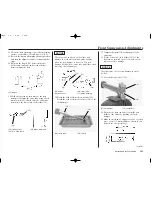
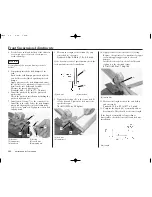
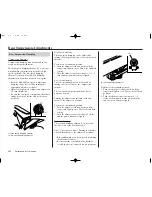
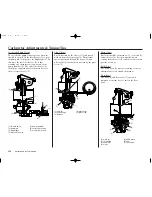
16.Insert both fork legs into the fork clamps.
Tighten the fork lower pinch bolts (13) to the
specified torque:
15 Ibf·ft (20 N·m, 2.0 kgf·m)
(1) outer tube
(16) upper fork clamp
(15) align
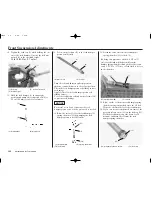
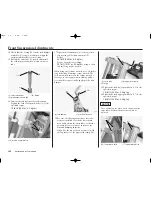
19.Tighten the fork lower pinch bolts (13) to the
specified torque:
15 Ibf·ft (20 N·m, 2.0 kgf·m)
20.Tighten the fork upper pinch bolts (17) to the
specified torque:
16 Ibf·ft (22 N·m, 2.2 kgf·m)
Over-tightening the pinch bolts can deform the
outer tubes. Deformed outer tubes must be
replaced.
NOTICE
(13) lower pinch bolts
(17) upper pinch bolts
(12)
(4)
(1)
(13)
(17)
(13)
(13) fork lower pinch bolts
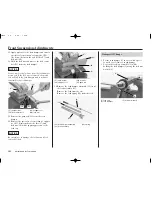
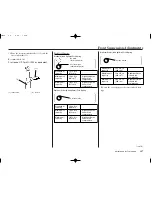
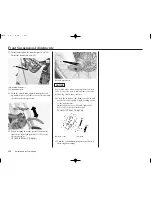
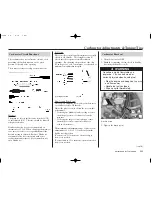
17.Tighten the fork damper (4) to the specified
torque using the lock nut wrench (14).
Actual:
25 lbf·ft (34 N·m, 3.5 kgf·m)
Torque wrench scale reading:
23 Ibf·ft (31 N·m, 3.2 kgf·m)
, using a 20 in
(50 cm) long torque wrench.
When using the lock nut wrench, use a 20-inches
long deflecting beam type torque wrench. The
lock nut wrench increases the torque wrench’s
leverage, so the torque wrench reading will be
less than the torque actually applied to the fork
damper.
(14)
(4)
(4) fork damper
(14) lock nut wrench
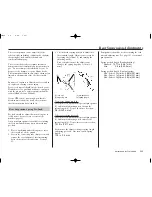
18.For ease of releasing air pressure after the
forks are installed, loosen the lower pinch
bolts and position the outer tubes so that the
pressure release screws are in front of the
rebound damping adjusters.
Align (15) the top of the outer tube (1) with
the top surface of the upper fork clamp (16).
(16)
(15)
(1)
Summary of Contents for CRF450R 2006
Page 1: ...2006 Honda CRF450R OWNER S MANUAL COMPETITION HANDBOOK ...
Page 14: ...10 Before Riding ...
Page 20: ...16 Basic Operating Instructions ...
Page 100: ...96 Servicing Your Honda ...
Page 144: ...140 Tips ...
Page 157: ...Technical Information 153 Wiring Diagram ...
Page 158: ...154 Technical Information ...
Page 169: ...Memo 165 ...
Page 170: ...166 Memo ...
Page 171: ...Memo 167 ...


