2
5
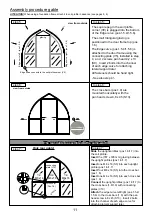
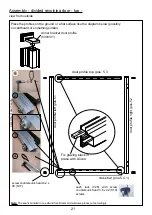
Assembly procedure - eaves -
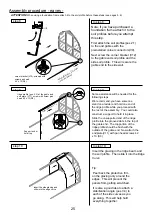
soil profile (pos. 2.1) slide
to corner bracket
corner bracket (V
2) screwed with
screw pan head
4,2 x
3 (S9).
Tip:
Peel back the protective film
on the glazing only around the
edges. This will prevent the
panels from getting scratched.
to step 9:
to step 8:
Some assistance will be needed for the
following steps.
We recommend you have someone
stand on a ladder and hold one end of
the ridge profile while you proceed with
the rest of the assembly. You could also
construct a support to hold it in place.
Slide the unsupported end of the ridge
profile into the grooves/slots in the top of
the gable end. The top portion of the
ridge profile should be flush with the
outside of the gable end. Now attach the
end plate(V11) with pan head screws 4.2
x 13 (S9)
to step
0:
step 8
step 9
step
0
ATTENTION!
When using a foundation frame attach it to the soil profile before these steps (see pages 5, 6)
ridge profile (pos. 3.3) at the gable and
end plate (V
) screw with screw pan
head 4,2 x
3 (S9)
ridge profil (pos. 3.3
Support end or
hold it up
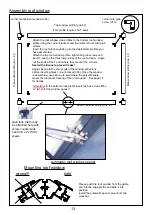
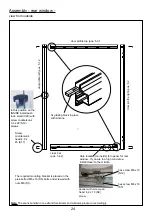
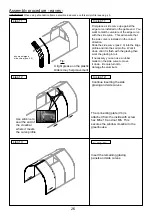
insert the side glazing and
slide into the edge curve
First attach the soil profiles(pos 2.1)
to the end gables with the
preinstalled corner connectors(V9).
Note: If you have purchased a
foundation frame attach it to the
soil profiles before you attempt
this step.
Next screw the corner bracket (V12)
to the gable end soil profile and the
side soil profile. This will secure the
gable end to the side wall.
It is also a good idea to attach a
stabilization angle (pos 3.4) to
each of the side curves as you
go along. This will help hold
everything together.
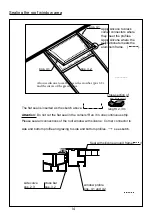
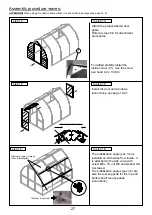
Insert the glazing in the ridge beam and
the soil profile. Then slide it into the Edge
Curve.

