2
Thank you for purchasing a Riga greenhouse!
Please
read all the assembly instructions then follow them step by step. We also recommend
following our YouTube animated assembly video. Find the link to the Exaco YouTube page on our
website at www.exaco.com.
If you have questions or run into any difficulty, please give us a call
at
877-760-8500.
What to do First:
The driver will have a Bill of
L
ading
which
will have the quantity of boxes you should
receive
.
Check all the outer boxes for damage and make sure you have the correct quantity.
If you are
missing a box or
see
damage - write this on the Bill of Lading before the driver leaves. Notify
Exaco as soon as possible if any of the boxes are damaged or missing.
In the case of damage:
Please do not refuse any of the boxes or the whole shipment, because of any damage. We will
gladly replace any damaged items. Sending replacement parts is a simple and easy process.
Contact Exaco Customer Service at 877-760-8500 or email us at [email protected].
Photos will help us
identify the parts and see the extent of damage.
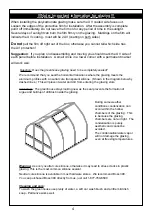
Protection from heavy winds:
If your area is subject to very strong wind gusts
,
we strongly recommend
adding some additional
wind protection such as
: a row of small trees, large shrubs or a wooden fence. Please contact
Exaco Trading customer service to discuss additional anchoring options and window bracing kits
for high wind.
Warning:
To prevent injury or damage, d
o not attempt assembly of this greenhouse in windy conditions.
It
is dangerous to leave a greenhouse partially assembled.
Damages during assembly process, due
to bad weather, are not covered by our warranty.
Assembly:
Much
of the assembly can
be
done
by one person, but it is most helpful to have a second pair of
hands available. Assembling the windows, doors and gables ahead of time will make you familiar
with the process and will make the main assembly go quicker and more smoothly.
Special Note:
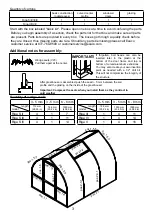
Much of the greenhouse is assembled with series of bolts that are inserted into the channels on
the aluminum profiles/extrusions. If you miss inserted a bolt where needed, there are insertion
points in
the black ends of the
vertical and curved profiles/extrusions. You may also create your
own insertion point with a 1/2" drill bit. This will not compromise the integrity of the structure
.
pc. Phillips screwdriver size 2
pc.
10mm Wrench
pc.
3mm allen key (included in the accessoires bag of the roof window)
pc. level
pc. stepladder
1 pc. file to remove any burrs on the profil
pc. rubber
mallet
pc. tape measure
- combination metric/inches is best
Storage:
Please keep all the boxes in a dry place and protect against sunlight (see not regarding
polycarbonate below). If stored outdoors, protect securely with tarps.
Placement of greenhouse:
If possible, choose a sunny location, avoiding the shadows of buildings and trees. For vegetables,
it is recommended to position your greenhouse in a north-south orientation if possible - for flowers
and potted plants, east-west.
For assembly, you will need the following tools:


