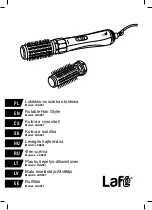
background image

3

18

even when the appliance is switched off. 

7.  For additional protection, the installation of a residual current 

device (RCD) with a rated residual operating current not 

exceeding 30mA is advisable in the bathroom electrical circuit. 

In case of doubt, ask a qualified electrician for advice. 

8.  Warning! 

Do not use the appliance on wet hair. It may be used 

on damp hair. 

9.  Read this instruction manual thoroughly before using the appliance.
10.  After each use, remove hair and dust from the appliance.
11.  If you intend to hand this appliance over to a third party, hand over this 

instruction manual as well.

12.  Regularly check the cord and plug for potential damage.
13.  Take special care when children are near the appliance.
14.  Do not hang the cord on sharp edges.
15.  Use the appliance only as described in this manual.

16. Warning!

 Do not wrap the cord around the appliance!

17.  Pulling or carrying the appliance by its cord, using the cord as a handle, 

trapping the cord in a closed door or pulling the cord over sharp edges is 
forbidden. Keep the cord away from heated surfaces.

18.  Do not turn off the appliance by pulling the cord. To unplug the cord from 

the power supply socket, pull the plug, not the cord.

19.  Do not place the appliance on a wet surface. 
20.  The appliance is intended for indoor use. 
21.  Only use the appliance for its intended purposes.

22. CAUTION!

 The appliance heats up during operation. Do not touch the 

elements that heat up (brush bristles) – risk of burns.

23. CAUTION!

 Do not touch the appliance when your hands are wet.

24. 

Before  first  use,  make  sure  the  voltage  indicated  on  the  appliance 

corresponds to your local outlet voltage.

25.  Unwind the cord carefully before use.
26.  Do not operate the appliance when it is damaged or after it malfunctions.
27.  Do not operate the appliance when dropped or if any evidence of damage 

Summary of Contents for HS-9314

Page 1: ...URZ DZENIE DO STYLIZACJI W OS W 2w1 2 in 1 HAIR STYLING TOOL INSTRUKCJA INSTRUCTION MANUAL...

Page 2: ......

Page 3: ...mog si nieznacznie r ni od orygina u 1 ZASTOSOWANIE I FUNKCJE 4 2 DANE TECHNICZNE 4 3 ZASADY BEZPIECZNEGO U YTKOWANIA 4 4 OBJA NIENIE SYMBOLI 7 5 BUDOWA 8 6 ZAWARTO ZESTAWU 9 7 U YTKOWANIE 9 8 CZYSZC...

Page 4: ...pod nadzorem osoby doros ej lub korzystaj z urz dzenia bezpiecznie zgodniezinstrukcj obs ugiirozumiej zagro enia 2 Nale yzwraca uwag nadzieci byniebawi ysi urz dzeniem 3 Czyszczenie i konserwacja urz...

Page 5: ...i 14 Nie wieszaj przewodu na ostrych kraw dziach 15 U ywaj urz dzenia tylko tak jak opisano w niniejszej instrukcji 16 Uwaga Nie wolno zwija przewodu zasilaj cego wok urz dzenia 17 Nie ci gnij urz dze...

Page 6: ...miennego 31 Zawsze od czaj od sieci pr du przemiennego je li nie korzystasz z urz dzenia oraz przed czyszczeniem 32 Je li urz dzenie jest gor ce po je na powierzchni odpornej na wysokie temperatury i...

Page 7: ...st zapewnione przez zastosowanie odpowiedniej izolacji podw jnej lub wzmocnionej kt rejzniszczeniejestbardzoma oprawdopodobne Urz dzenie przeznaczone do u ytku domowego Nale y od czy urz dzenie od r d...

Page 8: ...elowania okr g a 3 Otwory nawiewu 4 Dioda sygnalizuje e urz dzenie jest w czone 5 W cznik wy cznik wraz z 3 stopniami nawiewu 6 Przycisk zwalniania blokady nasadki 7 R czka 8 Obrotowe mocowanie z uchw...

Page 9: ...w 2w1 1x Szczotka do modelowania prostuj ca 1x Szczotka do modelowania okr g a 1x Instrukcja obs ugi 7 U YTKOWANIE UWAGA Podczas pracy urz dzenie nagrzewa si Nie przyk adaj d oni nie ap za otwory naw...

Page 10: ...ZOTK DO MODELOWANIA PROSTUJ C 1 Upewnij si e napi cie elektryczne w gnie dzie sieci elektrycznej jest zgodne z parametrami podanymi w niniejszej instrukcji obs ugi 2 Pod cz urz dzenie do sieci elektry...

Page 11: ...h odwi w osy 6 Czynno powtarzaj a zakr cisz loki na reszcie w os w Dla utrwalenia efektu po stylizacji u yj lakieru do w os w Po ka dym u yciu nale y wy czy urz dzenie od czy od sieci elektrycznej i p...

Page 12: ...cznym i oparzenia 8 1 G WNE ZASADY W a ciwe i regularne czyszczenie zapewnia bezpiecze stwo u ytkowania oraz przed u a ywotno urz dzenia 8 CZYSZCZENIE I KONSERWACJA 1 Czyszczenie powinno by przeprowad...

Page 13: ...a umieszczony na produkcie instrukcji obs ugi lub opakowaniu 1 Zawsze przechowuj urz dzenie w suchym wentylowanym miejscu niedost pnym dla dzieci 2 Chroni urz dzenie przed wibracjami i wstrz sami podc...

Page 14: ...udost pniana organom nadzoruj cym rynek W celu reklamacji produktu nale y dostarczy urz dzenie do Punktu Obs ugi Klienta w dowolnym sklepie sieci Biedronka Wszystkie pytania i problemy zwi zane z fun...

Page 15: ...osta a plomba zabezpieczaj ca oraz w kt rych dokonano pr b naprawy przer bek lub zmian konstrukcyjnych 6 Gwarancj nieobj te s podzespo y ulegaj ce naturalnemu zu yciu podczas eksploatacji 7 Zaleca si...

Page 16: ...ghtly from the original 1 APPLICATION AND FUNCTIONS 17 2 TECHNICAL SPECIFICATIONS 17 3 SAFETY INSTRUCTIONS 17 4 EXPLANATION OF SYMBOLS 20 5 APPLIANCE COMPONENTS 21 6 PACKAGE CONTENTS 22 7 USE 22 8 CLE...

Page 17: ...provided they do so under adult supervision in a safe manner in accordance with the instruction manual as well as with an understanding of the hazards involved 2 Do not allow children to play with th...

Page 18: ...Warning Do not wrap the cord around the appliance 17 Pulling or carrying the appliance by its cord using the cord as a handle trapping the cord in a closed door or pulling the cord over sharp edges i...

Page 19: ...liance is hot put it on a heat resistant surface Never cover the appliance with a towel clothes etc 33 Do not attempt to open the housing or remove any parts of the appliance The appliance does not co...

Page 20: ...ion damage to which is unlikely The appliance is intended for private indoor use Caution Switch off the appliance unplug it and let it cool down beforecleaningandmaintenancetoavoidelectricshockandburn...

Page 21: ...ing brush 3 Air blow outlets 4 Light indicator indicates that the appliance is switched on 5 On off switch with 3 blowing intensities 6 Attachment lock release button 7 Handle 8 Rotating mounting with...

Page 22: ...tyling tool 1x Straightening brush 1x Curling brush 1x User s manual 7 USE WARNING The appliance heats up during operation Do not touch or grasp the air blow outlets risk of burns Do not allow the dev...

Page 23: ...in this user manual 2 Plug the appliance into the power supply socket 3 Turn on the appliance and select the blowing intensity Warning Do not touch and do not put your hands on the air blow outlets R...

Page 24: ...e unplug it from the power supply socket and leave it to cool down Always remove all hair from the appliance thoroughly after every use Warning 1 Iftheapplianceishot putitonaheat resistantsurface Neve...

Page 25: ...d dust from the appliance Never use caustic or abrasive cleaning agents to clean the appliance 4 Do not clean the appliance under running water and do not immerse it in water 1 Always keep the applian...

Page 26: ...r package communicates this requirement 3 Thematerialsincorporatedintheappliancecanberecycledinaccordance with their relevant markings Thanks to recycling re use of materials or otherformsofutilizingu...

Page 27: ...urchase Should you find any defect submit a complaint at the place of purchase 2 A damaged product means a product failing to provide the features described in the Instruction Manual due to intrinsic...

Page 28: ...o facilitate defect verification 8 This warranty for the sold consumer product does not exclude restrict or suspend any rights of the buyer arising from statutory warranty regulations covering defects...

Reviews: