HOBO MicroRX Station for HOBOnet (RX2105 and RX2106) Manual
1-800-LOGGERS
9
www.onsetcomp.com
7.
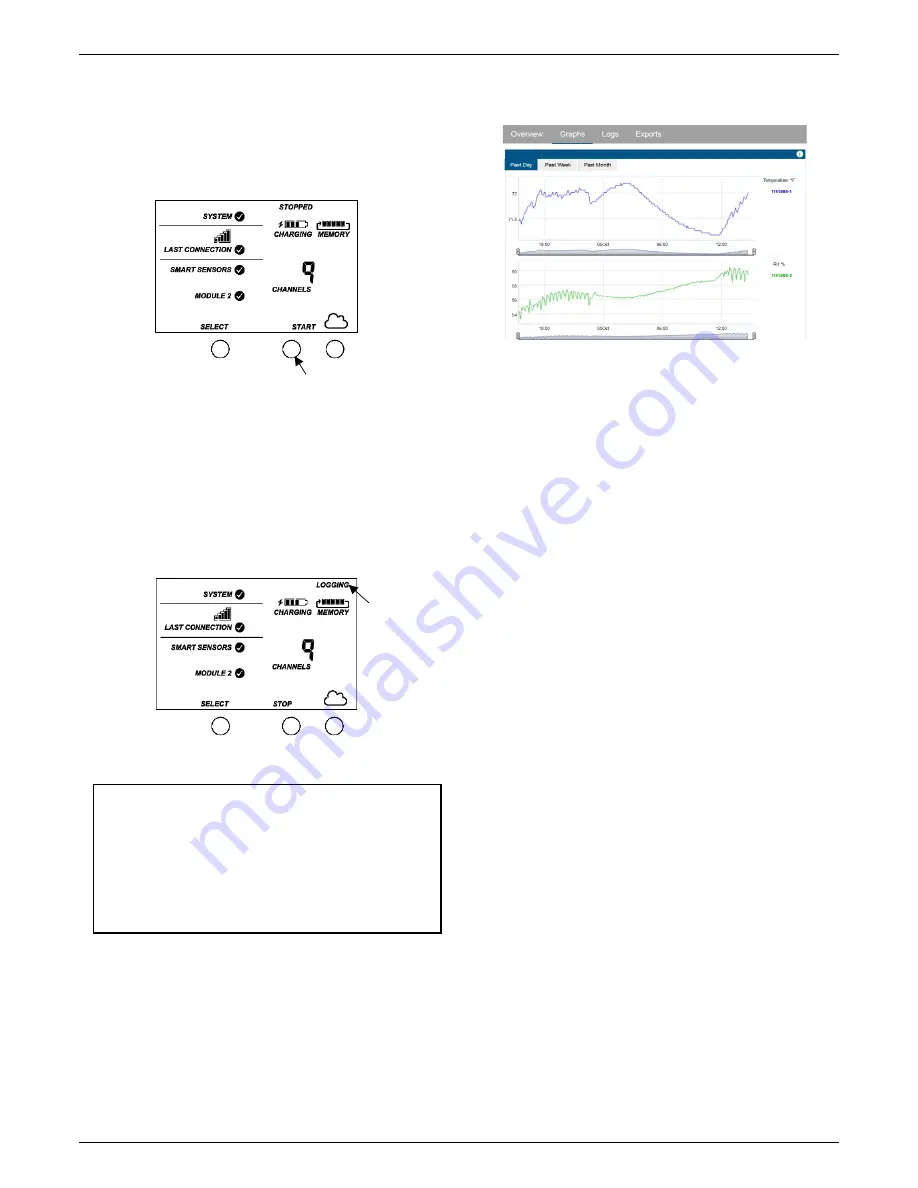
Start logging.
Press the Start button on the station to start logging. The
station will connect to HOBOlink (“Connection” will blink
on the LCD) and then logging will begin at the logging
interval specified for smart sensors (if applicable) and
wireless sensors.
You can also start logging from HOBOlink. Select
Start/Stop from the Configure menu in HOBOlink and click
Start. Logging will not begin until the next time the station
connects to HOBOlink. Press the Connect button on the
station to connect to HOBOlink at any time.
Once logging begins, “Logging” appears in the upper right
corner of the LCD as shown in the following example.
“Logging” will blink until the first logging sample is
recorded. At that point, it will stop blinking and remain
illuminated until logging is stopped.
Measurements are uploaded to HOBOlink each time the
station connects.
Important:
See
Deploying and Mounting the Station
for
installation steps and other deployment guidelines. If using
the station outdoors or in harsh indoor conditions, you
must install the sensor cable channel. See
Installing the
Cable Channel
for details.
Important:
If you are using smart sensors only and no
wireless sensors, power down the station and unplug the
manager to preserve battery power.
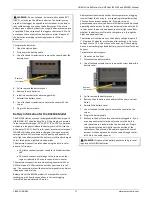
Viewing Data in HOBOlink
Data is uploaded to HOBOlink each time the device connects.
For a snapshot of the latest conditions, click Devices, then RX
Devices, and click the device name to view the readings from
the last connection. You can also view any enabled graphs as
shown in the following example.
Logged data is saved in a database. You can export this data on
demand as needed or set up automatic exports that are
delivered to email and/or FTP addresses on a schedule you
specify.
To download and export data:
1.
In HOBOlink, click Data and then Exports.
2.
Click Create New Export.
3.
Follow the instructions on the screen to select the name,
format, time zone, and time frame, and then the devices
and sensors to include in the export. Reorder the sensors as
needed.
4.
Click Save to keep these settings for future use or click
Export Data to export immediately.
To set up a scheduled data delivery:
1.
Click Data and then click Data Delivery.
2.
Click Create New Delivery.
3.
Under General Settings, type the name of the delivery
schedule and the frequency of delivery. Enable the Active
checkbox. Select other settings if desired.
4.
Under Select Data to Export, choose the name of the
custom data export you want to be delivered (or follow the
previous set of steps to set up a new data export).
5.
Under Data Destination, select FTP/SFTP or Email for the
delivery method and fill in the appropriate fields.
6.
Click Save. Data will then be delivered on the schedule you
selected.
See the HOBOlink Help for more information on Data Delivery
and other ways to monitor your station, such as using
dashboards.
Setting System and Sensor Alarms
You can set up both system and sensor alarms in HOBOlink.
System alarms can trip for a missed connection, low battery,
smart sensor failure, or missing mote. With a sensor alarm, you
can configure an alarm to trip at one measurement level and
clear at another. In addition, if you are using a rain gauge with
the station, then you can set up an accumulated rain sensor
alarm.
Press this button to start logging
“Logging”
appears
when logging
begins


