Attaching the elevator control horn
Locating the rudder exit hole
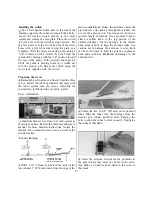
Locate a nylon control horn. Place the horn on
the bottom of the elevator. Position it 1" (25.4mm)
from center and aligned with the leading edge as
shown in the sketch and photo. Mark the two holes
with a felt-tip pen. The holes of the control horn
should line-up with the gap between the rudder
and the vertical stabilizer. Drill two 1/16" (1.5mm)
holes through the balsa elevator. Insert two 2-56 x
5/8" machine screws through the control horn and
elevator into the control horn back plate on the
opposite side of the elevator. Tighten the screws
but do not crush the balsa.
QThe precut rudder pushrod exit hole is located on
the same side as the rudder control horn, under the
covering. Locate the exit hole by gently running
your finger down the top of the fuselage. Using a
hobby knife, remove the covering from the rudder
pushrod exit hole. Do not remove the covering from
the exit hole on the opposite side.
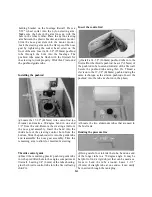
Cutting the elevator exit hole
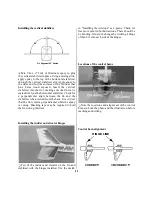
Installing the rudder horn
Locate the other nylon control horn. Place the
control horn on the left side of the rudder, 1" (25mm)
from the top of the hinged stabilizer as shown in the
photo on the previous page. Mark the two holes with
a felt-tip pen. Drill two 1/16" (1.5mm) holes through
the rudder. Use two machine screws 2-56 x 5/8" to
attach the control horn.
Q The precut elevator pushrod exit hole is located
on the same side of the fuselage as the elevator
control horn, beneath the covering. Locate the exit
hole by gently running your finger down the side of
the fuselage over the covering. Using a hobby knife,
remove the covering from the elevator pushrod
exit hole. Do not remove the covering from the exit
hole on the opposite side of the fuselage.
12

