8
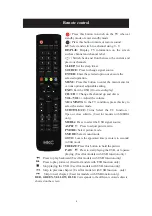
Remote control
:
Press this button to switch on the TV when at
standby mode or enter standby mode.
:
Press this button to mute or restore sound.
0-9
: Select and switch to a channel using 0 - 9.
DISPLAY:
Display TV information on the screen
such as channel and channel label.
:
Switch back and front between the current and
previous channels.
SLEEP:
Set the sleep timer.
SOURCE:
Press to change signal source.
ENTER:
Enter the selected option or execute the
selected operation.
MENU:
Press this button to enter the main menu for
various optional adjustable setting.
EXIT:
Exit the OSD (On-screen display).
CH-/CH+:
Change the channel up and down.
VOL-/VOL+:
Adjust the volume.
N
ICAM/MTS:
In the TV condition, press this key to
select the stereo mode.
SUBTITLE/CC:
Turns Select the CC function. /
Open or close subtitle.
(Used for models with MEDIA
only).
MEDIA:
Press to select the USB signal source.
ASPECT
:
Press to adjust picture ratio.
PMODE:
Select picture mode.
SMODE:
Select sound mode.
GOTO:
Locate the appointed time (accurate to seconds)
in USB mode.
FREEZE:
Press this button to hold the picture.
PALY
Press to start playing the USB, or to pause
playing. (Used for models with USB function only)
Press to play backward.(Used for models with USB function only)
Press to play forward. (Used for models with USB function only)
Stop playing the USB. (Used for models with USB function only)
Skip to previous chapter. (Used for models with USB function only)
Skip to next chapter. (Used for models with USB function only)
RED, GREEN, YELLOW, BLUE:
Corresponds to the different colored subjects
showed on the screen .
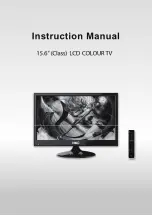
Summary of Contents for TM16S
Page 1: ...15 6 Class LCD COLOUR TV Instruction Manual ...
Page 7: ...6 Stand Installation Guide 6 1 x 4 PA s w e r c S mm 4PCS ...
Page 18: ...Visible screen size 15 6 inch 39 62cm 1366x768 47 85 ...
Page 21: ...Bedienungsanleitung 15 6 Zoll Klasse LCD FARB TV ...
Page 27: ... Standfuß installieren 4 Schrauben PA4x16 mm ...
Page 32: ... TIME ZEIT 1 Drücken Sie MENU zum Aufrufen des Hauptmenüs Dann drücken Si da ...
Page 35: ... PC bei Anschluss als Monitor und PC als Signalquelle J J J _ J ...
Page 41: ...Gebruikershandleiding ...
Page 47: ...6 Montage van de standaard schroeven PA4 x 16mm 4 stuks ...
Page 53: ...12 ...
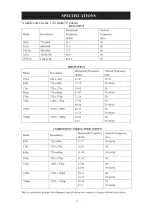
Page 58: ...Visible screen size 15 6 inch 39 62cm 1366x768 47 85 ...

