System Menu Programming
To help you get the maximum benefit from your Aurora, we will guide you through a simple set-up of a common collective pitch
120CCPM heli. The operations shown during this exercise will help you learn many of the basic programming steps required by most of
the Auroras features.
Channel assignments are;
#1 Aileron or “roll” cyclic
#2 Elevator or “pitch” cyclic
#3 Throttle
#4 Rudder or tail rotor pitch
#5 Gyro function
#6 Pitch Collective
After installing the servos and accessories in your heli, follow these steps to set-up it up.
9 CHANNEL 2.4GHz AIRCRAFT COMPUTER RADIO SYSTEM
9 CHANNEL 2.4GHz AIRCRAFT COMPUTER RADIO SYSTEM
38
39
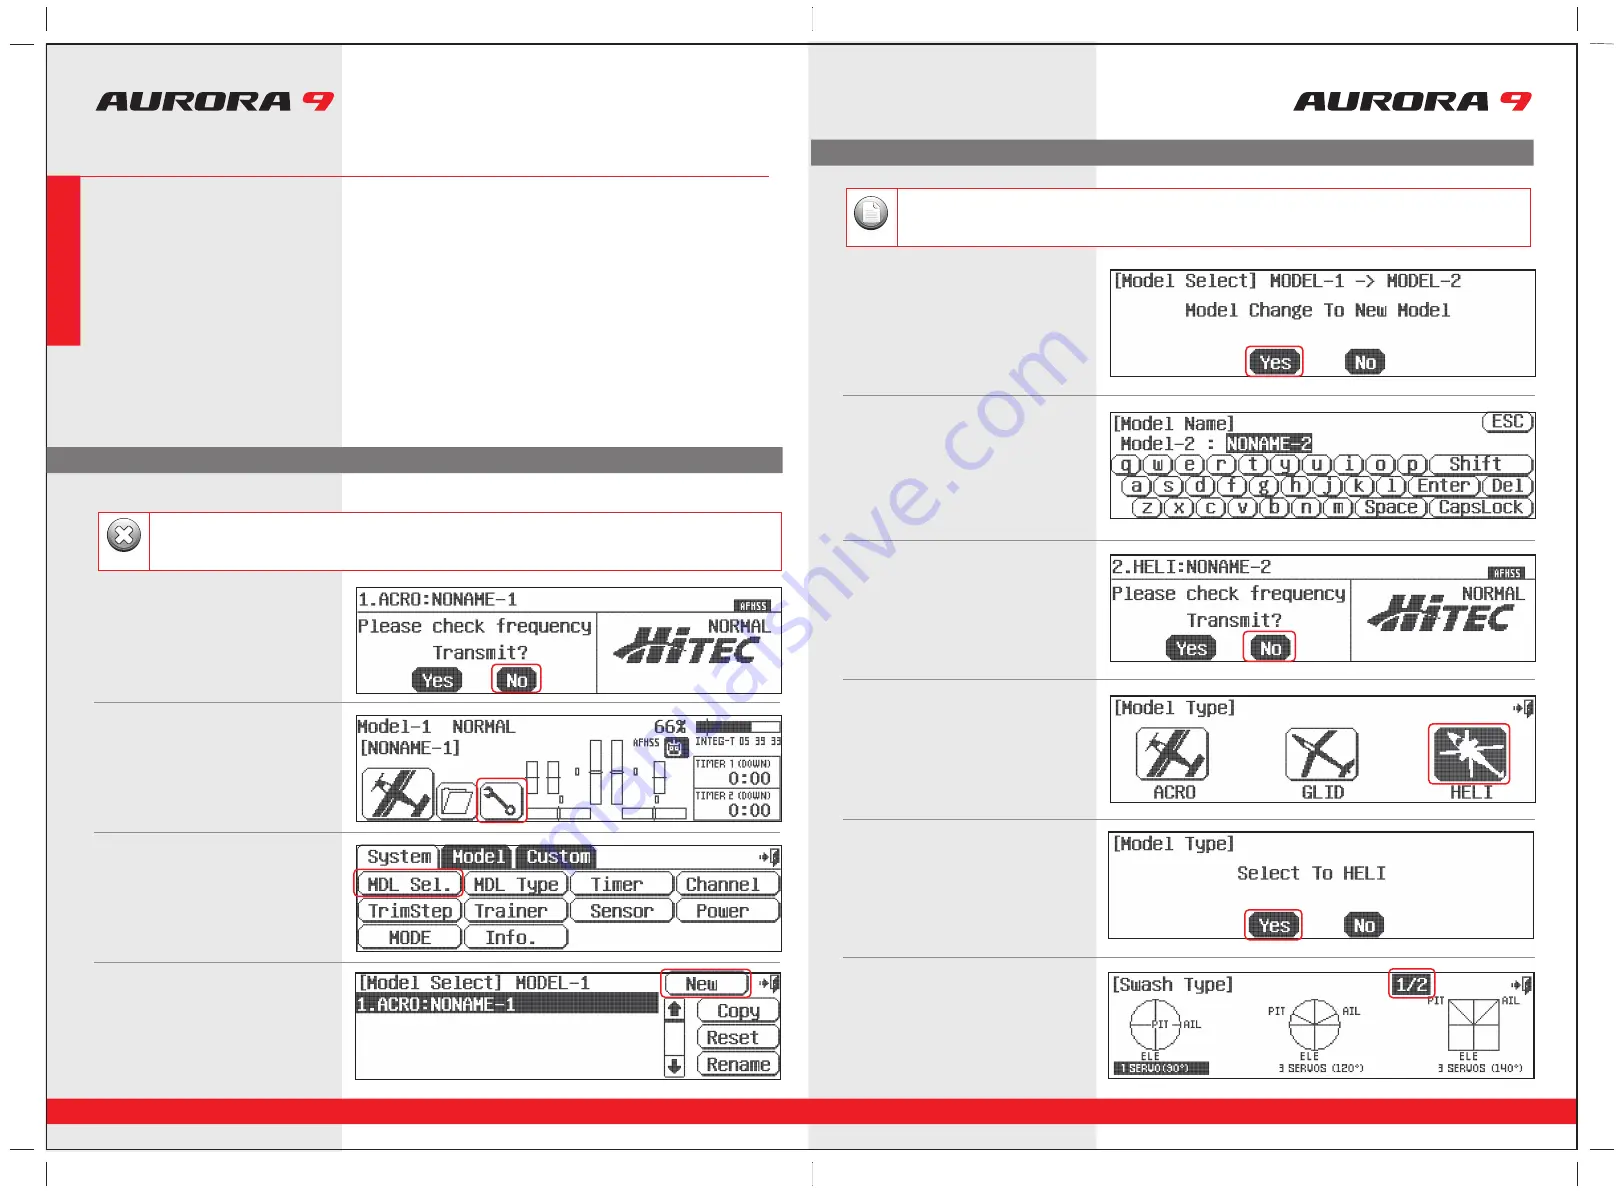
1. Turn on the transmitter; do not turn on the Heli.
2. The first screen is the transmit option,
select
No
.
5. At the model selection screen press,
New
.
6. Select,
Yes
to confirm the selection of
a new model.
7. At the model naming menu,
name your new model using the keyboard,
8. Here at transmit option screen,
press,
No
. We do not wish to transmit yet.
a. Press
Shift
to see the other characters.
b. When done press,
Enter
.
10. Select change to HELI,
Yes
at the model type
change confirmation screen.
11. Here is the screen that will tell the transmitter
what kind of swash type your heli uses.
9. Next you are drawn into the model type
screen where we select
HELI
(the heli icon on the right).
3. This is the home screen;
select the
wrench
icon for the System menu.
4. Note the System menu function choices,
select,
MDL Sel
.
For safety reasons during this set-up exercise on an electric powered heli please remove the blades and/or un-plug the
motor from the speed control.
Warning
We are programming a new model into the #2 model memory slot, not the model memory one slot. For the purpose of
this exercise it will ensure a fresh model memory with no existing programming.
Note
System Menu Programming
Quick Start Guide to setting up a Simple Heli
Sec
tion
Thr
ee


