--- 25 ---
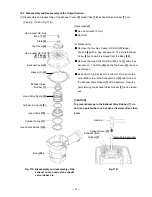
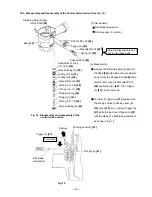
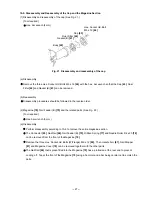
(b) Reassembly
Disassembly procedures should be followed in the reverse order. Note the following points.
Be extremely careful to prevent the entry of foreign particles into the control valve section.
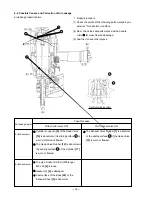
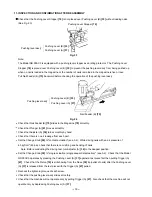
Thoroughly apply grease to the O-Ring (I.D. 1.8) [62] of Plunger (A) [61], the O-Rings (S-4) [56], (I.D. 8.8) [58]
and (I.D. 11) [59] of Valve Piston (B) [57], and the shaft of Plunger (A) [61] shown in Fig. 15.
As shown in Fig. 15, install Valve Bushing (A) [63] so that the roll pin groove in Valve Bushing (A) [63] will be
aligned with the roll pin hole in the Body [22]. First, insert the roll pin puller (3 mm dia.) into the roll pin hole.
Then, upon confirming that the puller passes through the hole, drive in the Roll Pin D3 x 22 [46].
If an attempt is made to drive the roll pin with force when the roll pin groove in Valve Bushing (A) [63] is not
aligned with the roll pin hole in the Body [22], it will damage the periphery of Valve Bushing (A) [63] and
prevent disassembly or reassembly.
Apply grease to the stem.
Coat the O-ring groove's
shaft with grease.
Body [22]
Roll Pin D3 x 22 [46]
Roll pin hole
Roll pin groove
Valve Bushing (A) [63]
Plunger (A) [61]
Valve Bushing (A) [63]
Fig. 18
After assembly, make sure that Plunger (A) [61] moves smoothly.
Summary of Contents for NR 90AC3
Page 39: ......


