44
Note
:
•
If the cover of disc insertion block is open, the ACCESS/PC indicator will blink when an image is displayed on the LCD
monitor screen: In this case, the DVD video camera/recorder will not turn off even if the power switch is set to “OFF”.
If the cover remains open after a while, the DVD video camera/recorder will automatically turn off.
•
Disc cannot be inserted or removed unless a charged battery or AC adapter/charger is connected to the DVD
video camera/recorder.
•
If a discharged battery is used, the disc cannot be inserted or removed: Connect a charged battery or AC
adapter/charger to the DVD video camera/recorder.
•
If there is some delay before recording starts, refer to “Check 4” on page 138.
•
If the disc is not correctly attached to the turntable, it will be difficult to close the cover: If this happens, do not
forcibly close the cover (this could cause a fault), but re-attach the disc to the turntable correctly.
•
If a single-sided disc is inserted into DVD video camera/recorder with the printed label facing the inside, an error
message will appear. Remove the disc and reinsert it with its recording side facing the inside. See “Trouble
Messages” on page 139.
• When using double-sided dis
c
Recording is possible on both sides of double-sided disc. However, when recording or playback on one side is
finished, recording or playback will not move automatically to the other side. Remove the disc once from the DVD
video camera/recorder, turn over the disc and insert it again for continued use.
The recording surfaces of double-sided disc are likely to become dirtied or scratched: Always make sure that
there is no dirt or scratch on the recording surface facing the pickup lens, and then use the disc taking great care
that it is not dirtied or scratched. Use the provided disc cleaning cloth to wipe off any dirt on disc (see page 27).
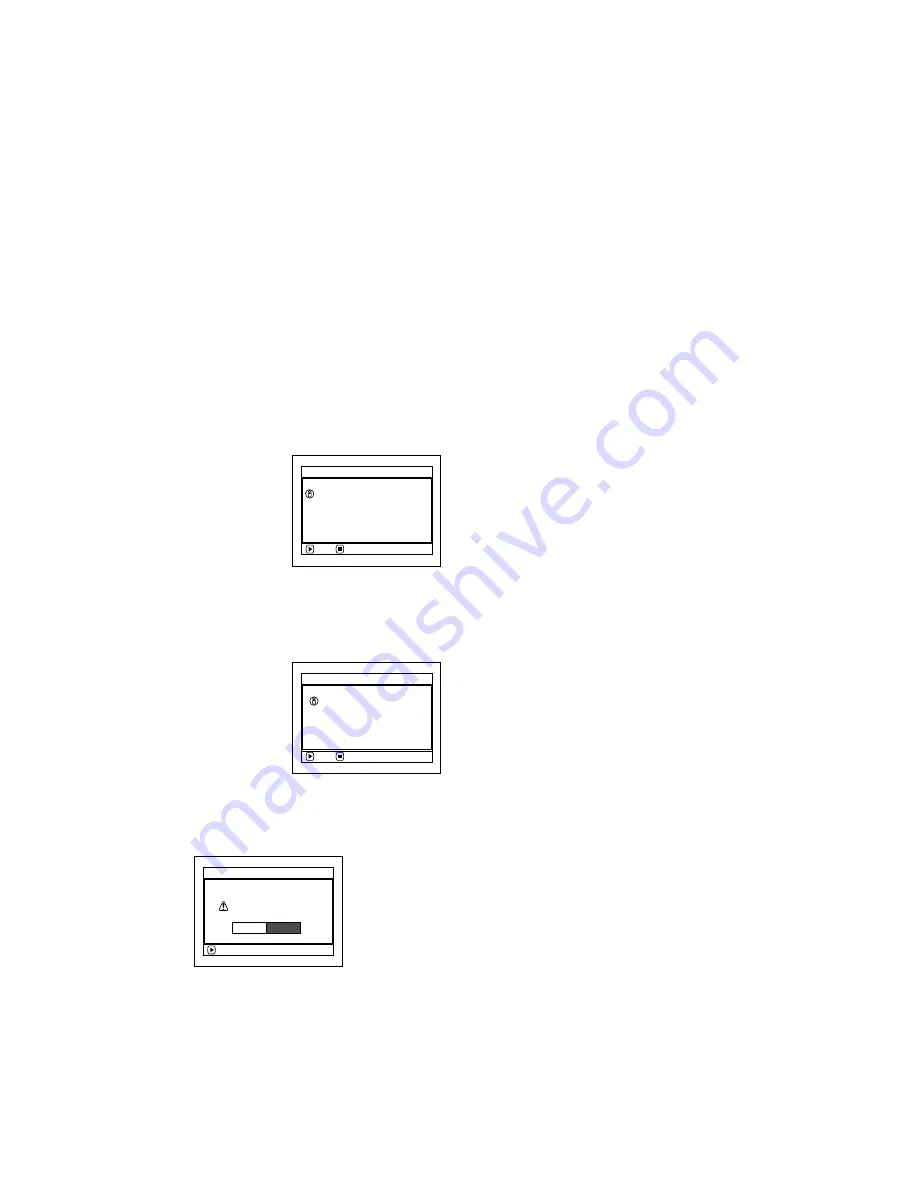
●
When using brand-new DVD-R dis
c
Recognition of the disc
will start.
The messages on the right
will appear in sequence by
pressing the
button
between messages.
When re
c
ording on this DVD video
c
amera/re
c
order:
1
Confirm the following
message on screen, and
then press the
button.
2
Choose “YES” and then press the
button.
The disc will be formatted.
When formatting is finished, message “DVD-
R disc, Video mode and 16:9 mode cannot be
changed” will appear.
3
Confirm the message, and then press the
button.
Note
:
•
See page 86 for video mode.
•
See page 87 for 16:9 mode.
NEXT
D i s c i s n o t f o r m a t t e d .
p o s s i b l e t o u s e f o r c a m e r a .
I f i t f o r m a t s , i t b e c o m e s
F o r ma t D i s c
CANCEL
NEXT
F o r ma t D i s c
CANCEL
Howe ve r , when you r e c o r d
f r om PC connec t i on
t e r m i n a l ,
p l e a s e d o n o t f o rmat.
ENTER
F o r m a t t h e d i s c n o w ?
F o r ma t D i s c
YES
NO