Installation Instructions
ML23B User Manual, October 2015
7
Step 2: Bench-test Configuration
Make sure everything works before installing into the production environment.
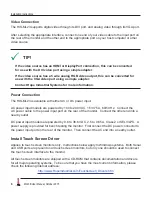
TIP!
If using a KVM extender, please refer to the installation instructions included
with the KVM extender module. It is particularly important to bench-test the full
configuration prior to final installation. This will help to identify and troubleshoot
any system issues while configuration changes may still be easily made.
Install Cable Connections
All monitors are shipped with both a 6 ft� (1�8 m) VGA video cable and 6 ft� (1�8 m) power cable,
unless longer cables were ordered in their place. DC models are shipped with a bench test
power supply. If you ordered a touch screen monitor, you also received a 6 ft. (1.8 m) USB
cable, unless a longer cable was ordered in its place. Serial (RS-232) cables may be ordered
separately�
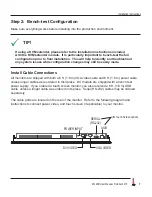
The cable ports are located on the rear of the monitor. Refer to the following diagram and
instructions to connect power, video, and touch screen (if applicable) to your monitor�
DVI VIDEO
USB
(for Touch Screen option)
SERIAL
(RS-232)
POWER INPUT
VGA VIDEO

