background image

Convenient Functionality

18

Convenient Functionality

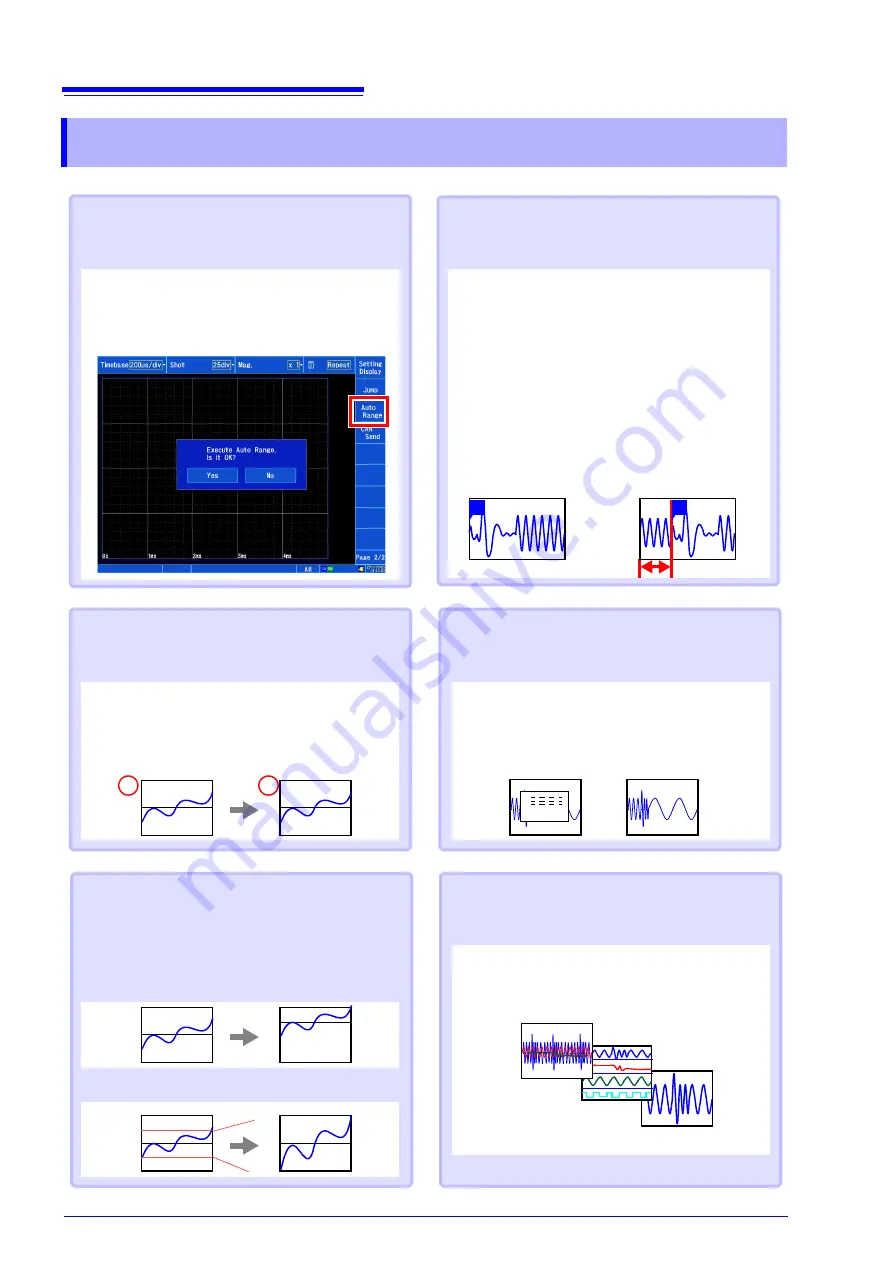
When you don’t know the time axis 

or range

“Auto-ranging”

Automatically sets the time axis range, voltage axis
range, and zero position. 

[Waveform Display (page2/2)]


[Auto Range]


[Yes]

When you wish to record evidence or 

passage of abnormal phenomena

“Pre-trigger” and “Post-trigger”

Allows you to record the waveform prior to the trig-
ger point or conditions after the trigger point. This
functionality is useful when you wish to assess
trends such as abnormal phenomena. 

[Waveform Display]

 / 

[Setting Display]


[Trigger]


[General]


[Pre-Trigger]

 / 

[Post-Trigger]

Display items vary with the trigger timing, percent
setting, and division setting. 

When you wish to convert readings to 

strain, temperature, or other values

“Scaling”

[Waveform Display]

 / 

[Setting Display]


[Channel]


[Analog]


[Scaling]

Sets the conversion method.

Without pre-trigger 
setting

With pre-trigger setting

A

V

When you wish to change the wave-

form position or display range

[Waveform Display]

 / 

[Setting Display]


[Channel]


[Display]


[Position]

 / 

[Variable]

“Position“

(specify the waveform zero position)

When you wish to assign measure-

ment results to display sheets and 

graphs

[Waveform Display]

 / 

[Setting Display]


[Channel]


[Analog]


[Display]


[Sheet]

 / 

[Graph]

ALL

S2

S1

When you wish to monitor waveforms

“Numeric monitor” and 

“Waveform monitor”

[Waveform Display]


[Numeric Monitor]

 / 

[Waveform Monitor]

Allows you to monitor current waveform and value 
input.

50

-50

-50

50

T

T

“Variable“

(specify with upper and lower limits)

Summary of Contents for MR8875

Page 1: ...MEMORY HiCORDER Measurement Guide MR8875 March 2014 Revised edition 2 MR8875A983 02 14 03H...

Page 2: ......

Page 3: ...s settings windows This manual covers the settings that can be configured on the Waveform screen in its description of how to op erate the Waveform screen Be sure to read the Operating Precautions an...

Page 4: ...ey Applies a user specified trigger SAVE key Saves data manually START key Starts measurement The key turns green while measure ment is in progress STOP key Stops measurement T USB cable slot Connect...

Page 5: ...isplay and other functions Configures the measurement method You can also configure the waveform display auto save and other settings Configure when you want to start and stop re cording based on a sp...

Page 6: ...rag Move your finger while touching the screen Switching screens Changing settings The setting will change each time you tap the screen Select from a list A more detailed tab will be dis played Tap th...

Page 7: ...ive Only an SD memory card can be used when saving data in real time 1 2 4 3 5 Connect the measurement cables to the input module Connect the AC adapter If using the optional battery pack see the inst...

Page 8: ...ntial to 0 V MR8901 MR8902 and MR8905 only Zero adjustment can be performed for all input modules at once For more precise measurement allow a warm up period of about 30 minutes to elapse after turn O...

Page 9: ...performed Since data is recorded directly to the SD memory card it is possible to record data in excess of the internal memory capacity Auto save The sampling speed or time axis recording length and...

Page 10: ...rent setting tap the setting again Select the desired set ting from the Shot list Set the length number of di visions to record each time data is acquired If you do not wish to change the setting tap...

Page 11: ...et the frequency band to cut filter band if you wish to cut excessive high fre quency components for example when input signal noise is a concern Coupling The instrument is normally used in DC cou pli...

Page 12: ...ns Select Analog and set the trigger condi tions for each channel Channel Trigger type Level value at which to apply trigger T T Level Slope T T T T Trigger types In Out Open the screen Waveform Displ...

Page 13: ...hen the media becomes full Save operation will stop but measurement will continue Delete Old files are deleted so that data can continue to be saved when the media becomes full Configure settings as n...

Page 14: ...th a touch pen cannot be detected Scrolling with the Arrow window Waveforms can be scrolled by either using the Arrow window or tapping the scroll bar Displaying the desired location with the scroll b...

Page 15: ...1 data point at a time Hard tap Moves 5 data points at a time Light tap Moves 1 division at a time Hard tap Moves 5 divisions at a time Touching continuously causes the waveform to scroll continuousl...

Page 16: ...graphs Normal Display graphs Gr1 Gr2 Gr3 Gr4 Waveform screen Channel window 1 2 Analog Select the channel to configure 2 Open the screen Waveform Display Setting Display Channel 1 Set the display to...

Page 17: ...at Time Pulse Width Duty Ratio Pulse Count Arithmetic Operation Time Difference Phase Contrast High Level Low Level Total of 24 types Specified calculation between cursors Waveform calculations can b...

Page 18: ...5 Text 3 CSV TXT Numerical calculation results Text 3 CSV TXT Display images BMP 4 BMP 1 You can load settings data automatically when the instrument is turned on auto setup function 2 Save data you w...

Page 19: ...r exceeds 1 000 a new folder will be automatically created with an updated number DATA000 to 999 MEASUREMENT PICTURE Folder for storing numerical calculation results Folder for storing display images...

Page 20: ...percent setting and division setting When you wish to convert readings to strain temperature or other values Scaling Waveform Display Setting Display Channel Analog Scaling Sets the conversion method...

Page 21: ...e measurement target in this example an oscillator Connect to CH1 1 2 Setting measurement and trigger conditions Setting measurement conditions Status window Configuring input channels Channel window...

Page 22: ...conditions example Save destination Save in SD Card Data filename Name Sine wave Save type Type Waveform Binary Channels to save Channel All Save range Range All If you wish to specify the save condi...

Page 23: ...nts Total data points in recording length Set recording length in divisions 100 data points 1 Example For a set recording length of 50 divisions 50 div x 100 data points 1 5 001 data points Voltage ax...

Page 24: ...Reference 22 MEMO...

Page 25: ...Reference 23 MEMO...

Page 26: ...Reference 24...

Page 27: ......

Page 28: ......

Reviews: