background image

9.3

Maintenance

and

Checks

9.3.1

Solution Tank

Check

(to perform every

50h

)

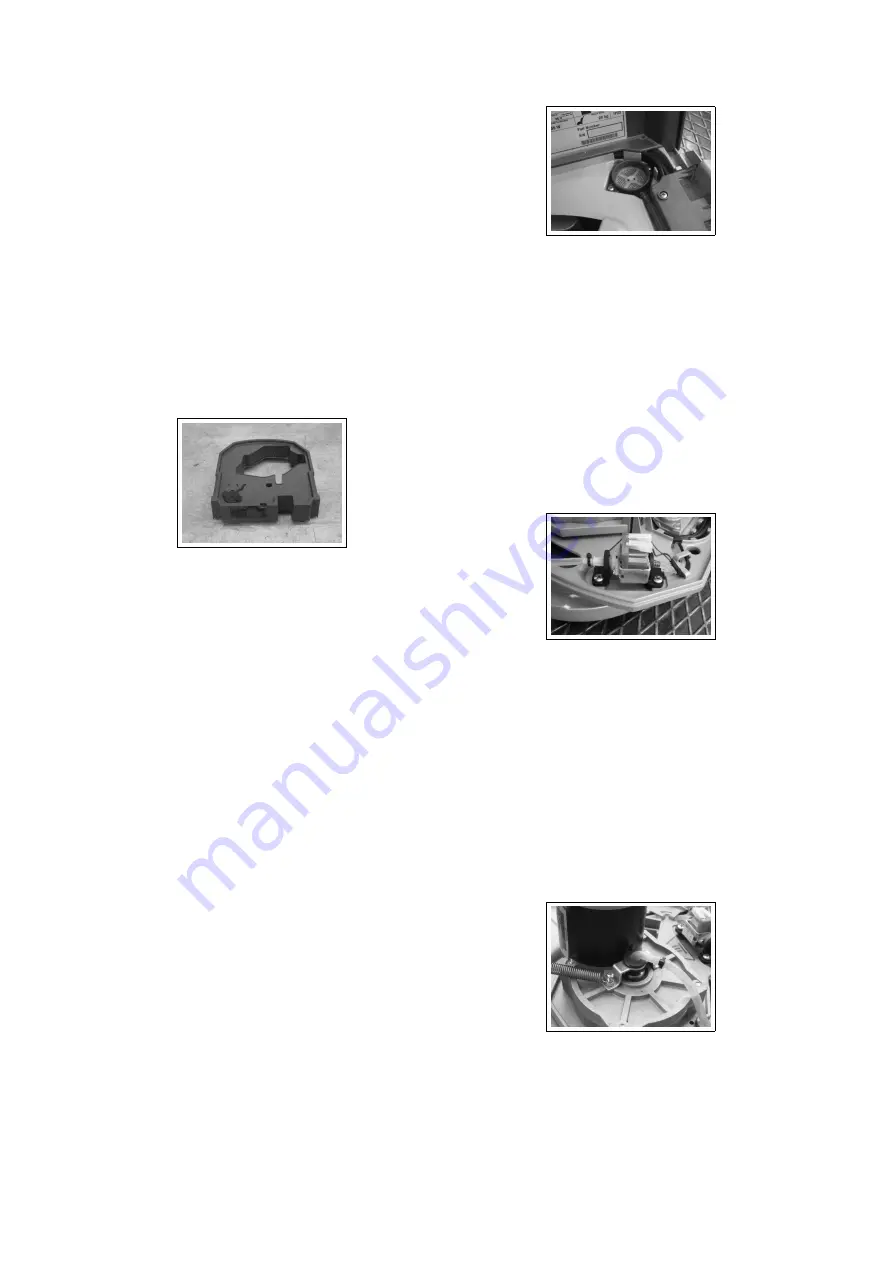
The solution tank has to be clean and
intact. It has not to have cracks or any
other kind of damage. Verify, when the
tank is completely filled up, that there
are not leakage. If necessary replace the
Solution Tank.

9.3.1-1

9.3.2

Hoses

Check

(to perform every

50h

)

Every single hose has to be intact and
has not to be worn out. It is extremely
important that the hoses kept the orig-
inal flexibility and they haven’t suffered
any chemical reaction with the detergent
used with the machine.

If necessary

proceed with the replacement of the
damaged hoses.

9.3.3

Clean Water Filter

Check

(to perform every

2h

)

The filter has a great importance, be-
cause its knob allows the opening of the
solution tank valve.
The filter has to be periodically cleaned
and it is also important to check that it
is intact and has no anomalies.

9.3.3-2

9.3.4

Water Pump

Check

(to perform every

50h

)

The water pump has to block completely
the solution flow when the brush deck
is not working. Viceversa it has to grant
the flow rate when the brush deck is
working.

9.3.4-3

9.3.5

Distributor

Check

(to perform every

50h

)

The distributor has to be intact and has
to grant the proper solution flow without
any leakage in the gearbox.

9.3.5-4

49

Summary of Contents for TRIDENT XM13SC

Page 1: ...SERVICE MANUAL TRIDENT XM13SC Version AB Date October 4 2017 Document Number 10055555...

Page 2: ...res 19 4 1 Electrical Installation 20 4 2 Mechanical Friction System 22 4 3 Drying System 23 4 4 Frame and Traction System 24 4 5 Solution Delivery System 25 III Machine Description 26 5 Electrical Sy...

Page 3: ...chine Frame and Traction System 47 8 1 Structure 47 8 2 Description 47 8 3 Maintenance and Checks 47 9 Cleaning Solution Supply System 48 9 1 Structure 48 9 2 Description 48 9 3 Maintenance and Checks...

Page 4: ...Part I Product Introduction 4...

Page 5: ...it is sufficient to remove both tanks The Serial Number is an extremely important information which has to be provided each time a Technical Support is required or is necessary to buy spare parts or a...

Page 6: ...y Tank gal 1 Vacuum Motor Voltage Power V W 36 150 Machine Length Handlebar Up Down in 21 8 35 2 Machine Height Handlebar Up Down in 41 3 13 8 Machine Width in 14 8 Sound pressure level ISO 11201 LpA...

Page 7: ...Part II Anomalies Resolution Guide 7...

Page 8: ...at page 8 3 The problem is not solved Refer to the Advanced Guide see section 3 2 2 at page 14 The battery don t work properly 1 The battery is not properly con nected Insert the battery until the en...

Page 9: ...ate the Green LED electrical continuity Replace the battery charger 5 The battery charger plugged in and turned on with battery inserted does not activate the Red LED charging Make sure the battery is...

Page 10: ...the related issue by following the proper instructions see section 5 6 1 at page 36 4 The switch Auto is not pressed Press the Auto switch 5 The brush motor is not working Refer to the Advanced Guide...

Page 11: ...dure 7 The squeegee is lifted up from the floor Lower down the squeegee 8 The squeegee rubber blades are worn out or broken Rotate or replace the squeegee rub ber blades see section 7 4 1 at page 44 9...

Page 12: ...ter is missing Restore the solution filter in the cor rect position see section 4 5 at page 25 5 The solution filter is stuck Clean the solution filter see section 4 5 at page 25 6 The water flow is a...

Page 13: ...3 2 Advanced Guide 3 2 1 Electric Cards Overview Main Card Handle Control Card Motor Control Card 13...

Page 14: ...J2 Black V 33 YES Point 4 NO Replace the main card 4 Check the voltage J6 Pink J2 Black V 33 YES Point 5 NO Replace the cables 5 Push the main switch and check the voltage J6 White J2 Black V 33 YES...

Page 15: ...the connector J4 Yellow Green V 33 YES Replace the cables NO Replace the main card 11 On the Main card check the voltage on the connector J4 Yellow Brown V 1 YES Replace the cables NO Replace the mai...

Page 16: ...ck the battery voltage V 1 YES Replace the cables NO Replace the battery 4 Check the battery voltage V 1 YES Replace the cables NO Replace the battery 3 2 5 The brush Motor doesn t work All the other...

Page 17: ...n the connector W Black Yellow with running machine V 0 YES Point 6 NO Replace the motor 6 Check the voltage on the connector W Black White with running machine V 0 YES Point 7 NO Replace the motor 7...

Page 18: ...unning machine V 33 YES Replace the cables NO Replace the main card 3 2 7 The Pump doesn t work All the other devices of the machine are functioning properly 1 Check the voltage in AC on the Pump s co...

Page 19: ...NING BEFORE TO PERFORM ANY OPERATION DESCRIBED BELOW VERIFY THAT THE MACHINE TANKS ARE COMPLETELY EMPTY THE MACHINE HAS TO BE TURNED OFF REMOVE THE BATTERY FROM THE MACHINE AT LAST VERIFY THAT THE MAC...

Page 20: ...stening clamp Remove the screws that secure the Handlebar Control Card to the up per casing and remove the card Remove the lifting handle from the handlebar stem by unscrewing the screws see fig 4 1 0...

Page 21: ...t the connectors from the brush motor Control Card remove the screws securing the plate to the upper frame and remove the card Remove the screws of the Main Switch support and remove it from the housi...

Page 22: ...or ca bles see fig 4 2 0 9 Disconnect the solution dispensing hose from the distributor hose of the gearmotor and release the tension spring see fig 4 2 0 10 Loosen the screws holding the gear motor s...

Page 23: ...Disconnect the power cables of the suction motor and remove the rub ber cover Turn the handlebar forward in hori zontal position Put the machine vertically and rotate the squeegee 180 degrees Disconn...

Page 24: ...ve the release lever together with cotter pin and pin see fig 4 4 0 20 Disconnect the connecting cable from the main card and remove the clamps Remove the fixing screws of the han dlebar joint and rem...

Page 25: ...ng levers Remove the Recovery tank and then the solution Tank Unscrew the screws and remove the housing and the clean water Filter Disconnect the power cables from the pump and remove the water pipes...

Page 26: ...Part III Machine Description 26...

Page 27: ...main card receive as input all the information from the control card These signals are translated from the main card to run correctly the scrubber dryer and to prevent any safety problem to the operat...

Page 28: ...5 3 Location of Electrical components 28...

Page 29: ...List of Components 1 Battery 2 ON OFF Switch 3 Handle Card 9 Main Card 10 Brush Motor control Card M1 Water Pump MBR Brush Motor MVA Suction Motor 29...

Page 30: ...e during the normal work Check the alarm code in order to de tect a possible malfunction Enter in three different menu User Menu to check the status of the battery and the hourmeter of the machine dep...

Page 31: ...itself when this is pressed the magnet is approached to the sensor which activates the functions of the ma chine see fig 5 3 2 2 5 3 2 1 5 3 2 2 5 3 3 Brush Motor control Card The brush motor control...

Page 32: ...In case of alarm 1 2 or 3 the alarm is reset by disconnecting the power If it appears again replace the charger In case of alarm 4 the alarm is reset when the charger cools down 5 3 6 ECO Function On...

Page 33: ...rogramming mode 1 Not Used 2 ENTER Confirm 3 SCROLL UP PLUS Scroll up and In crease 4 SCROLL DOWN MINUS Scroll down and Decrease 5 5 2 How to access the Opera tor Menu To enter to the Operator Menu go...

Page 34: ...irm by pressing the button 2 5 5 4 For example to modify the language from IT to EN Turn OFF the machine With the machine off press at the same time button 2 3 and 4 While the buttons are pressed turn...

Page 35: ...2 5 5 6 Use of the Check Monitor Function The Check Monitor function allows to check The battery status The motors absorption The status of the operator lever sensor The status of the operator lever S...

Page 36: ...netic field detected by the pres ence lever sensor acquired value less than 480 bits Traction Alarms Id Alarm Meaning Solution AL 14 Traction Lever pressed Safety lever pressed before start ing Detect...

Page 37: ...Make sure the machine is turned off Press simultaneously the buttons 2 3 4 Turn on the machine while holding down the buttons Wait the loading of the Operator Menu For the submenu of the Advanced Men...

Page 38: ...r into the Advanced menu manageable by expert technicians only 5 7 3 Advanced Menu MENU DESCRIPTION Options menu General sets Enter to the general parameters language battery Options menu Brushes sets...

Page 39: ...Default Min Max Description Vacuum Sets I Max Amp 10 0 1 0 18 0 Maximum current from the main card to the suction motor Vacuum Sets I Nom Amp 6 0 0 5 8 0 Rated current with T Nom manages the amperome...

Page 40: ...evice which rubs on the floor This device can be of various nature pad or brush in each case its function is to mechanically remove the dirt from the ground and facilitate the reaction between the dir...

Page 41: ...Check Monitor Menu and select the parameter I Br pressing the button 2 Lift the brush deck so that it does not touch the floor and turn on the motor the current absorption measured on the single motor...

Page 42: ...hat fix the arms to the brush deck Remove the recovery tank and the solution tank by releasing the lock ing levers Unscrew the screws between the gearmotor support and the frame and remove the bushing...

Page 43: ...um it out from the floor The system is basically made by a vacuum motor which produces an un derpressure This underpressure causes an air flow which flows in the whole Drying system The air that flows...

Page 44: ...x the wheel of the squeegee by tightening the nut loosened earlier 7 3 1 1 7 3 1 2 7 4 Maintenance and Checks 7 4 1 Squeegee Check to perform every 2h To have a good performance The squeegee chamber h...

Page 45: ...suction hose is particularly sensitive in the coupling areas between the pipe and couplings and in tight curves The Suction Duct and its top and bottom gaskets must be clean and intact 7 4 4 Suction...

Page 46: ...er to avoid any dirty water leakage or any pressure drop during the job 7 4 6 Vacuum Motor Check to perform every 150h Access the Check Monitor Menu and select the parameter I Vac pressing the button...

Page 47: ...by the mechanical friction system The wheels are directly fixed to the frame 8 3 Maintenance and Checks 8 3 1 Wheels Check to perform every 50h The wheel must be free to rotate smoothly without fricti...

Page 48: ...to clean The solution is then canalized to the filter which in addition to allowing the valve opening of the solution tank stops debris that could stuck the hoses system and compromise the proper fun...

Page 49: ...d with the machine If necessary proceed with the replacement of the damaged hoses 9 3 3 Clean Water Filter Check to perform every 2h The filter has a great importance be cause its knob allows the open...

Page 50: ...olour 439929 BRUSH PPL 0 3 11 PPL 0 012 Black 441041 BRUSH PPL 0 2 11 PPL 0 024 Black 439930 PAD HOLDER 11 10 1 2 Drying System PN Description Dimensions 439839 FRONT RUBBER 16 x 1 x 0 08 in 439841 RE...

Page 51: ...439802 MAIN CARD CFSS000 440029 HANDLE CONTROL CARD 440247 BRUSH MOTOR CONTROL CARD 439605 SERIAL CABLE FOR CONTROL CARD 439524 MAIN SWITCH 10 2 2 Mechanical Rubbing System PN Description 439433 GEAR...

Page 52: ...Hillyard Inc Service Manual TRIDENT XM13SC Hillyard Inc 302 North 4th Street P O Box 909 St Joseph Missouri 64501 USA Tel 1 800 365 1555 Fax 1 800 881 3840 Edition October 4 2017...

Reviews: