30
1.
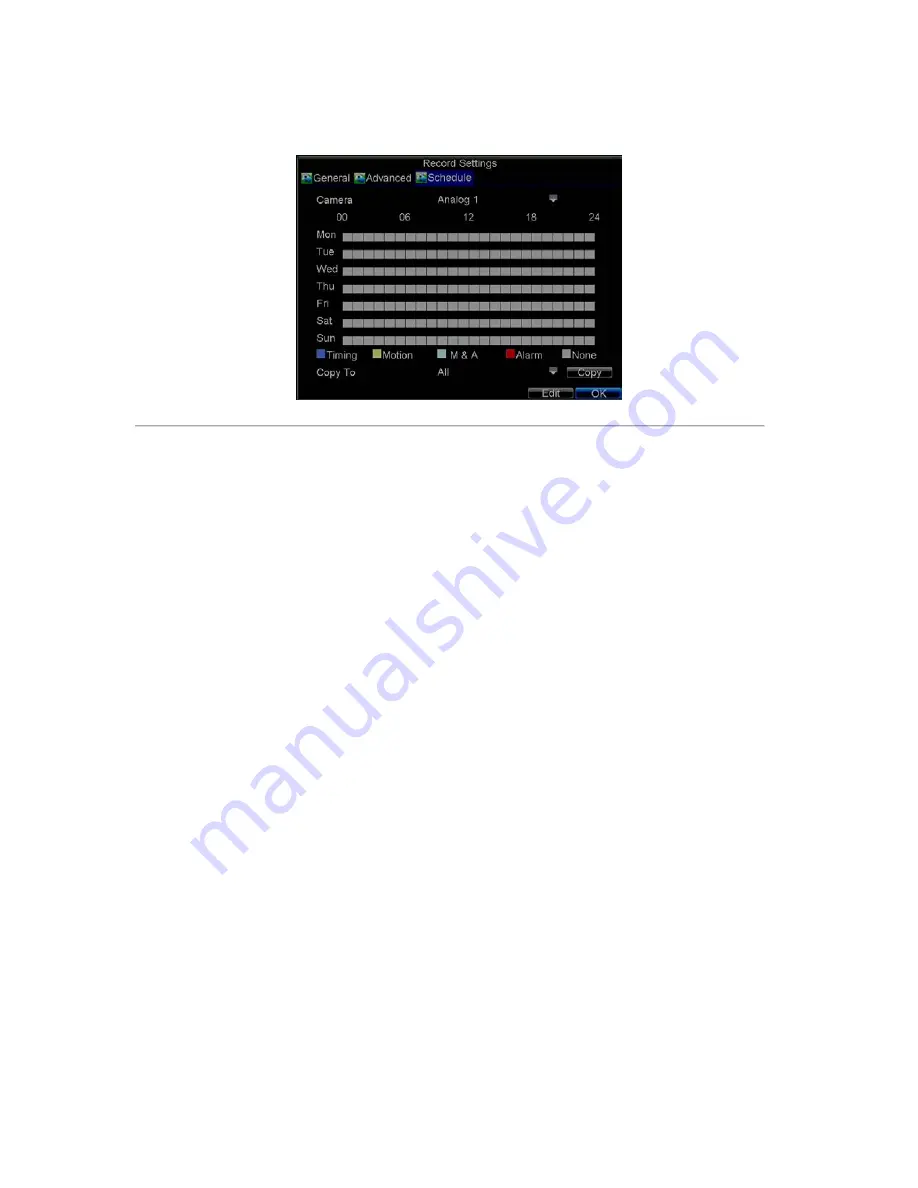
Click Menu > Settings > Record to enter the Record Settings menu.
2.
Select the
Schedule
tab to enter the Schedule dialog box, shown in Figure 4.
Figure4. Scheduling a Recording
3.
Select Camera you want to configure recording schedule.
4.
Click the
Edit
button to enter the
Schedule Settings
dialog box.
5.
Click and check
Enable Schedule
checkbox.
6.
Select the day you want to set up the schedule or select
All Week
to record for entire week.
7.
Click
All Day
to enable recording for entire day, or select different periods for each day. Up to 8 time
periods can be scheduled.
Note:
The time periods scheduled cannot be overlapped with each other.
8.
Select recording
Type
. Recording type can be selected to scheduled or triggered by motion detection
and/or alarm. For more specific settings about motion detection and alarm recordings, please refer to
the
Configuring Alarms
.
9.
Click the
OK
button to finish configuration.
10.
Repeat Steps 3-9 for other cameras or copy settings from one schedule to the others under the
Copy To
item.
11.
Click
OK
to finish configuration and save the schedule settings.
Note:
The
Event
encoding parameters will take effect when motion detection or alarm happens, and the
Timing
encoding parameters will take effect when there are no events happening.
Starting a Manual Recording
A manual recording can be enabled at any time by means of the following configuration:
1.
Press the
REC
button on the front panel to access the
Manual Record
dialog box, shown in Figure 5.
Summary of Contents for VC-SYS-16H301A Series
Page 1: ...VC SYS 4H101A 8H201A 16H301A Series DVR USER MANUAL Version 1 0 2...
Page 5: ...4 C H A P T E R 1 Introduction...
Page 17: ...16 C H A P T E R 2 Getting Started...
Page 23: ...22 C H A P T E R 3 Live Preview...
Page 28: ...27 C H A P T E R 4 Record Settings...
Page 35: ...34 C H A P T E R 5 Playback...
Page 40: ...39 Figure 7 Digital Zoom in Playback Mode...
Page 41: ...40 C H A P T E R 6 Backup...
Page 46: ...45 C H A P T E R 7 Alarm Settings...
Page 58: ...57 C H A P T E R 8 Network Settings...
Page 65: ...64 C H A P T E R 9 PTZ Control...
Page 71: ...70 C H A P T E R 1 0 Camera Management...
Page 75: ...74 C H A P T E R 1 1 HDD Management...
Page 81: ...80 C H A P T E R 1 2 DVR Management...
Page 92: ...91 Figure 17 Log Search Export Menu 7 Click Cancel to exit the current menu...
Page 93: ...92 C H A P T E R 1 3 Appendix...


