HIKVISION DS-6700HQHI-SATA Quick Start Manual Download Page 21

DS-6700HQHI-SATA Series Encoder Quick Start Guide 

20 


Figure 4. 13


Color Bar


4.6


Log 

Purpose: 

The operation, alarm, exception and information of the device can be stored in log files, which can be viewed and 

exported at any time. 

Before you start   

The Log function can be realized only when the Encoder is connected with HDD (for DS-6700HQHI-SATA) or 

network disk. And make sure the HDD or network disk has been initialized for the first time to use.     

Steps: 

1.


Click 

Log

 on the menu bar to enter the Log interface.     

2.


Set  the  log  search  conditions  to refine  your  search,  including  the  Major  Type,  Minor  Type,  Start  Time  and 

End Time.   

3.


Click the

 Search

 button to start searching log files.   

4.


The matched log files will be displayed on the list shown below.         


Up to 100 log files can be displayed each time. 
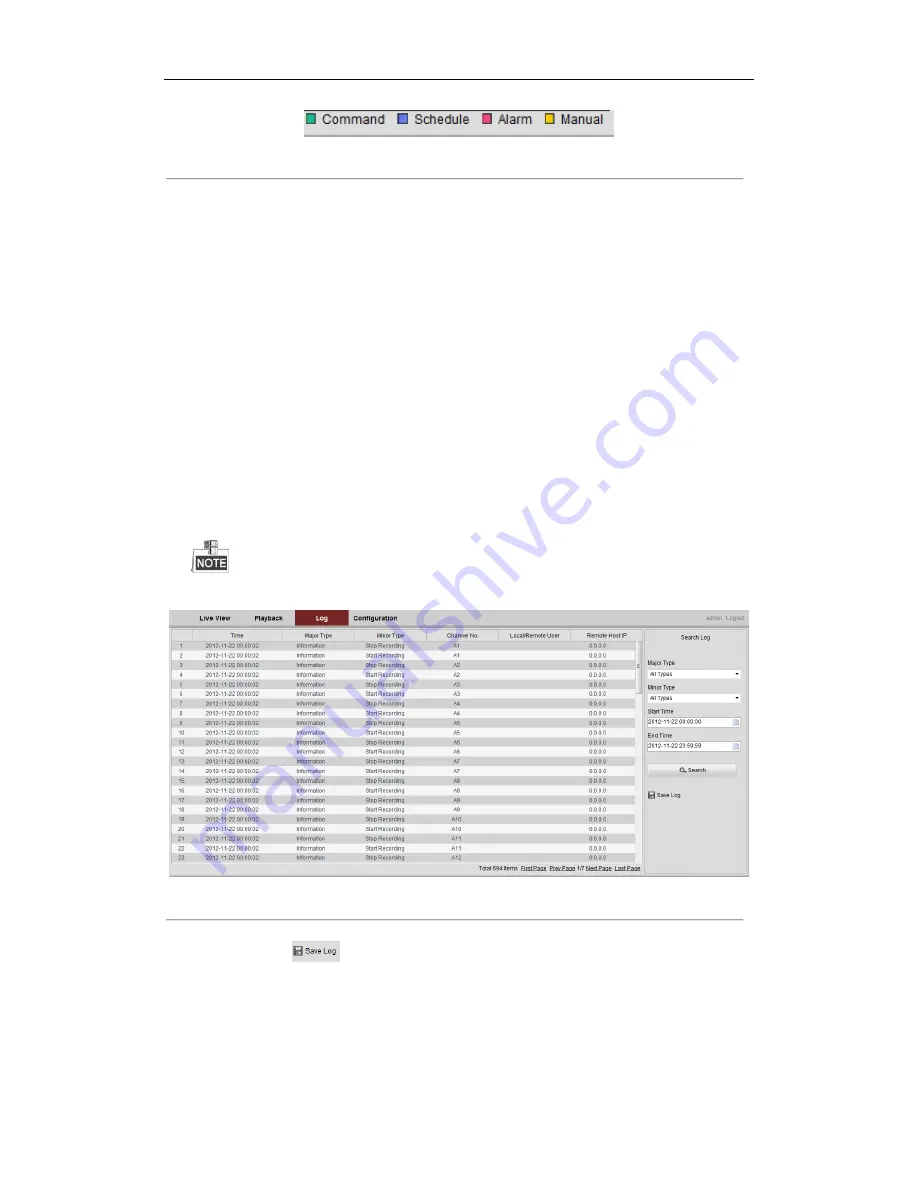


Figure 4. 14


Log Interface


5.


You can click the 

  button to save the searched log files to local directory. 


0102041050505 

Summary of Contents for DS-6700HQHI-SATA

Page 1: ...DS 6700HQHI SATA Series Encoder Quick Start Guide 1 DS 6700HQHI SATA Encoder Quick Start Guide UD 6L0202B2169A0...

Page 2: ...and logos mentioned below are the properties of their respective owners Legal Disclaimer TO THE MAXIMUM EXTENT PERMITTED BY APPLICABLE LAW THE PRODUCT DESCRIBED WITH ITS HARDWARE SOFTWARE AND FIRMWAR...

Page 3: ...g interference that may cause undesired operation EU Conformity Statement This product and if applicable the supplied accessories too are marked with CE and comply therefore with the applicable harmon...

Page 4: ...al safety regulations of the nation and region Please refer to technical specifications for detailed information Input voltage should meet both the SELV Safety Extra Low Voltage and the Limited Power...

Page 5: ...unit is properly secured to a rack or shelf Major shocks or jolts to the unit as a result of dropping it may cause damage to the sensitive electronics within the unit Use the device in conjunction wit...

Page 6: ...8 2 3 Hard Disk Installation 8 Chapter 3 Activation and Initializing Network Configuration for the Encoder 10 3 1 Setting the Admin Password via Web Browser 10 3 2 Setting Admin Password and Modifyin...

Page 7: ...or Description 1 POWER Lights in green when the device is powered on 2 STATUS Lights in green when data is being read from or written to HDD 3 Tx Rx 1 Does not light when the network is not connected...

Page 8: ...Figure 1 3 DS 6716HQHI SATA Table 1 2 Interface Description Description 1 VIDEO IN 2 AUDIO IN RCA Connector 3 AUDIO OUT RCA Connector 4 LAN Network Interface 5 RS 485 Serial Interface 6 12 VDC Power...

Page 9: ...diameter 4 Connect both the alarm and RS 485 cable 5 Allow at least 2cm 0 75 of space between racks mounted devices 6 Ensure the Encoder is grounded 7 Environmental temperature should be within the ra...

Page 10: ...ening the screws at the bottom of the chassis 3 Take out the HDD data line from the accessories box Plug one end of the data line to the circuit board and the other end to the data line port of HDD Co...

Page 11: ...e default IP address after your access Figure 3 1 Activation Interface 3 Create a password and input the password into the password field STRONG PASSWORD RECOMMENDED We highly recommend that you creat...

Page 12: ...t the client software from the supplied disk or the official website and install the software according to the prompts Follow the steps to activate the camera Steps 1 Run the client software and the c...

Page 13: ...of your own choosing using 8 16 characters including upper case letters lower case letters numbers and special characters in order to increase the security of your product And we recommend that you r...

Page 14: ...ick Start Guide 13 8 Change the device IP address to the same subnet with your computer by either modifying the IP address manually or checking the checkbox of Enable DHCP 9 Input the password to acti...

Page 15: ...n PC The login interface is displayed When the HTTPS feature is enabled the system will use the HTTPS login mode e g https 192 0 0 64 by default You can also input http IP address index asp e g http 1...

Page 16: ...e list Refer to the following table for the description of buttons on the live view window Icon Description Select the split window mode Start Stop live view Capture pictures in live view mode Manuall...

Page 17: ...l buttons up down left right upper left upper right bottom left bottom right on the display window when the mouse is located in the relative positions Click on the directional buttons to control the p...

Page 18: ...dule to enable recording schedule Figure 4 5 Schedule Settings Interface 4 Click Edit to enter the Edit Schedule interface 5 Choose the day in a week to configure scheduled recording Figure 4 6 Edit S...

Page 19: ...xes before the date and click Copy 4 Click OK to save the settings and exit the Edit Schedule interface 6 On the Schedule Settings interface click Advanced to configure advanced record parameters 7 Cl...

Page 20: ...Reverse Play Pause Stop playing Slow forward Fast forward Play by single frame Stop all channels from playing Capture pictures in playback mode Download video files Start Stop clipping video files Au...

Page 21: ...disk And make sure the HDD or network disk has been initialized for the first time to use Steps 1 Click Log on the menu bar to enter the Log interface 2 Set the log search conditions to refine your se...

Page 22: ...DS 6700HQHI SATA Series Encoder Quick Start Guide 21...

Reviews: