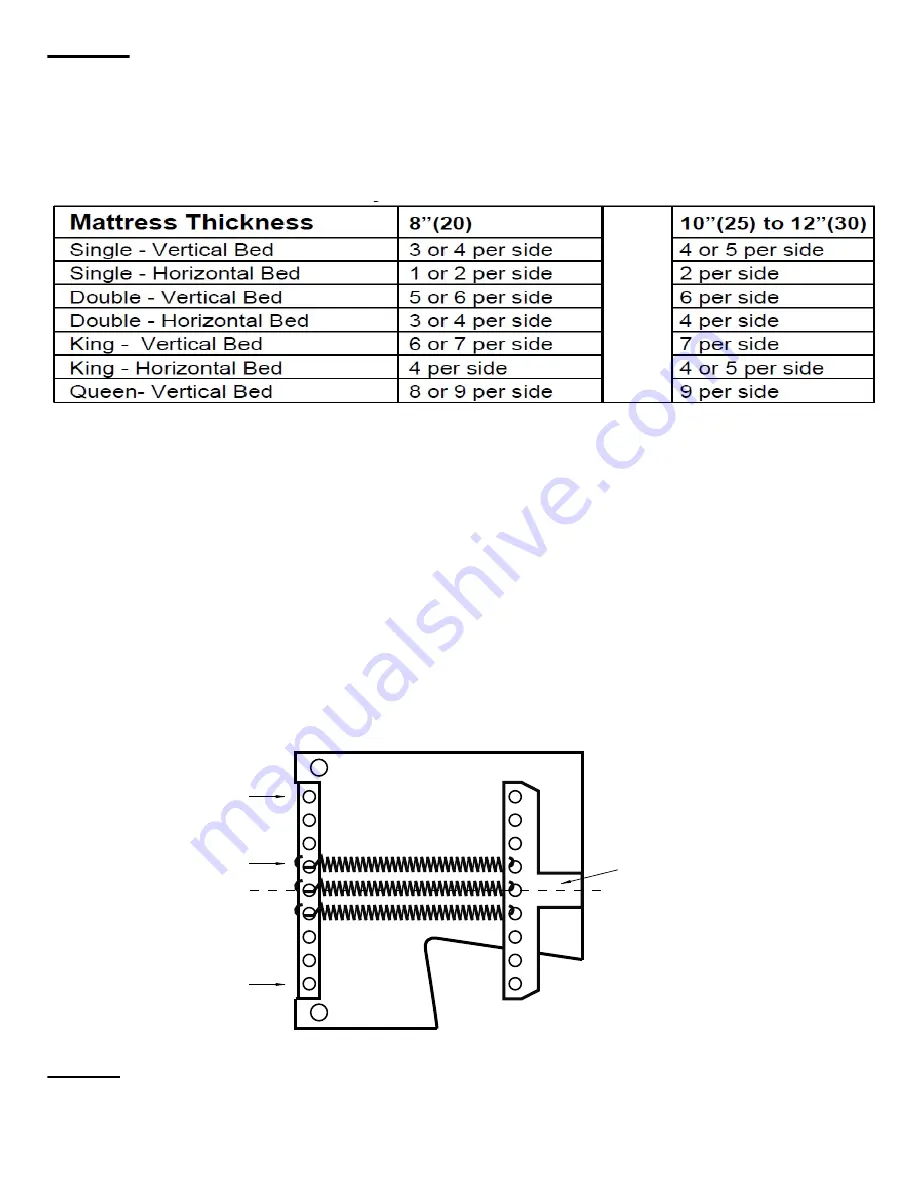
Select your bed from this chart:
Tension Arm T-Bracket
Spring Hole #1
Upturned Edge
of Mounting Plate
Center line
Spring Hole #9
Start by hooking one end of the spring under the up turned edge of the backer plate.
Lay the spring down and hook it into the matching hole in the T-shaped tension arm.
You may pry up this arm with a wood handle or shim to make inserting the hook easier.
NOTE:
All hook openings should face you.
Install an equal number of springs on each side of the center hole. Imbalance of one
spring is O.K. to the topside.
You should use the same number of springs and the same number of holes on both the
Lift Mechanisms. However, to achieve balance, you may use
one
more spring on either
the right or left Side Mechanism.
If it is necessary to remove the Face Panel, to add or subtract springs, reverse the pro-
cedures listed on pg.17 step 7 “Install the Bed Face Panel in Cabinet.” Be sure to
engage the Left and Right Arm Locks as you remove the Bed Face.
ALERT:
If the bed slams shut, you must remove sufficient springs to have a soft closure. If the bed
does not rest lightly on the floor when open, add the weight of linens and blankets to see if
this helps balance. If you determine that you need more or less lift (springs) you should
remove the Bed Face and make the necessary change. Your bed will function for many
years when properly balanced so take the time now to make any needed adjustments.
STEP 3: Install the Springs on the Lift Mechanisms
NOTE:
The maximum number of springs that each Lift Mechanism can use is nine. Nine
springs are provided for each lift mechanism; a varying number will be needed depending
on bed size, mattress weight, and materials added to the panel face such as moldings or
accessories.
1.
2.
3.
4.
Drawing 4.
10.


