


Running the System Step by Step 6-3
WARNING: DO NOT engrave or cut too far out of focus as this can be a potential fire
hazard. A maximum of two (2) complete turns of the Z-axis adjustment knob in either
direction from precise focus should be the limit.
It does not matter whether you bring the table up to go out of focus, or down, the effect is the
same. You should experiment on some scrap material at another time and note the difference.
In this example, we will engrave in precise focus. Once you have established focus, store your
focus tool and close the top door.
Creating the Graphic
In your graphics program set you page size to the maximum size of the engraving area, 18
inches wide by 12 inches tall in the Landscape mode. Create some text with a
BLACK
colored
fill and
NO
outline. For example, type in the word “Keychain”. Draw an outline box around the
text, color the outline
RED
, give the outline a thickness of .001 inches, remove the fill color(if
any), and round the edges if desired. Now add a circle with the same
RED
outline .001 inches
and
NO
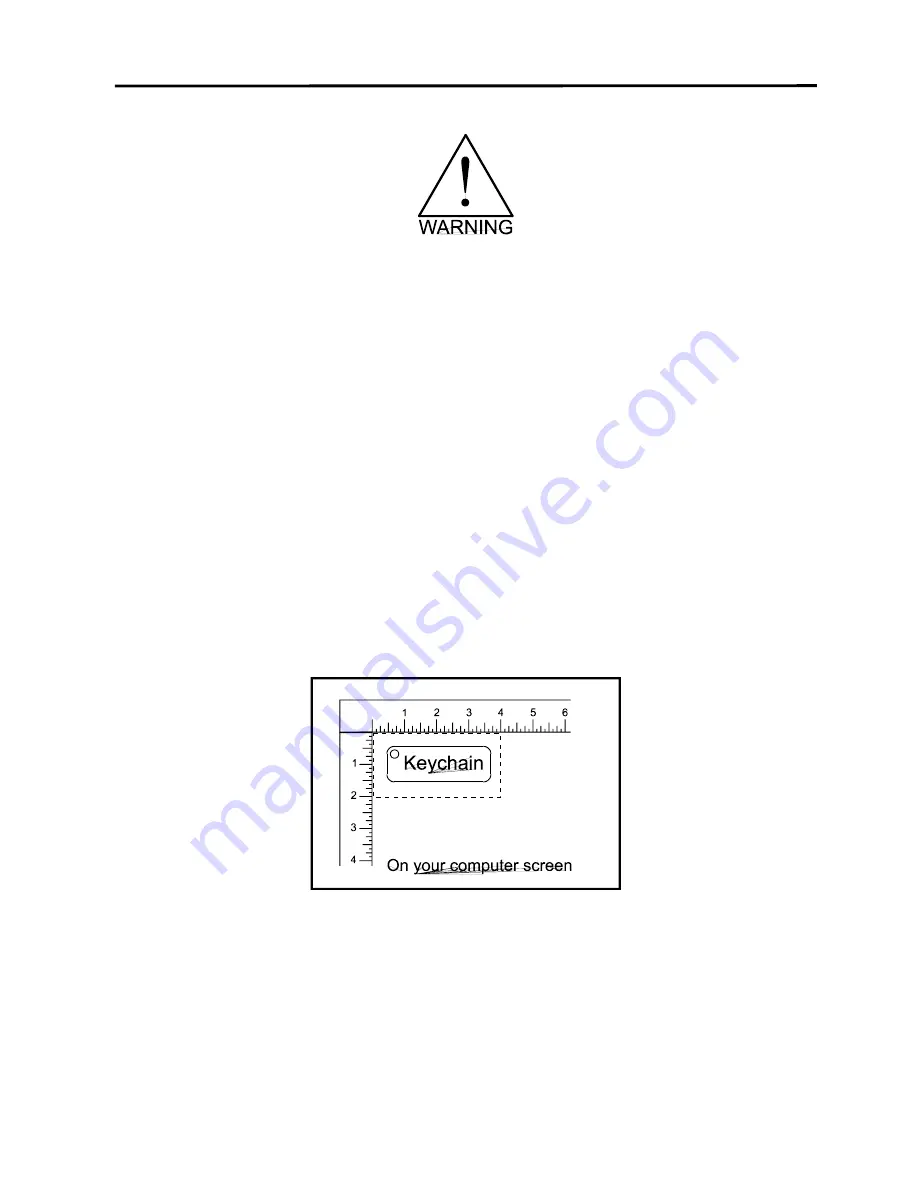
fill, for the key ring. Place the graphic into the upper left corner of the page, on
screen, relative to how the piece of wood is positioned in the engraving area as the following
diagram illustrates:
Setting the Drivers Properties
The next step is to set the drivers properties. From within your graphics program, get to where
you can see the driver parameter screen. Usually, there is a menu item called “Print Setup” or
“Print Options” that allows access to the printer driver screen from your graphics software. For
specific instructions on how to access the printer driver from your graphics software, please
refer to your graphics software instruction manual or online help screens.
Summary of Contents for VANGUARD OPTIMA
Page 1: ...VANGUARD OPTIMA USER S MANUAL ...
Page 2: ......
Page 6: ......
Page 21: ...2 4 Installation ...
Page 51: ...5 8 System Operation ...
Page 52: ...System Operation 5 9 ...
Page 101: ...9 2 Maintenance ...
Page 107: ...Appendix A Warranty Please insert your warranty statement here ...


