background image


www.heras.com 


English 

94 


Summary of Contents for HMD230+IGD

Page 1: ...User Manual Sliding gate drives HMD230 IGD English Version 1 3 February 2013 Translation of the Original User Manual ...

Page 2: ...www heras com English 2 ...

Page 3: ... DELIVERY 14 5 1 HMD230 14 5 2 IGD 14 6 OPENING CLOSING THE HMD230 IGD 15 6 1 OPENING THE COVER 15 6 2 CLOSING THE COVER 15 7 ACCESSORIES 16 7 1 ANTI CRUSHING SAFETY PROTECTION DEVICES 16 7 2 PHOTOCELLS OPTIONAL 16 7 3 LOOP DETECTION OPTIONAL 16 7 4 TRAFFIC LIGHT OPTIONAL 16 7 5 FLASHING LIGHT OPTIONAL 16 7 6 RADIO FREQUENCY RECEIVER OPTIONAL 16 7 7 LIGHTING OPTIONAL 17 7 8 LED LIGHTING IN TOP RAI...

Page 4: ...2 1 Menu 4 2 1 Closed position for installing 36 10 4 3 Marker plate 37 10 5 MENU 5 CLOCK CALENDAR 38 10 5 1 Menu 5 1 Clock display 39 10 5 2 Menu 5 2 Setting date time 39 10 5 3 Calendar functions of the motor drive 41 10 5 4 Menu 5 3 Activating the calendar 42 10 5 5 Menu 5 4 Displaying the weekly calendar 43 10 5 6 Menu 5 5 Changing the weekly calendar 43 10 5 6 1 Menu 5 5 1 Week day setting 43...

Page 5: ...0 6 6 Menu 6 9 Deleting all transmitters from the memory 63 10 7 LED LIGHTING OPERATION 64 11 MANUAL OPERATION IN THE EVENT OF FAULTS 65 11 1 DISENGAGING THE MOTOR 65 11 2 AUTOMATIC DISENGAGEMENT 65 12 EMERGENCY STOP 66 13 MAINTENANCE INSTRUCTIONS 66 13 1 GATE MAINTENANCE 66 13 2 HMD230 MAINTENANCE 66 13 3 CLEANING 66 14 DECOMMISSIONING AND REMOVAL 67 15 SPARE PARTS 67 16 TECHNICAL DATA 68 16 1 SL...

Page 6: ...g types of Heras sliding gate uGate Delta SHB Orion The HMD230 is available in 2 versions HMD230S Standard HMD230A Advanced The IGD is intended for the Heras iGate The IGD is available in 2 versions IGDP Premium IGDE Excellent See the chapter on TECHNICAL DATA for the technical specifications 1 4 HOW TO USE THIS MANUAL Carefully read this User Manual before using the sliding gate and save it for f...

Page 7: ...ed to perform technical interventions on the gate 1 6 EXPLANATION OF THE SYMBOLS Caution To prevent personal injury you must observe the safety instructions below Note To prevent material damage you must observe the safety instructions below Information This is followed by further information or by a reference to other documents Warning Risk of limbs getting crushed Warning Risk of injury to hands...

Page 8: ...it switches are not necessary anymore 2 1 HMD230 PROFILES The HMD230 is delivered with a pre programmed profile does not apply to the Netherlands This profile cannot be changed by the user PROFILE 1 PROFILE 2 PROFILE 3 PROFILE 4 Dead man s mode Pulse mode Pulse mode weekly calendar Pulse mode yearly calendar Choice of language 3 languages Log function Setting date time Inputs 1 2 3 Open stop close...

Page 9: ...t slam support run in anti crushing safety protection device head stile bottom rail HMD230 motor bracket road wheels running surface anti crushing safety protection devices guidepost top rail bars bottom rail HMD230 road wheels slam post running surface head stile anti crushing safety protection device anti crushing safety protection device bars portal ...

Page 10: ... sliding gate terms bottom rail IGD road wheels running surface head stile slam support slam column anti crushing safety protection device top rail LED lighting perforated plating guide column flash light HMD slam post anti crushing safety protection device bottom rail guidepost bars ...

Page 11: ...www heras com English 11 Illustration 5 Orion sliding gate terms HMD230 bottom rail road wheels bars slam post anti crushing safety protection device ...

Page 12: ... gate running surface must always be free from snow ice or dirt that might affect its sliding behavior In the event of frost check this before commissioning the gate If the running surface is blocked the gate will not move at all or will not complete its movement An irregular running surface may cause damage to the drive and or road wheels Climbing the gate is strictly forbidden as people climbing...

Page 13: ...ve the gate manually first switch the automatic fuse in the drive unit cabinet to off and make sure it cannot be switched on again e g by locking the cabinet Always lock the drive unit cabinet during use The drive unit cabinet may only be opened by an electrical engineer The EN 13241 1 EN 12453 and EN 12445 standards must be taken into consideration during installation To achieve a good safety lev...

Page 14: ...IN 18252 is not included for the Netherlands Illustration 6 HMD230 cover and cabinet Illustration 7 Gear wheel 5 2 IGD The IGD is delivered as a complete drive and control unit including gear wheel module 6 The drive is only delivered together with the iGate By default the half profile cylinder according to DIN 18252 is not included for the Netherlands Illustration 8 IGD cover and cabinet ...

Page 15: ...rain cover lift the cover away in a vertical movement Illustration 9 opening the cover 6 2 CLOSING THE COVER lower the tabs of the cover into the slot in the drive unit cabinet screw the cover into place to close it Make sure that the sides of the cover properly fit over the drive unit cabinet close the lever and the lock Illustration 10 closing the cover The illustration shows the HMD230 The same...

Page 16: ...MAINTENANCE 7 2 PHOTOCELLS OPTIONAL They detect the gate passage opening Photocells are located on the stationary part of the gate and usually take the form of a transmitter and a receiver If there is an obstacle e g a person between the transmitter and the receiver the gate will not close The photocell does not affect the opening of the gate 7 3 LOOP DETECTION OPTIONAL Safety loops in the pavemen...

Page 17: ...as soon as the gate is operated and it is switched off automatically after a certain pre set time See the relevant chapter of the HMD230 motor drive user manual 7 8 LED LIGHTING IN TOP RAIL OPTIONAL The iGate can optionally be fitted with LED lighting in the top rail This lighting serves as atmospheric lighting It is only lit if the gate is closed See the chapter LED LIGHTING OPERATION Accessories...

Page 18: ...can be operated in dead man s mode with limited comfort In dead man s mode the gate does not require anti crushing safety protection devices The gate will move as long as an OPEN or CLOSE key is pressed Dead man s operation is only permitted if the operator can see the entire gate system The drive and control unit must be fitted to the gate 8 2 2 AUTOMATIC MODE If the safety facilities have been i...

Page 19: ...gency room Only the one movement OPEN or CLOSED depending on programming that is requested will be performed at dead man s mode speed in this operating mode The safety facilities are also activated during this movement The movement can be interrupted by pressing and holding the STOP key or by a safety device being triggered When this interruption no longer applies the gate will immediately continu...

Page 20: ...llowing directions Automatic mode Dead man s operation mode Dead man s mode Automatic mode if safety has been restored Automatic mode Emergency operation Emergency operation Automatic mode if no emergency situation signal is active anymore and after restarting the control software ...

Page 21: ...nit 9 2 TOTAL VIEW OF IGD DRIVE UNIT Illustration 13 view of IGD drive unit cable strain relief cable bushing backplane automatic fuse place for extra components Control place for extra components motor automatic fuse cable strain relief motor timer optional control LED power supply LED control unit backplane place for extra components ...

Page 22: ...lector switch for making settings 7 Communication module slot optional 8 External radio frequency receiver optional 9 Connection for external antenna 10 ISK7 ATC 11 ISK connection 12 SKL connections for both running directions 13 Main fuse 230V 6 3A slow acting 14 Power supply loop connection 230VAC 50Hz 15 Motor connection 16 Power supply input 230VAC 50Hz 17 Relay outputs 18 Safety and control i...

Page 23: ... each has been provided to display more motor drive control information This shows the active operating mode of the motor drive or the movement status of the motor in legible text The background of the display is lit for as long as the twist and selector switch is operated 20 seconds after the last entry is made the light is switched off It can be switched on again at any moment by turning the sel...

Page 24: ...c mode Close Automatic mode gate closing active Automatic mode Stop immediately Automatic mode STOP active Automatic mode Close xx Automatic mode the gate closes automatically after XX seconds Heras HMD230 Dead man s operation Idle position for dead man s operation Dead man s operation Open Open gate in dead man s operation mode active Dead man s operation Close Close gate in dead man s operation ...

Page 25: ...ing mode is displayed The display then shows the text Main menu Illustration 18 Display of main menu on the LCD screen Turn the selector switch to select the individual menu options and then press the switch to activate the selected option The first menu option in a menu level always brings you back one level Back in menu The Exit main menu option in the main menu closes the menu display and resta...

Page 26: ...s can lead to second level submenus The gate movement cannot be started automatically when the main menu is active 9 11 BACKPLANE Several accessories such as photocells lighting etc can be connected to the backplane The backplane has several control LEDs The system is OK if all the green LEDs detector 1 detector 2 Key units 1 to 3 light up while the gate is not active If the gate gets an OPEN comm...

Page 27: ...ion H e r a s H M D 2 3 0 S 1 E N A u t o m a t i c M o d e 1 press and hold Activate the main menu M a i n M e n u 1 I d e n t i f i c a t i o n 1 1 press briefly I d e n t i f i c a t i o n 1 M a s t e r V e r s i o n press briefly The figures and the combination of numbers shown identify the software version used M a s t e r V e r s i o n F U 1 0 2 0 1 1 press and hold press briefly Exit the ma...

Page 28: ...1 press and hold press briefly Exit the main menu The control software is restarted M a i n M e n u Q U I T M e n u 10 1 3 Menu 1 3 Serial number Menu Action Display reading Explanation H e r a s H M D 2 3 0 S 1 E N A u t o m a t i c M o d e 1 press and hold Activate the main menu M a i n M e n u 1 I d e n t i f i c a t i o n 1 3 press briefly I d e n t i f i c a t i o n 3 S e r i a l n u m b e r ...

Page 29: ... parameters This does not apply to the user S e r v i c e M e n u 1 P a s s w o r d I n p u t press and hold press briefly Exit the main menu The control software is restarted M a i n M e n u Q U I T M e n u 10 3 MENU 3 DIAGNOSIS Several gate parameters can be set and viewed in this menu 10 3 1 Menu 3 1 Gate status The Gate status menu summarizes all information that represents the current conditi...

Page 30: ...uence matches inputs In8 to In1 An active input is indicated as 1 In the example only input In2 stop function break contact is connected to 24V I n p u t 8 7 6 5 4 3 2 1 V a l u e 0 0 0 0 0 0 0 1 3 1 3 press briefly turn CW G a t e S t a t e 3 O u t p u t 5 4 3 2 1 press briefly O u t p u t 5 4 3 2 1 V a l u e 0 0 0 0 0 3 1 4 press briefly turn CW G a t e S t a t e 4 C o m p l e t e d C y c l pres...

Page 31: ...gular intervals a maintenance interval can be defined depending on the number of gate movements If the maintenance reminder is active number of movement cycles or maintenance interval reached the display shows the Maintenance necessary message 10 3 2 Menu 3 2 Sensor Status Menu The statuses of the sensors can be displayed via Diagnosis Sensor Status Turning the switch displays the individual senso...

Page 32: ...u e 0 0 turn CW Part OPEN switch status optional P a r t O P E N S w i t c h V a l u e 0 0 turn CW Current value of the incremental encoder I n c r E n c o d e r V a l u e 2 1 4 7 4 1 8 1 turn CW Stationary anti crushing safety protection device for the OPEN direction of the gate S t a t E d g e O P E N V a l u e 0 0 turn CW Stationary anti crushing safety protection device for the CLOSING directi...

Page 33: ... 10 4 1 1 Menu 4 1 1 Set lighting coming home leaving home The HMD230 can drive a lamp e g to automatically light the zone around the gate when the gate is moving The lamp must be installed by an engineer password required See the chapter on Parameter settings in the HMD230 motor drive installation manual The connected lighting max 230 VAC 3A is activated by the drive unit as soon as a movement co...

Page 34: ...re defined timer settings These timer settings per menu must be displayed here The motor drive can close the gate automatically after a time as set 1 to 999 seconds has elapsed after the OPEN end position was reached This function is active only in automatic mode and after the OPEN end position has been reached The timer is off if the value equals 0 Menu Action Display reading Explanation H e r a ...

Page 35: ... to count down again This also applies to loop detection and anti crushing safety protection devices 10 4 1 3 Menu 4 1 3 Keep Part OPEN timer The motor drive can close the gate automatically after a time as set 1 to 255 seconds has elapsed after the Part OPEN position was reached This function is active only in automatic mode and after the Part OPEN position has been reached Menu Action Display re...

Page 36: ...sitions of the gate are laid down when installing and setting the gate and the drive The user can only change the CLOSED end position Possible causes of a position no longer being correct are The gate motor was disengaged and was not in exactly the same position when it was re engaged In rare exceptions when activating an anti crushing safety protection device the gear wheel may slip over a tooth ...

Page 37: ... keys on the backplane for 8 seconds applies to versions 1 02 and up Attention engaging the motor when the gate is in the wrong position may cause serious damage If in doubt contact the fitter See the chapter on DISENGAGING THE MOTOR 10 4 3 Marker plate In CLOSED position gate closed the slot of the marker plate must be aligned to the side of the drive unit If this is not the case then manually mo...

Page 38: ...ually move the gate to its CLOSED position and set the position again 10 5 MENU 5 CLOCK CALENDAR The clock module integrated in the HMD230 can be used to move the gate automatically on the basis of an exact time schedule If the power supply to the motor drive is switched off the date and time are kept up to date for a couple of weeks Automatic switch over to summer or winter time take place accord...

Page 39: ... briefly The current date and time are displayed D a t e 2 0 1 2 0 4 0 1 T i m e 1 6 3 4 4 5 press and hold press briefly Exit the main menu The control software is restarted M a i n M e n u Q U I T M e n u 10 5 2 Menu 5 2 Setting date time The internal clock of the HMD230 has been factory set If this time ever differs from the actual current time the clock can be set as follows Menu Action Displa...

Page 40: ...rrent month M o n t h V a l u e 0 4 turn CW press briefly S e t D a t e T i m e D a y turning press briefly Set the current day D a y V a l u e 0 1 turn CW press briefly S e t D a t e T i m e H o u r turning press briefly Set the current hour H o u r V a l u e 1 6 turn CW press briefly S e t D a t e T i m e M i n u t e turning press briefly Set the current minutes M i n u t e V a l u e 3 4 turn CW...

Page 41: ...ifferent ways at specific times Only available for profiles 3 4 Some commands are available for gate actions They can be called up at carefully defined times The times and commands can be repeated for the seven week days with a weekly cycle However other combinations of times and commands of a higher priority e g for holidays can be planned in a yearly calendar to suppress this weekly recurring ti...

Page 42: ...p Part OPEN function The gate can close again OPEN gate The gate moves to the OPEN position CLOSE gate The gate moves to the OPEN position if possible Gate Part OPEN The gate moves to the Part OPEN position if possible 10 5 4 Menu 5 3 Activating the calendar The following setting can be used to activate or deactivate the total calendar functions without you having to change the specific individual...

Page 43: ... 5 C l o c k C a l e n d a r 5 4 press briefly turn CW C l o c k C a l e n d a r 4 D i s p W e e k C a l press briefly turn Shows the switching time on the right Turn the selector switch to browse through all entries in the calendar M o n d a y 1 2 3 0 H o l d P a r t O P E N turn CW Shows the end of all actions entered Or is displayed if no week clock has been set D i s p W e e k C a l E N D pres...

Page 44: ... free memory position for a week day is displayed S u n d a y turn CW Select the week day M o n d a y press briefly Call up the entry mode for the hours M o n d a y 0 0 turning Select the hour for the switching time M o n d a y 1 2 press briefly Call up the entry mode for the minutes M o n d a y 1 2 0 0 turning M o n d a y 1 2 3 0 press briefly M o n d a y 1 2 3 0 N o A c t i o n turn CW Select th...

Page 45: ...e weekly calendar All entries for a week day can be copied to another week day on the weekly calendar provided that no entries have been made so far in the week day which the data is to be copied to Menu Action Display reading Explanation H e r a s H M D 2 3 0 S 1 E N A u t o m a t i c M o d e 5 press and hold turn CW Activate the main menu M a i n M e n u 5 C l o c k C a l e n d a r 5 5 press bri...

Page 46: ... n u Q U I T M e n u 10 5 6 3 Menu 5 5 1 Deleting individual entries You can delete individual entries for a week day on the weekly calendar as follows Menu Action Display reading Explanation H e r a s H M D 2 3 0 S 1 E N A u t o m a t i c M o d e 5 press and hold turn CW Activate the main menu M a i n M e n u 5 C l o c k C a l e n d a r 5 5 press briefly turn CW C l o c k C a l e n d a r 5 E d i ...

Page 47: ...g a week day You can also delete all entries for a week day from the weekly calendar after selecting the first entry for the week day in question Menu Action Display reading Explanation H e r a s H M D 2 3 0 S 1 E N A u t o m a t i c M o d e 5 press and hold turn CW Activate the main menu M a i n M e n u 5 C l o c k C a l e n d a r 5 5 press briefly turn CW C l o c k C a l e n d a r 5 E d i t W e ...

Page 48: ...xit the main menu The control software is restarted M a i n M e n u Q U I T M e n u 10 5 6 5 Menu 5 5 2 Deleting the weekly calendar You can also delete all entries for the entire weekly calendar as follows Menu Action Display reading Explanation H e r a s H M D 2 3 0 S 1 E N A u t o m a t i c M o d e 5 press and hold turn CW Activate the main menu M a i n M e n u 5 C l o c k C a l e n d a r 5 5 p...

Page 49: ... skipped The yearly calendar can be displayed as follows Menu Action Display reading Explanation H e r a s H M D 2 3 0 S 1 E N A u t o m a t i c M o d e 5 press and hold turn CW Activate the main menu M a i n M e n u 5 C l o c k C a l e n d a r 5 6 press briefly turn CW C l o c k C a l e n d a r 6 D i s p Y e a r C a l press briefly Shows the switching time on the right Turn the selector switch to...

Page 50: ...e the main menu M a i n M e n u 5 C l o c k C a l e n d a r 5 7 press briefly turn CW C l o c k C a l e n d a r 7 E d i t W e e k C a l 5 7 1 Press briefly E d i t W e e k C a l 1 S e t D a y press briefly An empty memory position for a date is displayed 2 0 press briefly turn CW Call up the entry mode for the year 2 0 1 1 turn CW Select the year for the switching time 2 0 1 2 press briefly Call u...

Page 51: ... 2 0 6 1 7 1 2 3 0 press briefly Call up the entry mode for the motor drive function for this switching time 2 0 1 2 0 6 1 7 1 2 3 0 N o A c t i o n turn CW Turn the selector switch in a clockwise direction to select the function 2 0 1 2 0 6 1 7 1 2 3 0 H o l d P a r t O P E N press briefly Press the selector switch to insert the full entry into the yearly calendar sorted by time The next memory l...

Page 52: ...a different date on the yearly calendar However a new date has to be entered for this Menu Action Display reading Explanation H e r a s H M D 2 3 0 S 1 E N A u t o m a t i c M o d e 5 press and hold turn CW Activate the main menu M a i n M e n u 5 C l o c k C a l e n d a r 5 7 press briefly turn CW C l o c k C a l e n d a r 7 E d i t W e e k C a l 5 7 1 press briefly E d i t W e e k C a l 1 S e t ...

Page 53: ...tion H e r a s H M D 2 3 0 S 1 E N A u t o m a t i c M o d e 5 press and hold turn CW Activate the main menu M a i n M e n u 5 C l o c k C a l e n d a r 5 7 press briefly turn CW C l o c k C a l e n d a r 7 E d i t W e e k C a l 5 7 1 press briefly E d i t W e e k C a l 1 S e t D a y press briefly turn 2 0 1 1 0 6 1 7 1 2 3 0 H o l d P a r t O P E N press briefly turn CCW A question is displayed 2...

Page 54: ...S 1 E N A u t o m a t i c M o d e 5 press and hold turn CW Activate the main menu M a i n M e n u 5 C l o c k C a l e n d a r 5 7 press briefly turn CW C l o c k C a l e n d a r 7 E d i t W e e k C a l 5 7 1 press briefly E d i t W e e k C a l 1 S e t D a y press briefly turning Select the entry to be deleted 2 0 1 1 0 6 1 7 0 1 2 3 0 H o l d P a r t O P E N press briefly turn CCW A question is di...

Page 55: ...efly turn CW C l o c k C a l e n d a r 7 E d i t W e e k C a l 5 7 2 press briefly turn CW E d i t W e e k C a l 2 D e l Y e a r C a l press briefly D e l Y e a r C a l D o n e press and hold press briefly Exit the main menu The control software is restarted M a i n M e n u Q U I T M e n u 10 6 MENU 6 RF REMOTE CONTROL The motor drive features a slot for a radio frequency receiver module An 868 MH...

Page 56: ...ustration 13 pos 9 The internal core of the coax cable of the antenna is connected to the right hand terminal near the housing side The antenna shield is connected to the most inward left hand terminal 10 6 1 Menu 6 1 Displaying the number of hand transmitters A separate storage location is reserved in the memory of the motor drive for each hand transmitter The total number of transmitters stored ...

Page 57: ...ic value is displayed for 2 seconds This is the value of the received signal together with the storage position RF xxxx Pos p If within twenty seconds after activating the menu the program does not recognize a valid code the menu is displayed again P r o g r T r a n s m i t Press the hand transmitter button When the transmission code has been recognized and saved the menu is displayed again Other ...

Page 58: ... A u t o m a t i c M o d e 6 press and hold turn CW Activate the main menu M a i n M e n u 6 R F R e m o t e C t r l 6 3 press briefly R F R e m o t e C t r l 3 P r o g K e y O P E N press briefly Program OPEN function P r o g K e y O P E N Press the hand transmitter button After recognizing and saving the transmission code a numeric value is displayed for 2 seconds This is the value of the receiv...

Page 59: ...nd saving the transmission code a numeric value is displayed for 2 seconds This is the value of the received signal together with the storage position R F 1 2 3 4 5 6 7 8 9 P o s 3 C l R F R e m o t e C t r l 4 P r o g K e y C L O S E press and hold press Exit the main menu The control software is restarted Check the key functions that have been taught in automatic mode M a i n M e n u Q U I T M e...

Page 60: ... t e C t r l 5 P r o g P a r t O P E N press and hold press Exit the main menu The control software is restarted Check the key functions that have been taught in automatic mode M a i n M e n u Q U I T M e n u 10 6 3 4 Menu 6 6 Programming hand transmitter button TOGGLE Menu Action Display reading Explanation H e r a s H M D 2 3 0 S 1 E N A u t o m a t i c M o d e 6 press and hold turn CW Activate ...

Page 61: ...hand transmitter has not yet been programmed then only the programmed function is available To restore the original functions the transmitter must be deleted in the menu Delete transmitter or Delete all and then be reprogrammed 10 6 4 Menu 6 7 Deleting transmitters from the memory You can delete specific individual hand transmitters from the HMD230 memory The menu option Delete transmitter puts th...

Page 62: ...nu Action Display reading Explanation H e r a s H M D 2 3 0 S 1 E N A u t o m a t i c M o d e 6 press and hold turn CW Activate the main menu M a i n M e n u 6 R F R e m o t e C t r l 6 8 press briefly turn CW R F R e m o t e C t r l 8 D e l e t e P l a c e N o press briefly Select the desired position e g Pos 1 Op Repeat if you want to delete multiple functions D e l e t e P l a c e N o P o s 1 p...

Page 63: ...3 0 S 1 E N A u t o m a t i c M o d e 6 press and hold turn CW Activate the main menu M a i n M e n u 6 R F R e m o t e C t r l 6 9 press briefly turn CW 0 7 T M R A u t o m O p e press briefly All transmitters have been deleted Check the number of transmitters stored by means of the menu option Active transmitters R F R e m o t e C t r l 9 D e l e t e A l l press and hold press briefly Exit the m...

Page 64: ...tically using a light dark switch When darkness falls the lights on the gate will go on See the manuals for the LED control unit and the week timer for instructions on how to operate and program them Illustration 24 LED control unit Illustration 25 Week timer If the gate has not been used for some time the lights on the gate may not work or may work poorly Open and close the gate automatically 3x ...

Page 65: ... opened and closed manually Illustration 25 release the motor When locking the system again close the gate as far as the mark on the bottom rail Now move the gate to and fro or sideways a bit to engage the gear wheel with the toothed bar Set the automatic fuse to ON Lock the drive unit cabinet after use Illustration 26 lock the motor 11 2 AUTOMATIC DISENGAGEMENT Versions with automatic disengageme...

Page 66: ...0 cycles See the chapter SERVICE MAINTENANCE 13 2 HMD230 MAINTENANCE The HMD230 motor drive does not require any maintenance Only the battery type CR 2032 for the integrated clock module must be replaced after 5 years The battery can be found in a vertical holder over the twist and selector switch Beware of causing a short circuit when using a metal implement to remove the battery The entire gate ...

Page 67: ...ly people trained by Heras are allowed to disassemble the bottom rail There is no hidden danger associated with dismantling the bars top rail and stiles The points that are fitted to some sliding gates are sharp There is a danger of being cut when disassembling such a gate Wear suitable gloves The master drive is fitted with a battery of the type CR 2032 Disposing of batteries as domestic waste is...

Page 68: ...AC N PE 10 50 60Hz External power supply 230V 230VAC 10 50 60Hz fused with a 6 3A slow acting fuse on the PCB Internal power supply 24V 24VDC stabilized 5 max 500mA fused with a semiconductor fuse that resets automatically for optional accessories Motor power kW 0 37 Control inputs 24VDC typ 4mA 12 V inactive logical 0 18 V active logical 1 galvanically isolated internally Local fuse max 10A Max t...

Page 69: ...www heras com English 69 16 2 HMD230 DIMENSIONS Afbeelding 28 Dimensions of HMD230 Afbeelding 29 16 3 IGD DIMENSIONS Afbeelding 30 Dimensions of IGD ...

Page 70: ...devices Guidelines for installing the anti crushing safety protection devices referred to as safety edges in the drawing below on different configurations of Delta and Orion sliding gates A sketch of the top view of the sliding gate is provided Explanation of symbols Delta Delta SHB ...

Page 71: ...www heras com English 71 Orion iGATE ...

Page 72: ...www heras com English 72 uGate ...

Page 73: ...www heras com English 73 Appendix B Declaration of Conformity ...

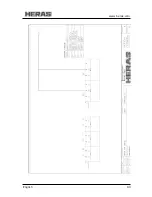
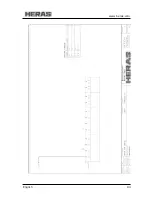
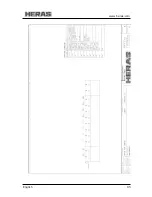
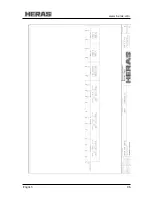
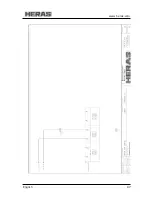
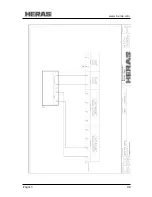
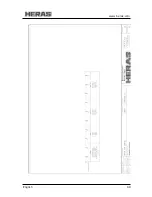
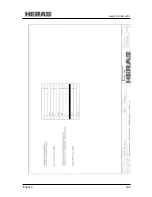
Page 74: ...www heras com English 74 Appendix C ELECTRIC DIAGRAM HMD230 ...

Page 75: ...www heras com English 75 ...

Page 76: ...www heras com English 76 ...

Page 77: ...www heras com English 77 ...

Page 78: ...www heras com English 78 ...

Page 79: ...www heras com English 79 ...

Page 80: ...www heras com English 80 ...

Page 81: ...www heras com English 81 ...

Page 82: ...www heras com English 82 ...

Page 83: ...www heras com English 83 ...

Page 84: ...www heras com English 84 ...

Page 85: ...www heras com English 85 ...

Page 86: ...www heras com English 86 ...

Page 87: ...www heras com English 87 ...

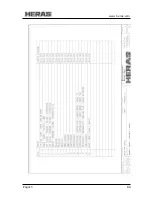
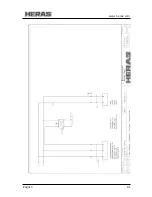
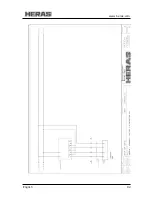
Page 88: ...www heras com English 88 Appendix D ELECTRIC DIAGRAM IGD ...

Page 89: ...www heras com English 89 ...

Page 90: ...www heras com English 90 ...

Page 91: ...www heras com English 91 ...

Page 92: ...www heras com English 92 ...

Page 93: ...www heras com English 93 ...

Page 94: ...www heras com English 94 ...

Page 95: ...www heras com English 95 ...

Page 96: ...www heras com English 96 ...

Page 97: ...www heras com English 97 ...

Page 98: ...www heras com English 98 ...

Page 99: ...www heras com English 99 ...

Page 100: ...www heras com English 100 ...

Page 101: ...www heras com English 101 ...

Page 102: ...www heras com English 102 ...

Page 103: ...www heras com English 103 ...

Page 104: ...www heras com English 104 ...

Page 105: ...www heras com English 105 ...

Page 106: ......

Reviews: