Section 5-3
18
MLSM2003-09-03
Procedure J
- Regulator Replacement
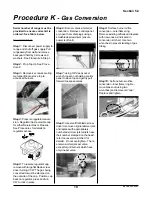
Step 1: Disconnect power supply to
range and shut off gas supply. Pull
range away from wall and remove
backguard held by 3 screws and
washers. See Procedure A Step 1.
Step 2: Prop Top Up. See Proce-
dure P.
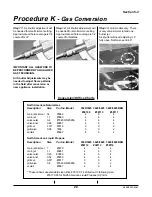
Step 3: Before replacing regulator
because flames are too high or too
low, check regulator cap for proper
gas setting.
Step 4: Cap is stamped with either:
”NAT” on the convex side or “LP” on
the hollow concave side. If stove is
set for Nat Gas and it receives
Propane, the flames will be large. If
stove is set to Propane and it
receives Nat Gas, flames will be
small. See Procedure K for Gas
conversion steps.
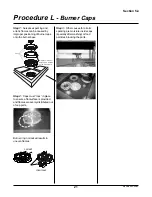
Step 5: If no gas flows through
regulator but there is gas to the
regulator, it is either mounted
backwards (although unlikely,
however there is an arrow stamped
on the body of the regulator to
ensure proper orientation); or it is
faulty.
Step 6: If installed backwards,
disconnect regulator from manifold
and inlet piping, reverse orientation
and re-install. Check all gas con-
nections with soapy water solution
to ensure no gas leaks.
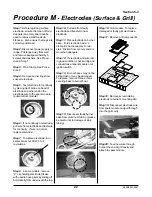
Step 7: If regulator is faulty (i.e no
gas flow, leak, etc.) then replace
regulator.
Step 8: To remove regulator,
carefully rotate and unscrew from
manifold. Ensure new regulator is
oriented with arrow pointing in
direction of gas flow and ensure pipe
dope is used in all threaded connec-
tions.
Step 9: When finished check all
gas connections with soapy water
solution to ensure no leaks are
present.
IMPORTANT: ALL GAS WORK TO
BE PERFORMED BY A
QUALIFIED GAS TECHNICIAN.


