6
5)
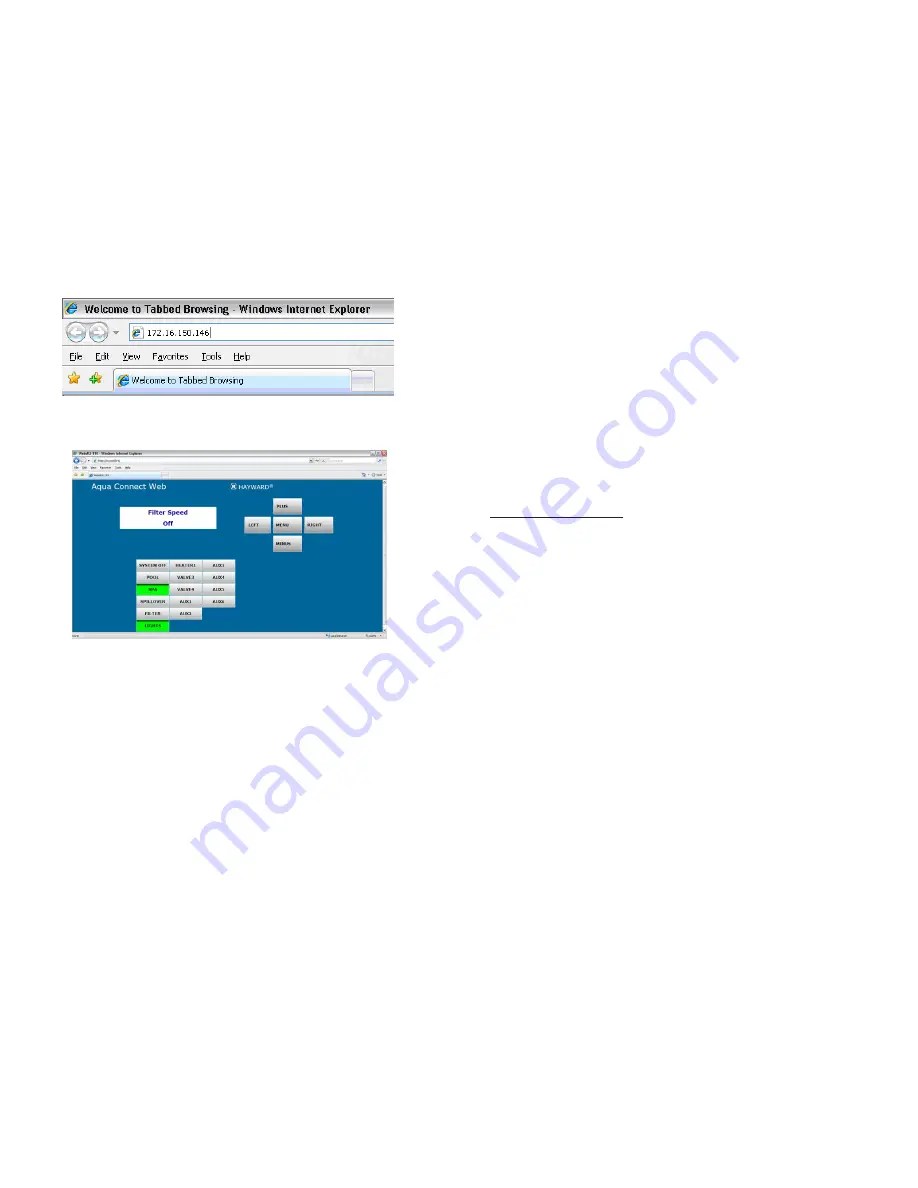
Enter the IP address (found in step 4) into the address line of Internet Explorer and
press the ENTER key on your keyboard (Figure 8).
6)
The local server should start and be functional.
Using the Local Server
The local server responds to single clicks and forwards the associated key to the pool
controller. Once a button is clicked, local server status will be changed as appropriate.
For instance, the status message displayed on the two by twenty character display may
change.
Led Status
The local server shows LED status for buttons differently than the pool control's local
display keypad or its associated remote controls. The LED status on the local server is
shown as follows:
GREEN - LED is ON
BLUE - LED is BLINKING
GRAY - LED is OFF
Display Status
The local server will also display status messages that are shown on the pool controller’s
two by twenty character display. The local server’s display should match that of the
pool controller.
7
Unlocking the Configuration Menu
The local server can also unlock the pool configuration menu. This is done by clicking
on the two by twenty character display while the “Configuration Menu-Locked” status
is displayed. Clicking on the two by twenty character display at other times will have no
effect.
Setup web client functionality
Aqua Connect Website Login Account Creation:
If the homeowner is going to use the Aqua Connect website to control and/or monitor
their pool, a login account on the Aqua Connect website needs to be established.
The ACHN needs to be associated with a login account on the Aqua Connect website to
control and/or monitor their pool via the web. A given ACHN can only be associated
with a single manager level account. This is the account that owns the ACHN and that
will be billed for renewals.
You must have the MAC address of the ACHN unit available to complete the registra-
tion. Refer to the bottom of page 3 to determine the MAC address for your ACHN.
Using a PC with Internet access, open your web browser and go to the website
www.aquaconnectweb.com
. Either log onto your existing account, or create a new ac-
count.
Create a new account:
•
Select
Set-Up New Account
.
•
Go to the box entitled
New Users: Enter New Account Information
and fill out all of
the required information.
•
After that, you should receive notice that your account has been created. At this
point you are logged into your account.
Register the ACHN and add your pool:
•
Select
Add a Pool.
•
In the window titled
Enter Site Information for this ACHN,
enter all of the required
information. Note that you can always go back and change information.
•
Select
Add Pool
at the bottom of the page.
•
If all of the information has been entered you will now see the Confirm Page which
will give you one final chance to review the information you have entered. If you are
satisfied that the information is correct, select
Confirm
. This will take you to a page
that displays a receipt. Print this and keep it for your records.
V
erify your login account:
•
Logout, then login using the username and password you just set up. You must be
able to get back into your account.
•
Once your username and password are accepted, you will be taken to the Dash-
board for this pool. The Dashboard is the page where you monitor you pool (see
below). No control is possible from the Dashboard.
•
Depending on how long it has been since the physical ACHN unit was installed,
you may need to wait for the Dashboard to initialize. If you have to wait longer than
10 minutes, check the ACHN and make sure that the LINK LED is active (blinking).
Figure 8
Figure 9


