


Setting Up the Collar(s)
Setting Up the Collar(s)
7
www.HavahartWireless.com
1-800-800-1819, OPTION 453
Setting Up the Collar(s)
Setting Up the Collar(s)
3
3
Installing a Battery:
•
Remove the clear plastic wrapping from
the Batteries.
•
Charge the Battery fully before using.
•
Turn the Battery Cap counterclockwise to the
“Unlock” icon, remove it and insert the Battery
(see illustration D).
•
Replace the Battery Cap, lining up the white dot on the Battery Cap with the “Unlocked”
icon, turning clockwise until the white dot on the Battery Cap is lined up with the
“Locked” icon on the Collar. The Collar Light will flash green. If it does not, shake the
Collar gently as the Collar is in sleep mode (see the Havahart
®
Wireless Collar Light Chart).
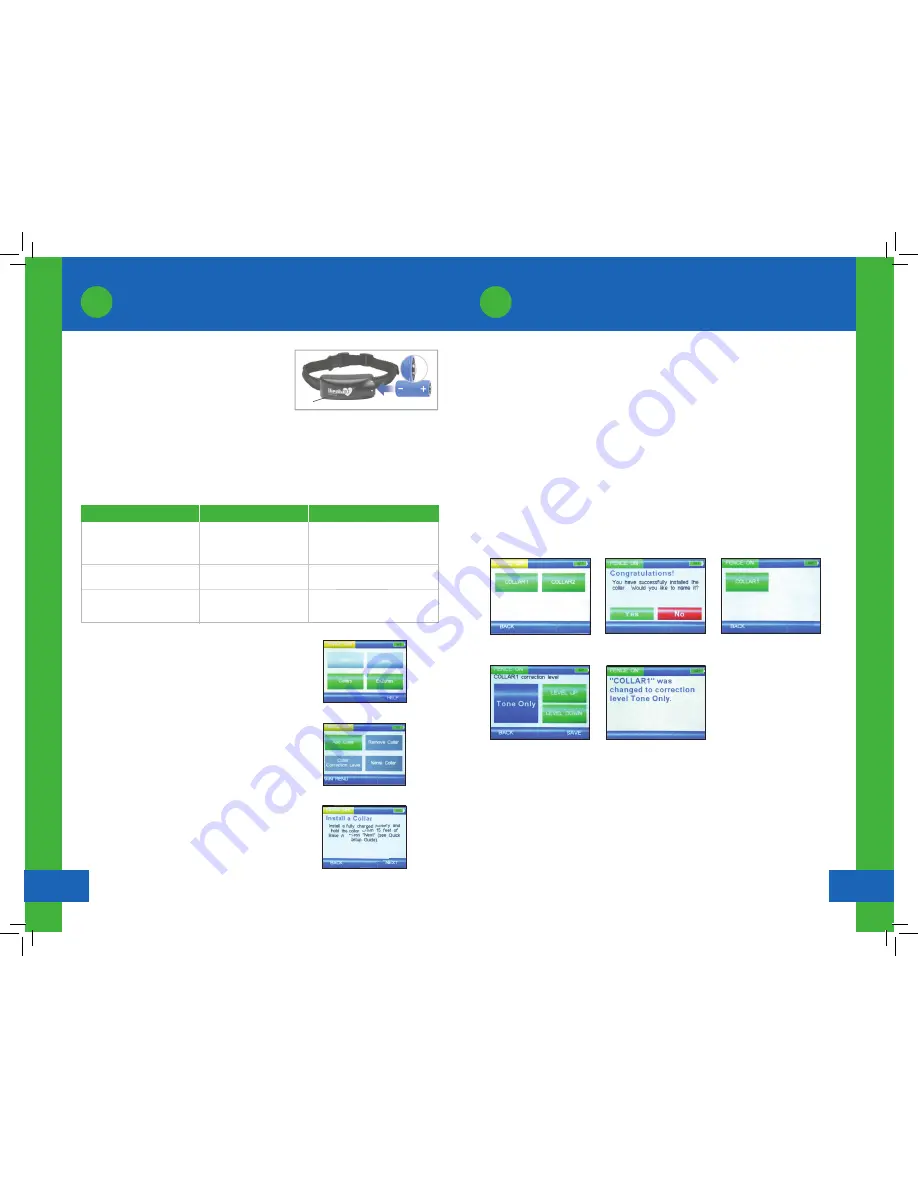
Activating a Collar:
•
The System allows you to activate up to 2 Collars
using the Controller.
•
Make sure the Collar you are activating is the only
Collar with Batteries and the only Collar turned on.
This keeps the System from tuning in on the
wrong Collar.
•
Position the Collar near the Master Base A.
•
Select “Collars” from the main menu (see Screen 4.1).
•
Select “Add Collar” (see Screen 4.2).
•
Press “Next” (see Screen 4.3).
Havahart
®
Wireless Collar Light Chart:
- Asleep OR
- Battery is too low OR
- Battery is not in the Collar
-Battery has good charge
-Low Battery
OR
-Boundary Breach
Collar Light
Action
Status
Off
Fast Green Flash every second
Red Flash
Shake gently and watch for the
Light to flash green. Make sure
a fully charged Battery is in the
Collar.
No action required
Charge the Battery OR
Return the dog to Roaming Area
+
Collar Light
Screen 4.2
Screen 4.3
Screen 4.1
8
Activating a Collar (continued):
•
While gently shaking the Collar to keep it awake, press the Collar button on the
Controller screen that you would like to activate (see Screen 4.4).
•
A congratulatory screen will appear (see Screen 4.5). Press “Yes” if you would like to
name the Collar.
Adjusting the Correction Level of a Collar:
•
Select “Collars” from the main menu (see Screen 4.1).
•
Press “Collar Correction Level” (see Screen 4.2).
•
Press Collar that you wish to adjust (see Screen 4.6).
•
Press “LEVEL UP” or “LEVEL DOWN” to adjust the correction level to the desired setting –
5 being the highest correction level and Tone-only being the lowest correction level
(see Screen 4.7).
•
Press “SAVE” and a confirmation screen will display briefly (see Screen 4.8).
Screen 4.4
Illustration D
Screen 4.5
Screen 4.8
Screen 4.6
Screen 4.7


