


Form No. QTSM-0213
6
INSTALLATION
General
The Quick-Therm Salamander is shipped with most components
pre-assembled. Care should be taken when unpacking shipping
carton to avoid damage to the unit and the components enclosed.
The Salamander can be placed on a countertop or mounted to a
brick or cement wall. The following installation instructions must
be performed before operating the Salamander.
ELECTRIC SHOCK HAZARD:
• Unit must be installed by a qualified electrician.
Installation must conform to all local electrical codes.
Installation by unqualified personnel will void unit
warranty and may lead to electric shock or burn, as well
as damage to unit and/or its surroundings.
• Unit is not weatherproof. Locate unit indoors where
ambient air temperature is a minimum of 21°C (70°F)
and a maximum of 45°C (113°F).
• Do not install unit above a steam table or other steam
generating appliance.
FIRE HAZARD:
• To reduce the risk of fire, the appliance is to be installed
in non-combustible surroundings only, with no
combustible material within 46 cm (18″) of the sides,
front, or rear of the appliance or within 102 cm (40″)
above the appliance. The appliance is to be mounted
on floors of non-combustible construction with non-
combustible flooring and surface finish and with no
combustible material against the underside, or on non-
combustible slabs or arches that have no combustible
material against the underside. Such construction shall
in all cases extend not less than 30 cm (12″) beyond
the equipment on all sides.
• Locate the unit a minimum of 51 mm (2″) from any
walls. If safe distances are not maintained,
discoloration or combustion could occur.
• Do not obstruct air ventilation openings on outer
housing of unit. Unit combustion or malfunction may
occur.
• Do not place anything on top of unit.
For wall mounting, use special wall mount bracket
provided with unit only. Secure wall mount bracket to a
solid, non-combustible surface using appropriate
hardware for mounting surface and weight of unit.
Locate unit at proper counter height in an area that is con-
venient for use. Location should be level to prevent unit or
its contents from falling accidentally and strong enough to
support the weight of the unit and contents.
Do not place anything on top of unit; doing so may subject
personnel to injury or damage unit.
NOTE: A qualified person must check possible placements of
the Salamander to ensure that the proper electrical
supply line is available.
1. Remove the unit from the carton.
NOTE: To prevent delay in obtaining warranty coverage,
complete online warranty registration. See the
IMPORTANT OWNER INFORMATION
section for
details.
CAUTION
WARNING
2. Remove tape and protective packaging from all surfaces of
the unit.
3. Clean the unit thoroughly to remove all protective industrial
grease.
NOTICE
: Use non-abrasive cleaners and cloths
only.
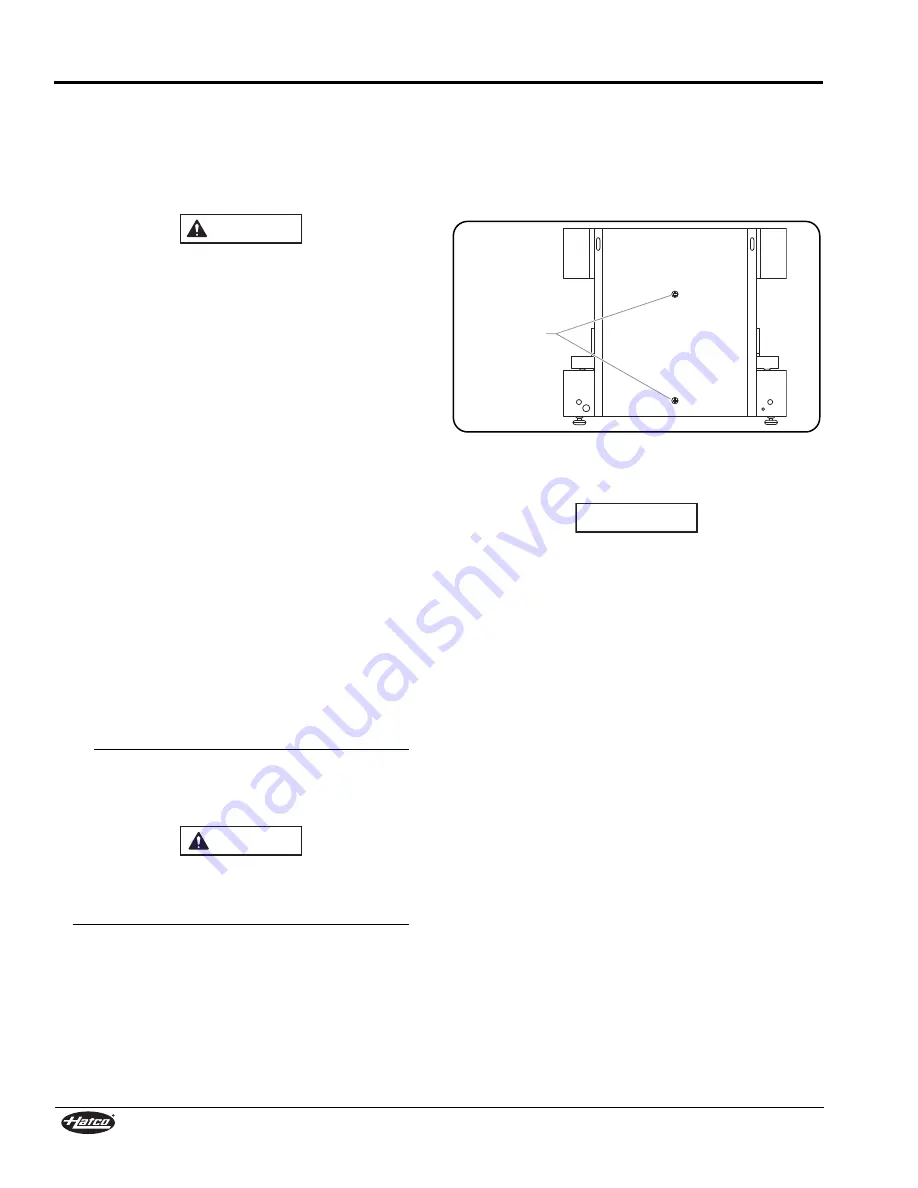
4. Remove the transport locking screws used to secure the
upper housing during shipping. Discard the screws.
Transport Locking Screws
NOTE: Do not plug in or hardwire the unit until either
countertop installation or wall mounting is complete.
Do not install unit above grills, fryers, or other appliances
that will expose unit to high temperatures, excessive
moisture, or grease-laden air. Improper installation will
damage components and void warranty.
5. For wall mounting, refer to the “Installing a Wall-Mounted
Unit” procedure in this section.
6. For countertop installation, place the unit in the desired
location.
• Locate the unit directly underneath an exhaust hood if
possible. This will ensure total suction of steam produced
during cooking.
• Make sure the unit is installed where the ambient air
temperature will not rise above 45°C (113°F) and where
it will not be exposed to excessive moisture or grease-
laden air.
• Make sure the unit is at the proper height in an area
convenient for use.
• Make sure the countertop is level and strong enough to
support the weight of the unit and food product.
• Make sure all the feet on the bottom of the unit are
positioned securely on the countertop with a minimum
of 51 mm (2″) between the unit and any wall.
NOTE: Make sure the unit is installed in a serviceable location
with enough slack in the power lead/cord to allow
cleaning and servicing at a safe working height.
7. Level the unit by turning the leveling feet on each leg, if
necessary.
Transport
Locking
Screws
NOTICE


