background image

Form No. DHWBIM-0421

2

English

This manual provides the installation, safety, and operating 

instructions for the Modular Built-In Dry Heated Wells. Hatco 

recommends all installation, operating, and safety instructions 

appearing in this manual be read prior to installation or operation 

of a unit.
Safety information that appears in this manual is identified by 

the following signal word panels:

WARNING

WARNING indicates a hazardous situation which, if not 

avoided, could result in death or serious injury.

CAUTION

CAUTION indicates a hazardous situation which, if not 

avoided, could result in minor or moderate injury.

NOTICE

NOTICE is used to address practices not related to 

personal injury.

INTRODUCTION

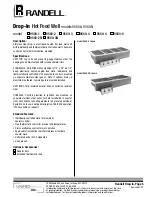
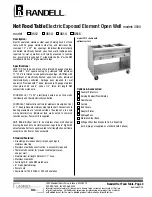
Hatco Modular Built-In Dry Heated Wells are specially designed 

to hold heated foods at safe serving temperatures. Dry wells 

are available in a variety of pan combinations — all heated 

with a long-life heating element that is covered by a 2 year part 

warranty. The metal sheathed heating element is controlled 

by a remote thermostat. Heat is distributed evenly throughout 

the heavy gauge stainless steel construction to ensure hot 

food. The design allows for easy maintenance and durable 

performance. All units are UL approved and equipped with a 

remote control enclosure.
Units are equipped with EZ lock mounting hardware. Controls 

include individual lighted power switches and thermostat 

controls that retain temperature settings. One year parts and 

on-site labor warranty is standard.
Hatco Modular Built-In Dry Heated Wells are a product of 

extensive research and field testing. The materials used were 

selected for maximum durability, attractive appearance, and 

optimum performance. Every unit is inspected and tested 

thoroughly prior to shipment.

Important Owner Information ..............................................2

Introduction ...........................................................................2

Important Safety Information ..............................................3

Model Description ................................................................4

Model Designation ...............................................................5

Specifications .......................................................................5

Plug Configurations .............................................................5

Electrical Rating Chart .........................................................5

Dimensions ..........................................................................6

Installation .............................................................................6

General ................................................................................6

Installing the Unit .................................................................7

Countertop Cutout Dimensions ...........................................7

Installing a Remote Control Enclosure ................................8

Control Enclosure Cutout Dimensions ................................8

Operation ...............................................................................9

General ................................................................................9

Maintenance ........................................................................10

General ..............................................................................10

Daily Cleaning ...................................................................10

Monthly Cleaning ...............................................................10

Troubleshooting Guide ...................................................... 11

Options and Accessories ..................................................12

Limited Warranty ................................................................14

Authorized Parts Distributors ...........................Back Cover

IMPORTANT OWNER INFORMATION

Record the model number, serial number (specification label 

located on the back of the unit), voltage, and purchase date 

of the unit in the spaces below. Please have this information 

available when calling Hatco for service assistance.
Model No. ________________________________________
Serial No. _________________________________________
Voltage ___________________________________________
Date of Purchase ___________________________________

Register your unit!

Completing online warranty registration will prevent delay in 

obtaining warranty coverage. Access the Hatco website at 

www.hatcocorp.com

, select the 

Support 

pull-down menu, 

and click on “Warranty”.

Business 

Hours: 

7:00 

am

 to 5:00 

pm

 Monday

Friday, 


Central Time (CT)


(Summer Hours 

— 

June to September

:

 7:00 

am

 to 5:00 

pm

 Monday

Thursday 

 7:00 

am

 to 4:00 

pm

 Friday)

Telephone: 800-558-0607; 414-671-6350
E-mail: [email protected]

24 Hour 7 Day Parts and Service

Assistance available in the United States

and Canada by calling 800-558-0607.

Additional information can be found by visiting our web site at 

www.hatcocorp.com

CONTENTS

Summary of Contents for DHWBI Series

Page 1: ...e do y comprendido el contenido de este manual Cualquier falla en el seguimiento de las instrucciones contenidas en este manual puede resultar en un serio lesi n o muerte Este manual contiene importan...

Page 2: ...elected for maximum durability attractive appearance and optimum performance Every unit is inspected and tested thoroughly prior to shipment Important Owner Information 2 Introduction 2 Important Safe...

Page 3: ...LECTRIC SHOCK HAZARD Turn power switch OFF disconnect unit from power source and allow unit to cool before performing any maintenance or cleaning DO NOT submerge or saturate with water Unit is not wat...

Page 4: ...countertop Modular Built In Dry Heated Wells are designed manufactured and tested to maintain safe food holding temperatures DHWBI 1 2 3 4 5 and 6 Models DHWBI models are capable of holding a variety...

Page 5: ...upplied according to the application not available with split controls Refer to the OPTIONS AND ACCESSORIES section for more information WARNING ELECTRIC SHOCK HAZARD Plug unit into a properly grounde...

Page 6: ...t be installed using ribbon putty gasket between the unit and the installation surface per installation instructions This unit must be installed by qualified trained installers Installation must confo...

Page 7: ...s as needed to secure the unit to the countertop EZ Locking Tab Countertop EZ Locking Tabs NOTE The Hatco EZ locking tabs work on countertops that have a maximum thickness of 3 16 5 mm For countertops...

Page 8: ...r all control enclosures is 6 1 2 165 mm Make sure to have enough space inside the cutout if installing with conduit on the side of the control enclosure For units with two control enclosures Each enc...

Page 9: ...light on each switch glows when it is on CAUTION BURN HAZARD Some exterior surfaces on the unit will get hot Use caution when touching these areas 4 Turn the Temperature Control Knob s to the desired...

Page 10: ...eserve the finish of the heated well s perform the following cleaning procedure daily 1 Move the Power I O on off switches to the O off position and allow the unit to cool 2 Remove and wash any pans a...

Page 11: ...Authorized Service Agent or Hatco Temperature Control not working properly Contact Authorized Service Agent or Hatco for assistance Heating element not working Power I O on off switch not working Temp...

Page 12: ...ee 4 quart 4 liter round pans 7 Quart 7 Liter Adapter Top 4 Quart 4 Liter Adapter Top Adapter Tops Trivets Stainless steel or nickel plated trivets are available in various sizes TRIVET 1 4 SS Quarter...

Page 13: ...4 l Round Pan 4 Quart 4 l Notched Lid 7 Quart 7 l Notched Lid 4 Quart 4 l Hinged Lid 7 Quart 7 l Hinged Lid 7 Quart 7 l Round Pan 1 2 Pan 2 1 2 64 mm Deep 1 3 Pan 2 1 2 64 mm Deep Full Pan 2 1 2 64 mm...

Page 14: ...Warmer Elements metal sheathed Drawer Warmer Drawer Rollers and Slides Food Warmer Elements metal sheathed Display Warmer Elements metal sheathed air heating Holding Cabinet Elements metal sheathed ai...

Page 15: ...e et d essais sur le terrain Les mat riaux utilis s ont t s lectionn s pour un maximum de durabilit d aspect esth tique et de performance optimum Chaque appareil est minutieusement inspect et test ava...

Page 16: ...lation conform ment aux instructions d installation reportez vous la section Installation de ce manuel N utilisez pas de nettoyant inflammable pour nettoyer cet appareil Assurez vous que tous les op r...

Page 17: ...d adaptation Deux bacs ronds 6 6 litres avec un adaptateur Trois bacs ronds 3 8 litres avec un adaptateur Les bacs alimentaires les barres de support de bacs et les ustensiles adaptables sont vendus s...

Page 18: ...ultez la section OPTIONS ET ACCESSOIRES AVERTISSEMENT DANGER DE D CHARGE LECTRIQUE Brancher l appareil sur une prise de courant avec terre de tension de format et de configuration des broches corrects...

Page 19: ...e de plomberie et d lectricit ATTENTION Placez l appareil sur un plan de travail dont la hauteur est appropri e un emplacement pratique utiliser L emplacement doit tre assez solide pour supporter le p...

Page 20: ...bordure de la d coupe de la table de travail Veillez ce que le joint mastic en bandes d passe de la bordure de la d coupe ou scellez l unit avec un adh sif base de silicone NOTA Un rouleau de joint ma...

Page 21: ...ide et d lectrocution NOTA Faites appel un lectricien qualifi pour brancher les appareils une source d alimentation 1 Coupez et percez les trous appropri s dans la surface de fixation Consultez le par...

Page 22: ...terrupteur s allume lorsque l appareil est en marche ATTENTION DANGER DE BR LURE Certaines surfaces ext rieures de l appareil deviennent chaudes Toucher ces zones de l appareil avec pr caution 4 Tourn...

Page 23: ...tenir la performance il est recommand de nettoyer tous les jours l appareil 1 Mettre l appareil hors tension et laisser refroidir l appareil 2 Retirez et lavez tous les bacs et tous les adaptateurs 3...

Page 24: ...gulation de temp rature ne fonctionne pas correctement Contactez votre agent de maintenance agr ou Hatco pour assistance L l ment chauffant ne fonctionne pas L interrupteur d alimentation I O marche...

Page 25: ...ts chauffants DHWBI puissent accueillir trois bacs ronds de 4 litres 4 quarts Bac rond de 7 litres Adaptateurs de bacs Bac rond de 4 litres Adaptateurs de bacs Adaptateurs de bacs Grilles Des grilles...

Page 26: ...ier inoxydable grande taille 4 102 mm de profondeur largeur x profondeur x hauteur 324 x 527 x 102 mm 12 3 4 x 20 3 4 x 4 BAC 4QT Bac rond 4 litres 4 quarts 171 mm dia x 203 mm 6 3 4 dia x 8 BAC 7QT B...

Page 27: ...enveloppe m tallique l ments de pr sentation du r chaud enveloppe m tallique air chauffant l ments des armoires de stockage enveloppe m tallique air chauffant l ments de puits chauffants s ries HW HW...

Page 28: ...314 535 2222 NEBRASKA Anderson Electric Omaha 402 341 1414 NEVADA Burney s Commercial Las Vegas 702 736 0006 Hi Tech Commercial Service N Las Vegas 702 649 4616 NEW JERSEY Jay Hill Repair Fairfield 9...

Reviews: