background image

Archive Service

66

Vision

Instruction Manual

The new metadata section will now appear in the metadata column.
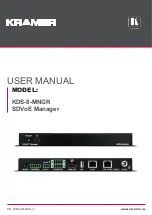
To edit the contents of a metadata section click underneath the relevant section heading (FIG. 97). A blue border appears. Edit or

enter text in the space provided.

Archive Permissions

The Archive Permissions Screen Archives > Archive Permissions is used to control user and set-top box access to Archives and the

folders contained within Archives. By default User Access is disabled for an Archive. This means that any user can carry out any

operation on the archive and its contents. To control access to an Archive proceed as follows:
1.

Choose the Archive to restrict from the Select a Service drop down and click Load.

2.

Change the Archive User Access Control setting from No to Yes and click Apply. Now Access Control has been enabled for an

Archive. No users can access content in that Archive.

3.

To give users access to a folder, expand the User Groups heading in the User Groups column and choose a User Group.

4.

Expand the Archive and folder to give access to in the Archive Contents column such as the Content folder.

5.

Drag the chosen user group and drop it under the folder where you see the text Drop a user group here. The Permission

column is now enabled. This column shows all permissions available to this user group on this folder. The available permissions

are show in the Archive Permissions table.

Enable the permissions required and click Apply. To remove this user group and revoke all its permissions click Remove.
There is a special user group called AMX-STB-VIRTUAL-USERGROUP which controls access for set-top box users, this is shown in

blue. This group only has one permission, the View permission, as set-top boxes are unable to carry out any other actions on

Archive contents. To allow set-top box users to view published MPEG2 or MP3 media in a particular folder, give the AMX-STB-

VIRTUAL-USERGROUP view permission on that folder.

NOTE: To update set-top-box permissions, navigate away from the main menu on the set-top box using the set-top box controller. 

Press and hold the menu button to update Archive Permission changes.

FIG. 97  

Editing Metadata Section Contents
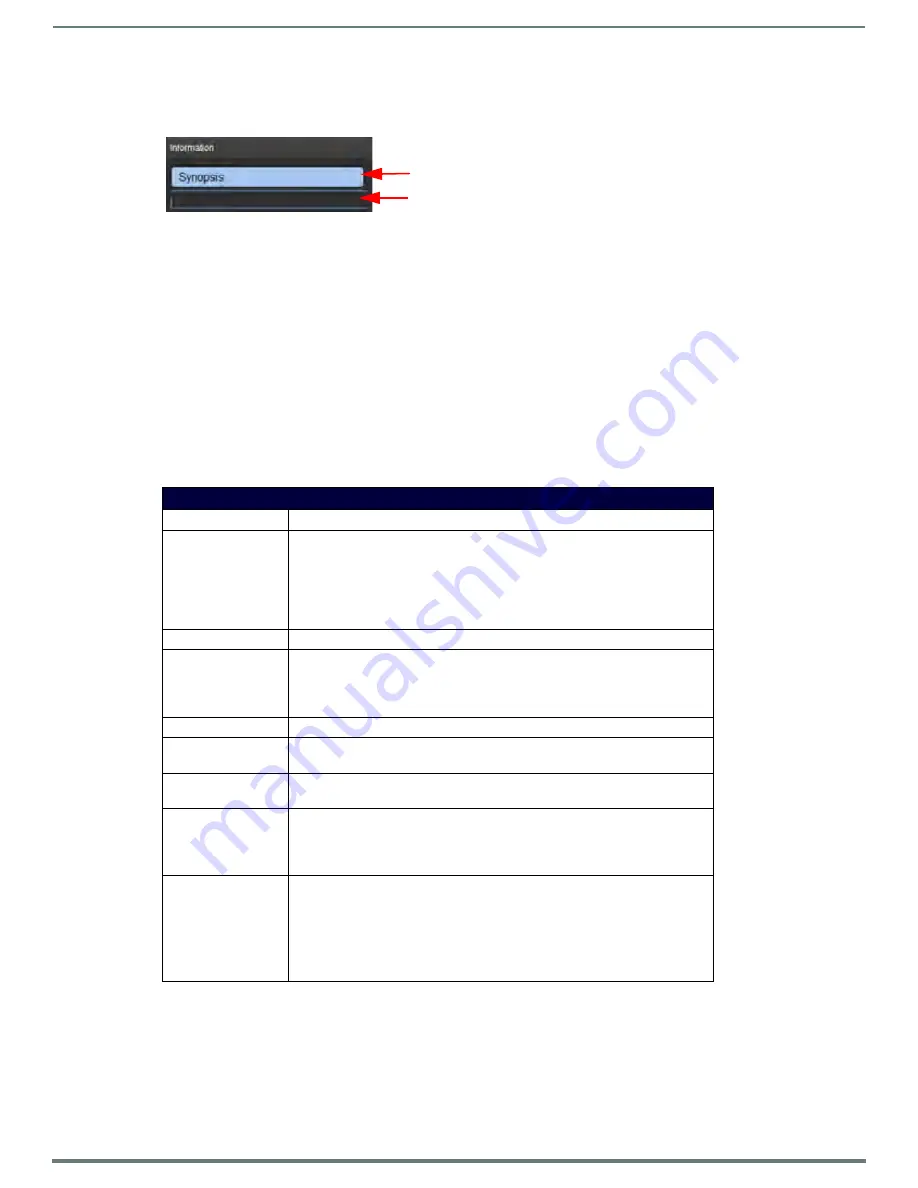
Archive Permissions

Permission

Description

Manage Category

This permission allows the following tasks:
• Create a category inside this category.
• Edit category description and name.
• Delete media files in this category.
• Cut/paste files/folders to/from this category.
• Create shortcut to video in this category.

Delete Category

Delete category (if empty).

View Media

View and play Media files in this category. Without this permission you cannot view

the category at all.

NOTE: Any account that is not an Administrator, will only see published videos when 

browsing an archive from a tablet or Set Top Box interface

Upload Media

Upload Media to this category.

Edit Media

• Rename Media.
• Edit media metadata.

Edit Poster Frame

Update video thumbnail (note the thumbnail that is captured may be out of sync

with the video due to technical limitations).

Download Media

Download media to user’s machine. Internet Explorer smart screen filter will need

to be disabled.

NOTE: Due to Flash and browser security, if downloading videos in order to upload 

later into Vision2, please rename the extension of the file video.mpeg to video.ts.

Publish Media

View unpublished Media and change the publish state of Media from Publish to

Hidden and vice versa. Published media can be viewed and played by Set-Top Box

users who have view permissions on an folder and any other users with View

permission. Hidden media is only viewable by PC users with Publish Media

permissions or Admin Tablet users. Standard Tablet and Set-Top box users, will

never see hidden videos even if Publish Media permissions have been set for their

user group.

Click heading to select

Click under heading to start editing

Summary of Contents for AMX VISION2 V8.4

Page 1: ...INSTRUCTION MANUAL VISION2 V8 4 VIDEO MANAGEMENT AND DISTRIBUTION...

Page 2: ...ked on the outside of each box The RMA is valid for a 30 day period After the 30 day period the RMA will be canceled Any shipments received not consistent with the RMA or after the RMA is canceled wil...

Page 3: ...ower supply cord plug from the AC receptacle 17 Where the mains plug or an appliance coupler is used as the disconnect device the disconnect device shall remain readily operable 18 DO NOT overload wal...

Page 4: ...Canadian ICES 003 Cet appareil num rique de la classe B est conforme la norme NMB 003 du Canada EU COMPLIANCE INFORMATION Eligible to bear the CE mark Conforms to European Union Low Voltage Directive...

Page 5: ...Top Box Connections 7 Installation 8 Installing Master Server Accessories 8 Installing a Secondary Power Supply 8 Installing Expansion Storage 8 Set Top Boxes 8 Configuring the Set Top Box 9 Using th...

Page 6: ...License Rules Engine 26 System Limits 26 Rules for V2 Master XXXX Servers 26 Manage System 28 View Logs 28 User Interface Configuration 29 Adding a New Device to the Device List 30 Creating a New Tem...

Page 7: ...ive 60 Configuring IIS for NAS SAN Archives 60 Supported Video on Demand Media Formats 60 Flash Video FLV 60 Windows Media Video WMV 60 MPEG 2 60 MPEG 4 AVC H 264 61 MP3 61 Video on Demand and Managin...

Page 8: ...signal on screen 78 No TV signal from Transmitter 78 Appendix B Backup and Restore Processes 79 Backup Procedure 79 Database Backup Procedure 79 Restore Procedure 79 Appendix C Troubleshooting 80 Tim...

Page 9: ...as slaves are subordinate to this server Typically a V2 MASTER xxxx server is used as the Master server but it is possible to use other servers as the master server in smaller installations User acce...

Page 10: ...RVER 3600 FG3106 36 a This is the physical capacity Actual available storage space will be less due to the RAID configuration of the disks Power 1100W 100 240 VAC 47 63 Hz Note You can add one additio...

Page 11: ...48 TB of raw storage The disks in a Vision2 server are in a RAID configuration so the total available capacity for video content will be less The V2 DISK 1210 Expansion Disk Kit can be either field or...

Page 12: ...for Composite video Component YPrPb RGB S Video and analog audio IOIOIO port 1 IR extender and TVI port Codecs MPEG 2 MP HL MPEG 4 pt10 AVC H 264 HP L4 Video Resolution Up to 720p and 1080i The video...

Page 13: ...osts file is located in the folder C windows system32 drivers etc FIG 1 shows a hosts file for a setup with one master server called V2MASTER with IP address 192 168 20 110 and one Digital TV Applianc...

Page 14: ...ision2 uses typical Cat5 5e 6 cabling for RJ 45 connections The following table lists the pinouts signals and pairing associated with the LAN connector FIG 2 Vision2 Master Server Rear Panel FIG 3 LAN...

Page 15: ...rogramming on a connected video source The set top boxes are used only for MPEG 2 content They support viewing MPEG Video on Demand Stop Play and Pause Fast Forward and Rewind features NOTE The Set To...

Page 16: ...e the secondary power supply into the slot until the orange tab beside the power connector clicks into place Installing Expansion Storage The following steps describe how to add an additional 24TB of...

Page 17: ...on the rear of the unit 2 Choose one of the following methods to connect the set top box to audio and video sources Use an HDMI cable to connect the HDMI port on the set top box to an HDMI port on the...

Page 18: ...ed with Opera 11 need to use a new Vision2 URL outlined in the Browser Homepage section below 7 Select the back option and return to the main menu Set Top Box Networking Setup networking on the set to...

Page 19: ...st be configured to point at the master server not to any of the slave servers 4 Press enter and another Password prompt appears Enter the password for modifying settings in the space provided the def...

Page 20: ...webpage error select the OK button on the remote and using the remote power the set top box off and on again Afterward the Vision2 main menu loads After the set top box reboots it accesses the specifi...

Page 21: ...e the remote control to scroll through the list of archives and press OK to enter an archive Within an archive will be a number of categories Use the cursor keys on the remote to navigate to and highl...

Page 22: ...To refresh your set top box to display new content in your archive or to refresh the template displayed navigate away from the main menu into the Live Channels or Video on Demand pages and press and h...

Page 23: ...n 2 0 5 and the VLC Active X plugin must be installed to view Video on Demand and Live Channels Later versions of VLC are not guaranteed to work When you first use Internet Explorer after installing t...

Page 24: ...k OK to convert this server to a master server FIG 27 7 Follow the prompt to reboot the server 8 Optional add more servers to the system if required See the Manage System on page 28 9 License the serv...

Page 25: ...testuser and password test123 You will now see the menus available to a user with the lowest level of access rights Note that the user can only access Archives Browse Archives Recent Updates and Live...

Page 26: ...nly have access to Archive Browsing NOTE The tablet user interface uses a caching mechanism when browsing archive contents To see new content changes made by other users and permissions changes the us...

Page 27: ...will prevent access and tell them which user account has locked the service Locks for all services except Record and Producer will be cleared after 20 minutes without activity Record and Producer ser...

Page 28: ...gue box 5 Select the server type using the type drop down menu from the following options Slave Server FG3106 XXK or FG3107 12 for the FG3107 12K Master This is the same hardware as the Master server...

Page 29: ...tive Tools and Open Windows Media Services An RPC error box appears click OK to bypass it 8 In Windows Media Services select Action from the top menu Open Add Server and enter the new server name and...

Page 30: ...bed in more detail below We also discuss how to upgrade your license to increase the number of services you can allocate AMX License Manager To use Vision2 you must first license the Master Server usi...

Page 31: ...ucts Manually enter the license server hostname or IP address Use this option if the AMX License Server is on the network and you know the hostname or IP address or are having problems using the previ...

Page 32: ...ng an amx com account click on Lookup Account to provide credentials email address and password to automatically populate the contact information for this license based on the AMX account information...

Page 33: ...te existing software license entitlement 9 Select your Vision2 Entitlement and click Next 10 Enter the Asset ID obtained from AMX in the text box provided 11 Click Next your new asset is now installed...

Page 34: ...aximum of 10 Record services can be had per Archive service in your Vision2 system For example if you have two Archives services you can have a maximum of 20 Record Services in your system A maximum o...

Page 35: ...rs and 9 other services with the following limitations The server can have no more than 9 Reflector services The server can have no more than 6 Record services The server can have no more than 9 Produ...

Page 36: ...r Vision2 servers The two types of log are Service Logs logs for specific Vision2 service Server Logs logs for specific Vision2 servers View a Server log as follows 1 Set the Servers Logs check box 2...

Page 37: ...Use the Templates drop down menu to select a new template Click Apply to update the Template Exit the main Set top box menu and press and hold the menu button to force it to refresh the Template Templ...

Page 38: ...t Add New Device Click to add a new device to the template list See Adding a New Device to the Device List section on page 30 for more information Delete Device Click to delete the currently selected...

Page 39: ...e 4 Click Create The left side of the Template Editor screen displays a list of options that can be configured for an individual template These options are only available after clicking Edit Settings...

Page 40: ...ontal Gap Use the spin box to indicate the horizontal spacing between each thumbnail You can set any value between 0 and 255 Vertical Gap Use the spin box to indicate the vertical spacing between each...

Page 41: ...ound Color 1 Use the color chart to indicate the first color used to create the background gradient NOTE The gradient values are used to create a gradient wash over the main info image to allow text t...

Page 42: ...x Management Set Top Boxes support Live Channels or Video on Demand Stop Play Pause Fast Forward and Rewind features See the Set Top Boxes on page 8 for information on setting up a set top box FIG 49...

Page 43: ...cess top The Administrator Windows NT user account on the master server can still login as well An example is as follows Start Administrator Settings add key AdministratorsGroupName value CN AMX Londo...

Page 44: ...ser with no permissions configured can only browse archives and play live channels Access to archives is controlled by a separate screen Archives Archive Permissions The V2 Services Permissions contai...

Page 45: ...fect of these permissions Click Reset to undo any changes made to the permissions since entering this screen FIG 51 User Group Users Have Permissions To Enable disable Mpeg Recorder1 And Change Servic...

Page 46: ...em report tab The top section of the page contains three dials which show from left to right Combined bitrate the total bandwidth on the selected network interface card Multicast bitrate the current M...

Page 47: ...the VOD bandwidth limit set by the VOD bandwidth license configured on that server This allows you to see if you are exceeding that limit Configuration The configuration tab is used to select which ne...

Page 48: ...el in the Channel Name text box 3 Select the type of channel from the Type options menu Vision 2 supports three types of unmanaged channels Multicast Windows Media Stream Multicast MPEG 2 Transport St...

Page 49: ...of the encoder in the Encoder IP Address text box You can find the IP address of the MAX CSE encoder on the LED on the front of the unit 3 In the Username text box enter the username used to gain acc...

Page 50: ...otocol Vision2 only supports the UDP multicast protocol If the encoder is set to the RTP protocol change this setting and apply the changes Address This is the multicast address of the Encoder output...

Page 51: ...so add a new live channel to the list of Live Channels available to PC and set top box users which takes its name from the Encoder s Service Name NOTE With the stream enabled you cannot change any of...

Page 52: ...een FIG 61 by going to Live Channels Manage MPEG Reflectors The following options appear on the Reflector service configuration page FIG 61 Reflector Configuration Page MPEG Reflector Service Options...

Page 53: ...s containing an MPEG 2 or H 264 video stream in the URL text box 4 Click the Multicast option button to select a multicast stream 5 Select the IP address of the network card you want to use to output...

Page 54: ...2 can output multicast streams for selected tuner channels FIG 63 Configure the settings to use for these streams as follows 1 Use the NIC drop down in the Multicast Output Streams section to select w...

Page 55: ...ppear in the TVCT table for your transmitter device even when the transmitter is configured to only stream certain channels Channel To Transmit Table On the right of the page is a table containing a l...

Page 56: ...a NAS archive and is only permitted on Master servers If the former look at the amount of free space on each available server Once the appropriate server is found use the Manage Licensing screen to a...

Page 57: ...he New User dialog FIG 66 Create a new user named v2system with the password Vision2 3 Check the User cannot change password and Password never expires check boxes Click Create and then click Close 4...

Page 58: ...and select tab Log On 12 In the Log On tab FIG 68 check This Account click Browse Advanced Find Now and select v2system Click OK and OK 13 Enter and confirm Password Vision2 click Apply and OK the al...

Page 59: ...In the Alias text box enter ArchiveNAS 25 Set the PhysicalPath text box to the UNC Path to the folder on the NAS e g NASservername ArchiveNAS FIG 69 26 Select Connect as and check Specific User 27 In...

Page 60: ...ssible Click Close Configure the V2AppPool to use the identity of the v2system user 29 In the IIS Manager FIG 72 select Connections Application Pools 30 Right click V2AppPool and select Advanced Setti...

Page 61: ...the Slave server if applicable 35 Click OK to close the dialog 36 Click OK and close the dialog 37 Right click V2AppPool and select Recycling FIG 74 38 Uncheck Regular time intervals in minutes 39 Ch...

Page 62: ...veNAS The Available Storage on this Drive graphic will change and display the New Storage space on the NAS 49 Change the following Streaming URLs to point to the NAS drive Virtual Directory Edit exist...

Page 63: ...IS Manager 2 Select Connections Sites Archives FIG 77 This is the FTP site 3 Right click on Archives site and select Add Virtual Directory FIG 78 4 In the Alias text box enter ArchiveNAS 5 Set the Phy...

Page 64: ...d enter the username v2system and password Vision2 for the NAS share and click OK FIG 79 8 Select Test Connection and confirm user is valid and path is accessible FIG 80 9 Click Close FIG 79 NAS FTP S...

Page 65: ...ble FIG 81 11 Exit IIS Manager 12 Now launch the v2FTP client from remote PC 13 Login and enter the Master V2 server name 14 Select the NAS archive on my server its Archive Service 2 and click Load Ar...

Page 66: ...w see the folders available or the Archive FIG 83 16 Select the required file to upload 17 Select the Bitrate and check Published 18 Select the folder to upload the file to on the archive 19 Select ad...

Page 67: ...Basket 21 Select Upload FIG 84 22 File should now start to upload to the Archive 23 When upload is complete FIG 85 Click OK 24 Time taken to upload depends on the size of the media file and network s...

Page 68: ...t click the V2AppPool and select Advanced Settings 11 In Process Model Identity select ApplicationPoolIdentity and click the button 12 Select a Custom Account and enter the domain username of the NAS...

Page 69: ...y shows published videos If the user is a non administrator and access control is enabled on this archive then they user will only see updates in folders that they have been given view permission to b...

Page 70: ...e available when you enter a folder Search Archive search the whole archive for media files whose name or metadata match text entered by the user Note you do not have to enter the full text you can us...

Page 71: ...system Sort Media by Name Sort media by name Playing Video Double click on a video to play it Vision2 automatically selects the best format and bitrate if there multiple formats and bitrate versions o...

Page 72: ...bnail to identify the video in the archive Select Options Cancel Done editing to finish NOTE The snapshot captured by update poster frame is taken from the nearest previous I frame to the point at whi...

Page 73: ...r media start playing a video and select Edit Information from the options drop down menu To edit metadata carry out the following 1 Add a metadata section or select an existing metadata section 2 Edi...

Page 74: ...users to view published MPEG2 or MP3 media in a particular folder give the AMX STB VIRTUAL USERGROUP view permission on that folder NOTE To update set top box permissions navigate away from the main m...

Page 75: ...Section Sequential text Table Section A table with a user defined number of columns Creating a New Metadata Section To create a new text section click Add new Text section The following options appear...

Page 76: ...size Download the FTP Client as follows 1 Go to Archives Download FTP client 2 Click the link to download ADOBE AIR 3 Click Download now and then run to install AIR 4 Click the download link above the...

Page 77: ...Click the basket with the plus icon to add this file to the upload basket 13 Repeat steps 6 12 for each file to upload 14 Using the bottom section of the window expand the archive tree and select a c...

Page 78: ...to the Vision2 archive again replacing the defective file NOTE The Producer service cannot display HD h 264 Live Channels Producer Channel Best Practices When creating producer channels consider the f...

Page 79: ...play if there is no scheduled content Viewing the Stream Enable the Stream and click the Watch icon Some content must be scheduled or an intermission source enabled otherwise nothing will be seen Port...

Page 80: ...Live Feed Sources drop down Expand the chosen Live channel and select the length of time for this channel to display The following durations are available 15 30 45 and 60 minutes Drag the chosen live...

Page 81: ...ives on the same server as the Record service or on a NAS The Record service needs an audio track to function correctly If recording a CCTV camera audio on the camera will need to be enabled to create...

Page 82: ...ord services Manual Recording Configure the Record Service in the same way as for a Continuous Record except choose Manual Record from the Recording Type drop down After the Record service has been co...

Page 83: ...m of the screen Click Edit to enter the Schedule Screen Alternatively go to Video Recorders Scheduled Recording and select and load the Scheduled Record Service to use Edit the Record Schedule as foll...

Page 84: ...crements If a value in the Duration text box is entered that isn t a 10 minute increment Vision2 automatically rounds up to the next 10 minute increment without alerting you 5 Click Add A new recordin...

Page 85: ...rd admin From Windows desktop navigate to Start and select Shut Down As an alternative press and hold the power button on the front face of the unit until activity and power indicator lights turn off...

Page 86: ...ision2 Set Top Box Connect the power cord to the Set top box Verify power and network connectivity by looking at the lights on network interface at the rear of the unit If the unable to load web page...

Page 87: ...the same line as filename to select a folder for backups Name the backup files with the name of the database and date of backup 6 Select Format Tar 7 Set Encoding to UTF 8 8 Set Rolename to postgres...

Page 88: ...Postgres datestyle MUST be configured to the same datetime zone on all Vision2 servers 1 Open C Program Files x86 PostgreSQL 9 2 data postgresql conf file on each server and look for datestyle attrib...

Page 89: ...rade installations must be performed using the built in Vision2 administrator account Post Upgrade Perform the following steps after upgrading your Vision2 system Change Recycling Conditions Settings...

Page 90: ...oting sequence of services the Vision2 Network Monitor service Startup Type needs to be delayed until the NICs become available If this is not done the wrong NIC will be used which means the data reco...

Page 91: ...rade Processes 83 Vision2 Instruction Manual 3 Select the Startup type drop down and pick Automatic Delayed Start FIG 116 4 Press OK 5 Restart service FIG 116 AMX Vision2 Network Monitor Service Prope...

Page 92: ...tered trademarks of their respective companies AMX does not assume responsibility for errors or omissions AMX also reserves the right to alter specifications without prior notice at any time The AMX W...

Reviews: