


3
BDS
Introduction, Verify Line Voltage Before Using, Unpacking, Installation Location,
Cleaning, Moving the Receiver, and Supplied Accessories
Introduction
please register your product on our web site at www.harmankardon.com.
Note: you’ll need the product’s serial number. at the same time, you can
choose to be notified about our new products and/or special promotions.
Thank You for Choosing Harman Kardon
Products!
In the years since Harman kardon engineers invented the high-fidelity receiver, we have
taken to heart this philosophy: Bringing the joy of home entertainment to as many people
as possible, adding performance and ease-of-use features that enhance the experience.
The BDs series of home entertainment systems offers a complete home entertainment
solution with a wealth of listening and viewing options in one sleek receiver.
To get the maximum enjoyment from your new BDs receiver we urge you to read this
manual thoroughly and refer back to it as you become more familiar with your new
receiver’s features and their operation.
If you have any questions about this product, its installation or its operation, please
contact your retailer or custom installer, or visit our web site at www.harmankardon.com.
Verify Line Voltage Before Using
your BDs receiver has been designed for use with 110 – 240-volt, 50Hz/60Hz aC current
and includes a detachable IeC power cable intended for use in the region where the
receiver is sold.
Connection to a line voltage other than that for which the unit is intended can create
a safety and fire hazard and may damage the unit. If you have any questions about
the voltage requirements for your specific model or about the line voltage in your area,
contact your dealer before plugging the unit into a wall outlet.
Unpacking
The carton and shipping materials used to protect your new receiver during shipment
were specially designed to cushion it from shock and vibration. we suggest that you
save the carton and packing materials for use in shipping if you move or if the unit ever
needs repair.
To minimize the size of the carton in storage, you may wish to flatten it. you can do it by
carefully slitting the tape seams on the carton’s bottom and collapsing it. you can store
cardboard inserts in the same manner. packing materials that cannot be collapsed should
be saved along with the carton in a plastic bag.
If you do not wish to save the packaging materials, please note that the carton and
other sections of the shipping-protection materials are recyclable. please respect the
environment and discard those materials at a local recycling center.
Remove the protective plastic film from the front-panel lens. Leaving the film in place will
affect the performance of your remote control.
Installation Location
• To ensure proper operation and to avoid the potential for safety hazards, place the
unit on a firm and level surface. when placing the unit on a shelf, be certain that the
shelf and any mounting hardware can support the weight of the product.
• provide proper space both above and below the unit for ventilation. If this product will
be installed in a cabinet or other enclosed area, make certain that there is sufficient
air movement within the area. Under some circumstances, a fan may be required.
• Do not place the unit directly on a carpeted surface.
• avoid installation in extremely hot or cold locations or in an area that is exposed to
direct sunlight or heating equipment.
• avoid moist or humid locations.
• Do not obstruct the fan vents on the rear panel or the ventilation slots on the top and
sides of the unit or place objects directly over or next to them.
• Do not place the receiver directly on top of a product that generates excessive heat.
• Due to the heat generated by the receiver there is the remote possibility that the
rubber padding on the bottom of the unit’s feet may leave marks on certain wood
or wood-veneer materials. Use caution when placing the unit on soft woods or
other materials that heat or heavy objects may damage. some surface finishes
may be particularly sensitive to absorbing such marks, due to a variety of factors
beyond Harman kardon control, including the nature of the finish, cleaning materials
used, normal heat and vibration caused by the use of the product, or other factors.
your warranty will not cover this type of damage to furniture, so exercise caution
in choosing an installation location for the component and in performing normal
maintenance practices.
• your new Harman kardon Blu-ray Disc™ receiver requires a broadband Internet
connection for streaming capability and BD-Live™ interactivity.
Cleaning
when the receiver gets dirty, wipe it with a clean, soft, dry cloth. If necessary, and only
after unplugging the aC power cord, wipe it with a soft cloth dampened with mild soapy
water, then a fresh cloth with clean water. wipe it dry immediately with a dry cloth. NeVeR
use benzene, aerosol cleaners, thinner, alcohol or any other volatile cleaning agent. Do
not use abrasive cleaners, as they may damage the finish of metal parts. avoid spraying
insecticide near the unit.
Moving the Receiver
Before moving the receiver, disconnect any interconnection cords to other components,
and disconnect the unit from its aC outlet.
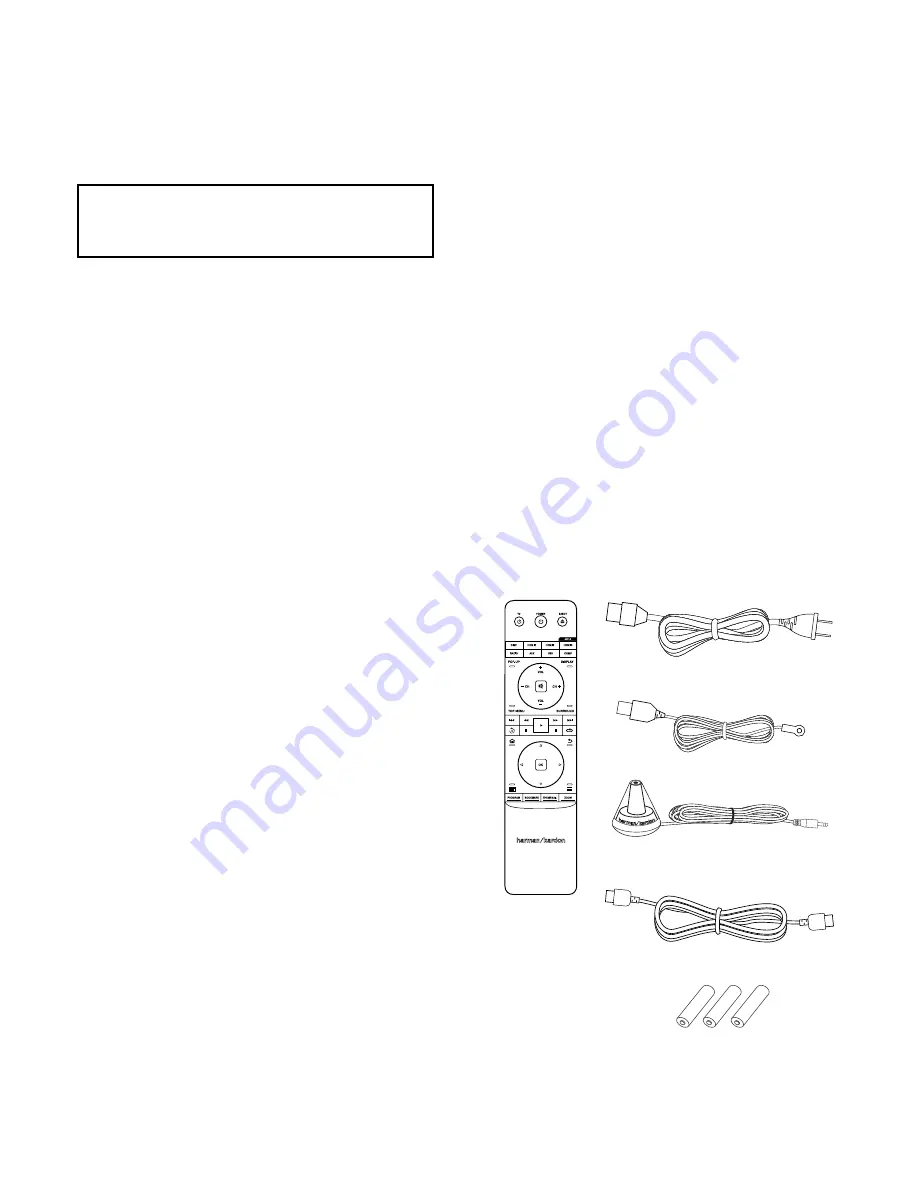
Supplied Accessories
If any of these items are missing, please contact Harman kardon Customer service via
www.harmankardon.com.
Remote
Control
3 X AAA Batteries
HDMI Cable
EZ Set/EQ™
Microphone
FM Antenna
Power Cord
(varies with region)


