background image

8

AVR

Set Up the Receiver

Install the Batteries in the Remote Control

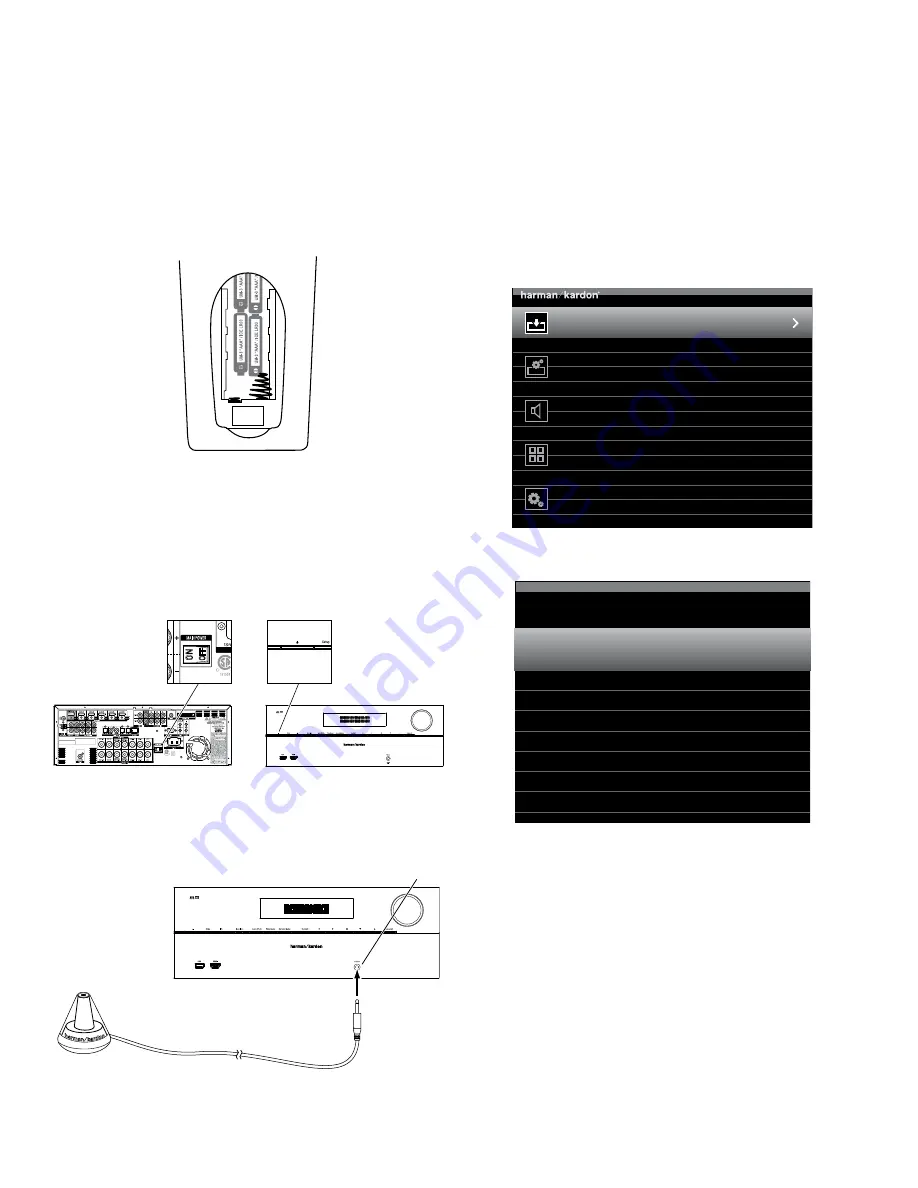
Remove the remote control’s battery cover, insert the four supplied AAA batteries as shown in the illustration, 
and replace the battery cover.

NOTE: Remove the protective plastic from the receiver’s front panel so it doesn’t reduce the remote 
control’s effectiveness.

Turn On the Receiver

1. Set the rear-panel Main Power switch to “On.” (The front-panel Power indicator will glow amber.)

2. Press the front-panel Power button.

Configure Your Speakers

1. Plug the supplied EzSet/EQ™ microphone into the receiver’s Headphone connector.

2. Place the microphone at ear height in your listening position.

3. Turn on your TV and select the TV input where you connected the receiver in Connect Your TV, on 

page 3.

4. Press the remote control’s AVR button. The receiver’s on-screen display (OSD) setup menu will appear 

on the TV. (Note: If you have used a composite video connection to your TV, the OSD menus will not 
appear on your TV. Follow the steps below using the receiver’s front-panel display.)

Source Select

Select the Source Device to Enjoy

Setup Source

Setup Source Devices Connected to the AVR

Speaker Setup

Speaker Optimization, EQ

Zone 2

Manage and Control Zone 2

System

General AVR Settings

5. Use the remote’s arrow and OK buttons to select “Speaker Setup.”

Automatic Setup – EzSet/EQ

Automated Speaker Setup and EQ

Manual Setup

Manually Adjust Speaker Settings

Speaker Setup

6. Select “Automatic Setup – EzSet/EQ.”

7. Select “Continue.”

8. Follow the instructions that appear on the screens.

Assign The Receiver’s Source Buttons

1. Review the input connections you listed on the

 Input Connections and Assigned Source Buttons 

table, 

on page 4. Note what changes (if any) you want to make from the default source-button assignments 
that appear on the list.

2. Turn on your TV and select the TV input where you connected the receiver in

 Connect Your TV

, on  

page 3.

Main Power 

Switch

Power 

Button

EzSet Microphone 

(supplied)

Receiver 

Headphone 

Connector

Connections

Summary of Contents for AVR 3650

Page 1: ...Audio video receiver AVR 3650 AVR 365 AVR 2650 AVR 265 Quick Start Guide ENGLISH...

Page 2: ...ventilation slots on the top of the receiver or place objects directly over them Do not place the receiver directly on a carpeted surface Do not place the receiver in moist or humid locations in extr...

Page 3: ...rmation about making connections to it Powered Subwoofer Receiver Subwoofer Connector Single RCA Audio Cable not supplied Connect Your TV or Video Display If your TV has an HDMI connector Use an HDMI...

Page 4: ...tons to any of the input connectors listed in the table according to where you actually connect each of your source devices As you connect your various source components fill out the Connected Compone...

Page 5: ...receiver Receiver Video Connectors Component Video Cable not supplied To Component Video Outputs Component Video Equipped Source Device Composite Video Devices Use composite video connectors for video...

Page 6: ...analog audio recorder s inputs to the receiver s analog audio Rec Out connectors You can record any analog audio input signal Video Recorders Connect an analog video recorder s video input connector...

Page 7: ...the supplied AM antenna as shown and connect the antenna wires to the receiver s AM and Gnd connectors You can connect either wire to either connector Rotate the antenna as necessary to minimize back...

Page 8: ...osite video connection to your TV the OSD menus will not appear on your TV Follow the steps below using the receiver s front panel display Source Select Select the Source Device to Enjoy Setup Source...

Page 9: ...tion to Display Resolution from Source HDMI Bypass 6 Press the remote control s AVR button again The receiver s on screen display OSD setup menu will reappear on the TV Note If you have used a composi...

Page 10: ...EQ is a trademark of HARMAN International Industries incorporated DLNA is a registered trademark of the Digital Living Network Alliance HDMI the HDMI logo and High Definition Multimedia Interface are...

Reviews: