background image

Troubleshooting table

Page EN-24

Troubleshooting table

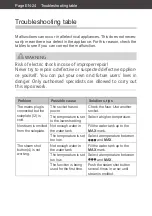
Malfunctions can occur in all electrical appliances. This does not neces-
sarily mean there is a defect in the appliance. For this reason, check the 
tables to see if you can correct the malfunction.

 WARNING

Risk of electric shock in case of improper repair!
Never try to repair a defective or suspected defective applian-
ce yourself. You can put your own and future users’ lives in 
danger. Only authorised specialists are allowed to carry out 
this repair work.

Problem

Possible cause 

Solutions, tips

The mains plug is 
connected but the 
soleplate (12) is 
cold.

The socket has no 
power.

Check the fuse. Use another 
socket.

The temperature is set 
to the lowest setting.

Select a higher temperature.

No steam is emitted 
from the soleplate.

Not enough water in 
the water tank.

Fill the water tank up to the 

MAX

 mark.

The temperature is set 
too low.

Select a temperature between 

 and 

MAX

.

The steam shot 
button (4) is not 
working.

Not enough water in 
the water tank.

Fill the water tank up to the 

MAX

 mark.

The temperature is set 
too low.

Select a temperature between 

 and 

MAX

.

The function is being 
used for the first time.

Push the steam shot button 
several times in a row until 
steam is emitted. 

Summary of Contents for EC1745

Page 1: ...Dampfbügeleisen Gebrauchsanleitung EC1745 2 MA X 0 3 1 0 1 2 Anleitung Version 93528 20210419 Bestell Nr 848853 Nachdruck auch auszugsweise nicht gestattet ...

Page 2: ...ockenbügeln 17 Dampfbügeln 18 Sprühstoß ausführen 19 Senkrechten Dampf stoß ausführen 20 Ausschalten 20 Tipps zum richtigen Bügeln 21 Grundsätzliche Tipps 21 Stoffe und Temperaturen 22 Auf links oder rechts bügeln 22 Blusen und Hemden 23 Hosen 23 Reinigung und Wartung 24 Gerät reinigen 24 Selbstreinigung durchführen 25 Fehlersuchtabelle 26 Service 28 Allgemeiner Service 28 Ersatzteile 28 Umweltsch...

Page 3: ...en an den nachfolgenden Verwender des Geräts weiter Folgende Signalbegriffe finden Sie in dieser Gebrauchsanleitung WARNUNG Dieser Signalbegriff bezeichnet eine Gefährdung mit einem mittle ren Risikograd die wenn sie nicht vermieden wird den Tod oder eine schwere Verletzung zur Folge ha ben kann VORSICHT Dieser Signalbegriff bezeichnet eine Gefährdung mit einem niedri gen Risikograd die wenn sie n...

Page 4: ...führen Der Hersteller übernimmt keine Haftung für Schäden die durch nicht bestimmungsgemäßen Ge brauch entstanden sind Sicherheitshinweise In diesem Kapitel finden Sie all gemeine Sicherheitshinweise die Sie zu Ihrem eigenen Schutz und zum Schutz Dritter stets beachten müssen Beachten Sie zusätzlich die Warnhinweise in den einzelnen Kapiteln zu Bedienung Reinigung etc Risiken für bestimmte Persone...

Page 5: ... steht Erstickungsgefahr Kinder dürfen nicht mit dem Gerät spielen und kei nen Zugriff auf das Gerät haben wenn sie unbeauf sichtigt sind Reinigung und Wartung dürfen nicht von Kindern ohne Beaufsichtigung durchgeführt werden Risiken im Umgang mit elektrischen Haushaltsgeräten WARNUNG Stromschlaggefahr Das Berühren spannungsfüh render Teile kann zu schweren Verletzungen oder zum Tod führen Gerät n...

Page 6: ... Netzkabel nicht knicken oder klemmen und nicht über scharfe Kanten legen Netzstecker nie am Netzka bel aus der Steckdose zie hen immer den Netzste cker selbst anfassen Netzstecker niemals mit feuchten Händen anfassen Netzstecker und Netzkabel nie in Wasser oder andere Flüssigkeiten tauchen Im Fehlerfall sowie vor der Reinigung und der War tung den Netzstecker aus der Steckdose ziehen bzw Sicherun...

Page 7: ...ts beschädigt ist muss es durch den Her steller oder seinen Kunden dienst oder eine qualifizier te Fachkraft ersetzt werden um Gefährdungen zu ver meiden VORSICHT Brandgefahr Unsachgemäßer Umgang mit dem Gerät kann zu einem Brand führen Gerät nur an eine ord nungsgemäß installierte Schutzkontakt Steckdose anschließen Der Anschluss an eine Steckdosenleiste oder eine Mehrfachsteck dose ist unzulässig...

Page 8: ...Au ßenflächen verwenden Nur weiche Tücher verwen den Darauf achten dass kein Wasser in die elektrischen Teile dringt Risiken im Umgang mit einem Dampf Bügeleisen WARNUNG Stromschlaggefahr Immer den Netzstecker aus der Steckdose ziehen wenn Sie das Gerät nicht benutzen bevor Sie Wasser nachfül len oder ausgießen bevor Sie das Gerät reini gen wenn eine Störung auf tritt bei Gewitter Das Bügeleisen da...

Page 9: ...trom netz angeschlossen bzw noch heiß ist Beim Bügeln stets aufmerk sam bleiben Sicherstellen dass sich we der andere Personen insbe sondere Kinder noch Haus tiere am Gerät verbrennen können Das Gerät darf nur mit der mitgelieferten Abstellvor richtung verwendet werden Das Gerät immer hochkant auf der Standfläche abstel len Textilien nicht am Körper bügeln Immer auf einer festen sta bilen Unterlage...

Page 10: ...hr Brennbare Gegenstände in unmittelbarer Nähe des Ge räts können sich leicht ent zünden Temperaturempfindliche brennbare oder feuerge fährliche Gegenstände nicht auf oder neben dem Gerät abstellen Bei unbe absichtigtem Einschalten können sie sich verformen oder entzünden Brennbare Flüssigkeiten und Dämpfe vom Gerät fernhalten Das Gerät nicht mit De cken Lappen oder Ähnli chem abdecken da diese Ge...

Page 11: ...wenn Sie die Dampf Funktion bei Stof fen aus feinen Kunstfasern anwenden Fehlgebrauch kann zu Schä den am Gerät führen Ausschließlich Wasser in den Wassertank füllen Nie mals andere Flüssigkeiten wie z B Entkalkungsmittel etc einfüllen Nicht über metallene Ge genstände wie Knöpfe Reißverschlüsse etc bügeln Die Bügelsohle kann sonst zerkratzen Gerät ausschalten bevor Sie den Netzstecker aus der Ste...

Page 12: ...dort und packen Sie es aus 2 Prüfen Sie ob die Lieferung vollständig ist 3 Kontrollieren Sie ob das Gerät Transportschäden aufweist 4 Sollte die Lieferung unvollstän dig sein oder das Gerät einen Transportschaden aufweisen nehmen Sie bitte Kontakt mit unserem Service auf siehe Seite DE 28 WARNUNG Gerät nicht in Betrieb neh men wenn es einen sichtba ren Schaden aufweist ...

Page 13: ... Wassertankverschluss 3 Dampfregler 4 Dampfstoßtaste 5 Sprühstoßtaste 6 Kontrollleuchte 7 Netzkabel 8 Standfläche 9 Wassertank 10 Heizstufenmarkierung 11 Temperaturregler 12 Bügelsohle Geräteteile 2 MA X 0 3 1 0 1 2 11 12 3 2 4 5 6 8 7 9 1 10 ...

Page 14: ...efüllen WARNUNG Kurzschlussgefahr Eingedrungenes Wasser kann einen Kurzschluss und Strom schlag verursachen Sie kön nen sich verletzen wenn Sie dann in Kontakt mit dem Ge rät kommen Vor dem Befüllen des Was sertanks den Netzstecker aus der Steckdose ziehen Die Öffnung des Wasser tanks während des Betriebs nicht offenstehen lassen oder öffnen 1 Öffnen Sie den Wassertank verschluss 2 2 MA X 0 3 1 2 ...

Page 15: ...lleuchte 6 leuchtet 4 Drehen Sie den Temperatur regler 11 auf die höchste Stufe MAX Wenn die Höchsttemperatur erreicht ist erlischt die Kont rollleuchte 5 Bügeln Sie das Textilstück eini ge Minuten lang um eventuelle Fertigungsrückstände aus der Bügelsohle 12 herauszu bügeln Das Gerät kann beim ersten Gebrauch einen Geruch entwi ckeln Der Geruch verschwindet nach kurzer Zeit Heizstufe einstellen H...

Page 16: ...halten leuchtet die Kontrollleuchte 6 wieder Wenn Sie eine höhere Tem peratur einstellen leuchtet die Kontrollleuchte und signalisiert dass das Gerät nachheizt Da sich das Gerät schneller erwärmt als es wieder ab kühlt sollten Sie Kleidungsstücke der ersten Heizstufe immer zuerst bügeln Heiz stufe Textilien Dampf Dampf stoß Sprüh stoß Selbst reinigung 0 bis Seide Acetat Acryl Nylon Polyester Rayon...

Page 17: ... 0 1 2 6 1 Stellen Sie das Gerät auf die Standfläche 8 2 Stellen Sie sicher dass sich kein Wasser im Wassertank 9 befindet 3 Stellen Sie sicher dass der Dampfregler 3 auf Position 0 steht 4 Um das Gerät einzuschalten stecken Sie den Netzstecker in eine ordnungsgemäß installier te Steckdose Die Kontrollleuchte 6 leuchtet 5 Drehen Sie den Temperatur regler 11 auf die gewünschte Stufe Wenn die Temper...

Page 18: ... Per sonen oder Tiere richten Direkten Körperkontakt mit der heißen Bügelsohle ver meiden 1 Stellen Sie das Gerät auf die Standfläche 8 2 Stellen Sie sicher dass sich genügend Wasser im Wasser tank 9 befindet 3 Stellen Sie sicher dass der Dampfregler 3 auf Position 0 steht 4 Um das Gerät einzuschalten stecken Sie den Netzstecker in eine ordnungsgemäß installier te Steckdose Die Kontrollleuchte 6 l...

Page 19: ...r Bügelsohle und es treten kein Dampf und keine Wassertropfen mehr automatisch aus den Öff nungen in der Bügelsohle aus Sie können weiterhin Dampfstöße ausführen Das Gerät heizt wieder auf die eingestellte Heizstufe nach Sprühstoß ausführen Falls notwendig können Sie Texti lien mit einem Sprühstoß anfeuch ten um Falten einfacher heraus zubügeln 2 MAX 0 3 1 0 1 2 5 1 Um das Textilstück anzufeuch te...

Page 20: ...schte Stufe 2 Wenn die Temperatur er reicht ist erlischt die Kontroll leuchte 6 3 Halten Sie das Gerät in senk rechter Position 4 Stellen Sie den Dampfregler 3 auf die gewünschte Dampfstufe 5 Drücken Sie die Dampfstoß taste 4 Ausschalten 1 Stellen Sie das Gerät auf die Standfläche 8 2 Stellen Sie den Dampfregler 3 und den Temperaturregler 11 auf Position 0 3 Um das Gerät auszuschalten ziehen Sie d...

Page 21: ...auf Temperaturstufe 1 gebügelt werden sollen immer zuerst bü geln Bügeln Sie bei Blusen Hem den Hosen und Kleidern als erstes die schwer zugänglichen Stellen von beiden Seiten Knopfleisten Manschetten Kragen Taschen Bügeln Sie die großen Flächen immer zuletzt Bügeln Sie gleichmäßig und nicht zu schnell Hektische Bügelzüge schieben den Stoff leicht zusammen und verursa chen ggf mehr neue Falten als...

Page 22: ... Kleidungsstück sodass Sie es nicht direkt bügeln Textilien mit diesem Symbol dürfen nicht gebügelt werden Auf links oder rechts bügeln Wenn Sie eine glänzende Tex tiloberseite möchten z B bei Tischdecken bügeln Sie das Textilteil auf rechts Wenn Sie keine glänzende Oberfläche möchten bügeln Sie das Textil teil von links Textilien wie Seide erhalten durch das Bügeln schnell einen Glanzschimmer Um ...

Page 23: ...en und Hemden ist ein Ärmelbrett sehr hilfreich Damit bekommen Sie auch schwer zu gängliche Stellen glatt Hängen Sie das Kleidungsstück anschließend zum Ausdampfen auf einen Bügel Hosen Bügeln Sie die Hosentaschen und den Hosenbund erst auf links und dann auf rechts Ziehen Sie das Hosenoberteil über das Bügelbrett und bügeln Sie es von beiden Seiten Wenn die Hose eine Bügelfalte bekommen soll lege...

Page 24: ...smittel oder Rei nigungsutensilien benutzen Topfschwämme oder Ähn liches Diese können die Oberflächen zerkratzen Keinen Essig oder chemi sche Reinigungsmittel in den Wassertank füllen Zum Reinigen des Geräts keinen Dampf oder Hoch druckreiniger benutzen Alle Teile nach dem Reinigen gründlich abtrocknen 1 Stellen Sie den Dampfregler 3 und den Temperaturregler 11 auf Position 0 2 Ziehen Sie vor der R...

Page 25: ...n eine ordnungsgemäß installier te Steckdose Die Kontrollleuchte 6 leuchtet 6 Drehen Sie den Tempera turregler 11 auf die höchste Stufe MAX 7 Wenn die Höchsttemperatur erreicht ist erlischt die Kontroll leuchte 8 Halten Sie das Gerät über ein Spülbecken 0 1 2 3 9 Halten Sie den Dampfreg ler 3 auf der Position gedrückt Dampf und kochendes Was ser treten aus den Öffnungen in der Bügelsohle 12 aus Un...

Page 26: ...esteckt aber die Bügelsohle 12 ist kalt Die Steckdose hat keinen Strom Prüfen Sie die Sicherung Verwenden Sie eine andere Steckdose Die Temperatur ist auf die niedrigste Stufe eingestellt Stellen Sie eine höhere Temperatur ein Es tritt kein Dampf aus der Bügelsohle aus Es ist zu wenig Wasser im Wassertank Füllen Sie den Wassertank bis zur Markierung MAX Die Temperatur ist zu niedrig eingestellt Wä...

Page 27: ...t Das Bügelergebnis ist schlecht Die Heizstufe ist falsch eingestellt Stellen Sie die Heizstufe ein die für das zu bügelnde Material nötig ist Das Kleidungsstück hat sich verfärbt Es wurde mit einer zu hohen Temperatur gebügelt Stellen Sie sicher dass die Heizstufe den Vorgaben auf dem Pflegeetikett entspricht Bügeln Sie ggf probeweise an der Innenseite des Saums Kalkrückstände Verunreinigungen ko...

Page 28: ... in Deutschland Wenden Sie sich bitte an die Firma Hermes Fulfilment GmbH Tel 0 57 32 99 66 00 Montag Donnerstag 8 15 Uhr Freitag 8 14 Uhr E Mail ersatzteilservice eletrokleingeraete hermes ws com Kunden in Österreich Wenden Sie sich bitte an das Kundencenter oder die Produktberatung Ihres Versandhauses Bitte beachten Sie sind für den einwandfreien Zustand des Geräts und die fachge rechte Benutzun...

Page 29: ...er Verpackung trennen möchten entsorgen Sie diese bitte umweltfreundlich Umweltschutz Entsorgung Abfallvermeidung Maßnahmen der Abfallvermei dung haben nach den Vorschriften der Richtlinie 2008 98 EG grund sätzlich Vorrang vor Maßnahmen der Abfallbewirtschaftung Als Maßnahmen der Abfallvermei dung kommen bei Elektro und Elektronikgeräten insbesondere die Verlängerung ihrer Lebens dauer durch Repar...

Page 30: ...t Hersteller hanseatic Gerätebezeichnung Dampfbügeleisen Modell EC1745 Leistung in W 1500 1900 Versorgungsspannung in V 50 60 Hz 220 240 Schutzklasse I Gewicht in g ca 950 Bestellnummer 848853 nahmestelle abzugeben Dadurch werden sie einer umwelt und res sourcenschonenden Verwertung zugeführt Sie können Elektro Altgeräte kos tenlos beim lokalen Wertstoff Recyclinghof abgeben Für weitere Informatio...

Page 31: ...Steam iron User manual EC1745 2 MA X 0 3 1 0 1 2 Manual version 93528 20210419 Article no 848853 Reproduction even of excerpts is not per mitted ...

Page 32: ...ature EN 17 Using the vertical steam shot feature EN 18 Switching off EN 18 Tips for ironing correctly EN 19 Basic tips EN 19 Fabrics and tempera tures EN 20 Ironing inside out or right side out EN 20 Blouses and shirts EN 21 Trousers EN 21 Cleaning and maintenance EN 22 Cleaning the appliance EN 22 Self cleaning EN 23 Troubleshooting table EN 24 Service EN 26 General customer service EN 26 Spare ...

Page 33: ...ions for future reference Give all safety notices and ins tructions to the next user of the appliance The following symbols can be found in this user manual WARNING This symbol indicates a hazard with a medium level of risk which if not avoided could result in death or serious injury CAUTION This symbol indicates a hazard with a low level of risk which if not avoided could result in minor or moder...

Page 34: ...damage caused by impro per use Safety notices In this chapter you will find gene ral safety notices which you must always observe for your own pro tection and that of third parties Please also observe the warning notices in the individual chapters on operation cleaning etc Risks for certain groups of people CAUTION Danger to children and peop le with impaired physical sen sory or mental abilities ...

Page 35: ...liance when left unattended Cleaning and maintenance may not be performed by children without supervisi on Risks when handling household electrical appliances WARNING Risk of electric shock Touching live parts may result in severe injury or death Only use the appliance in doors Do not use in wet rooms or in the rain Do not start up or continue to use the appliance if it is visibly damaged e g the ...

Page 36: ...ny other liquids In the event of a fault as well as before cleaning or maintenance disconnect the mains plug from the socket and or switch off or unscrew the fuse Do not put any objects in or through the housing openings and also make sure that children cannot insert any objects through them Never clean the appliance with a high pressure clea ner or steam cleaner This appliance contains electrical...

Page 37: ...cket extension cable or a multi socket plug Do not operate the applian ce with an external timer or a separate remote control system NOTICE Improper handling of the ap pliance may result in damage or explosions Do not use sharp objects to unpack the appliance When cleaning please note Never use soap or any harsh granular soda ba sed acid based solvent ba sed or abrasive cleaners All purpose cleane...

Page 38: ...ater that has seeped into the appliance may cause a short circuit or electrocu tion It is then possible that you could injure yourself if you come into contact with the appliance Do not open or leave the water tank inlet open du ring operation CAUTION Risk of burns The appliance will become very hot during operation Touching hot components may cause serious burns Do not leave the appliance unsuper...

Page 39: ...ugh contact with hot steam Never turn the hot appli ance so the hot soleplate is facing upwards otherwise hot water may escape Do not use hot steam on clothing while it is being worn Avoid direct contact with the hot steam Do not point the steam at other persons or animals Fire hazard Flammable objects placed close to the appliance may ig nite easily Do not place tempera ture sensitive flammable or...

Page 40: ...lian ce heat setting specified on the textile care label sewn onto the textile Use an intermediate layer when using the steam fun ction with fine synthetic fi bre fabrics Misuse may damage the ap pliance Only fill the water tank with water Never fill with other liquids e g descaling agent Do not iron over metal ob jects such as buttons zips etc Otherwise the soleplate could be scratched Switch offtheap...

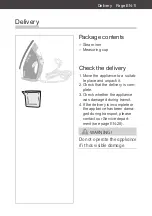
Page 41: ...to a suitab le place and unpack it 2 Check that the delivery is com plete 3 Check whether the appliance was damaged during transit 4 If the delivery is incomplete or the appliance has been dama ged during transport please contact our Service depart ment see page EN 26 WARNING Do not operate the appliance if it has visible damage ...

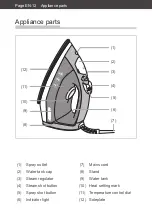
Page 42: ...ater tank cap 3 Steam regulator 4 Steam shot button 5 Spray shot button 6 Indicator light 7 Mains cord 8 Stand 9 Water tank 10 Heat setting mark 11 Temperature control dial 12 Soleplate Appliance parts 2 MA X 0 3 1 0 1 2 11 12 3 2 4 5 6 8 7 9 1 10 ...

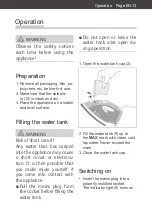
Page 43: ... seeped into the appliance may cause a short circuit or electrocu tion It is then possible that you could injure yourself if you come into contact with the appliance Pull the mains plug from the socket before filling the water tank Do not open or leave the water tank inlet open du ring operation 1 Open the water tank cap 2 2 MA X 0 3 1 2 Fill the water tank 9 up to the MAX mark with clean cold tap ...

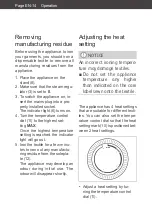
Page 44: ...etting is reached the indicator light will go out 5 Iron the textile for a few minu tes to iron out any manufactu ring residue from the solepla te 12 The appliance may develop an odour during initial use The odour will disappear shortly Adjusting the heat setting NOTICE An incorrect ironing tempera ture may damage textiles Do not set the appliance temperature any higher than indicated on the care ...

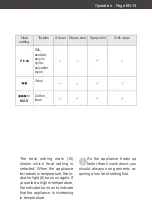
Page 45: ... you select a higher temperature the indicator turns on to indicate that the appliance is increasing in temperature Heat setting Textiles Steam Steam shot Spray shot Self clean 0 to Silk acetate acrylic nylon polyester rayon Wool to MAX Cotton linen As the appliance heats up faster than it cools down you should always iron garments re quiring a low heat setting first ...

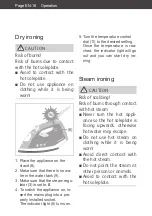
Page 46: ...he mains plug into a pro perly installed socket The indicator light 6 turns on 5 Turn the temperature control dial 11 to the desired setting Once the temperature is rea ched the indicator light will go out and you can start dry iro ning Steam ironing CAUTION Risk of scalding Risk of burns through contact with hot steam Never turn the hot appli ance so the hot soleplate is facing upwards otherwise ...

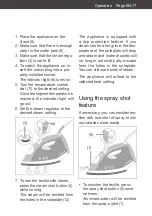
Page 47: ...he textile with steam press the steam shot button 4 while ironing The steam will be emitted from the holes in the soleplate 12 The appliance is equipped with a drip protection feature If you steam iron for a long time the tem perature of the soleplate will drop and steam and water droplets will no longer automatically escape from the holes in the soleplate You can still use bursts of steam The app...

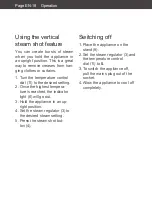
Page 48: ...desired setting 2 Once the highest tempera ture is reached the indicator light 6 will go out 3 Hold the appliance in an up right position 4 Set the steam regulator 3 to the desired steam setting 5 Press the steam shot but ton 4 Switching off 1 Place the appliance on the stand 8 2 Set the steam regulator 3 and the temperature control dial 11 to 0 3 To switch the appliance off pull the mains plug ou...

Page 49: ...ld always start by ironing garments to be ironed at tem perature setting 1 For blouses shirts trousers and dresses iron the hard to reach areas on both sides first button placket cuffs collar pockets Always iron the large areas last Iron evenly and not too quickly Hectic strokes when ironing will push the fabric together some what and may produce more new wrinkles than the wrinkles you have ironed...

Page 50: ... on top of the garment to prevent direct contact with the iron Textiles with this sym bol may not be ironed Ironing inside out or right side out If you would like a shiny textile surface e g table cloths iron the textile right side out If you do not want a shiny surface iron the textile inside out Ironing textiles such as silk will quickly produce a shiny effect To avoid this effect you should alw...

Page 51: ...oard is very helpful when ironing blouses and shirts This will help you to also smooth hard to reach areas Then hang the garment on a clothes hanger to let it dry off Trousers Iron trouser pockets and the waistband first inside out and then right side out Pull the top part of the trousers over the ironing board and iron from both sides If the trousers are supposed to have a crease place the left t...

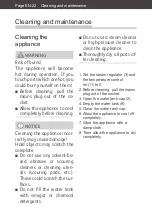
Page 52: ...se any solvent ba sed abrasive or scouring cleaners or cleaning uten sils scouring pads etc These could scratch the sur faces Do not fill the water tank with vinegar or chemical detergents Do not use a steam cleaner or high pressure cleaner to clean the appliance Thoroughly dry all parts af ter cleaning 1 Set the steam regulator 3 and the temperature control ler 11 to 0 2 Before cleaning pull the m...

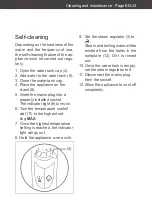
Page 53: ...lug into a properly installed socket The indicator light 6 turns on 6 Turn the temperature control dial 11 to the highest set ting MAX 7 Once the highest temperature setting is reached the indicator light will go out 8 Hold the appliance over a sink 0 1 2 3 9 Set the steam regulator 3 to Steam and boiling water will be emitted from the holes in the soleplate 12 Dirt is rinsed out 10 Once the water...

Page 54: ... Problem Possible cause Solutions tips The mains plug is connected but the soleplate 12 is cold The socket has no power Check the fuse Use another socket The temperature is set to the lowest setting Select a higher temperature No steam is emitted from the soleplate Not enough water in the water tank Fill the water tank up to the MAX mark The temperature is set too low Select a temperature between ...

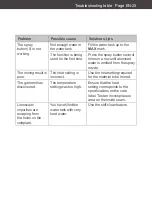
Page 55: ...ter is emitted from the spray nozzle The ironing result is poor The heat setting is incorrect Use the heat setting required for the material to be ironed The garment has discoloured The temperature setting was too high Ensure that the heat setting corresponds to the specifications on the care label Test an inconspicuous area on the inside seam Limescale impurities are escaping from the holes on th...

Page 56: ...re parts Customers in Germany Please contact the company Hermes Fulfilment GmbH Tel 49 0 57 32 99 66 00 Monday Thursday 8 a m 3 p m Friday 8 a m 2 p m Email ersatzteilservice eletrokleingeraete hermes ws com Customers in Austria Please contact your mail order company s customer service centre or product advice centre Please note You are responsible for the condition of the appliance and its proper...

Page 57: ...f you would like to dispose of the packaging please dispose of it in an environmentally friendly way Environmental protection disposal Waste prevention According to the provisions of Di rective 2008 98 EC waste preven tion measures always take priority over waste management For electrical and electronic de vices waste prevention measures include extending the lifespan of defective devices through ...

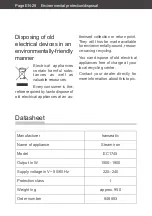
Page 58: ... at an au Datasheet Manufacturer hanseatic Name of appliance Steam iron Model EC1745 Output in W 1500 1900 Supply voltage in V 50 60 Hz 220 240 Protection class I Weight in g approx 950 Order number 848853 thorised collection or return point They will thus be made available for environmentally sound resour ce saving recycling You can dispose of old electrical appliances free of charge at your loca...

Reviews: