38
T o o l s / F i x i n g s
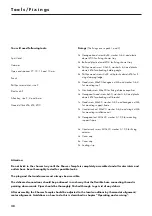
You will need following tools:
Spirit level
Hammer
Open end spanner 27, 19, 13 and 10 mm
Punch
Phillips screw driver, size 2
Electric drill
Allen key, size 2, 4 and 6 mm
Stone drill bits Ø6, Ø8, Ø10
Fixings
(The fixings are in pack 1 and 2)
2x Hexagon head screw 8x60, washer A 6,4 and plastic
dowel Ø10 for fixing shower tray
2x Bolt and plastic dowel Ø14 for fixing shower tray
4x Phillips wood screw 4,5x35, washer A 6,4 and plastic
dowels Ø6 for attaching holding angle
8x Phillips wood screws 4x45 with plastic dowels Ø6 for fi-
xing clamping ledge
2x Head screw M6x20 hexagon nut M6 and washer A 6,4
for mounting roof
1x Star knob screw M6x20 for fixing distance equaliser
4x Hexagonal wood screw 6x50, washer A 6,4 and plastic
dowels Ø8 for attaching wall bracket
1x Head screw M8x30, washer A 8,5 and hexagon nut M8
for mounting support frame
2x Countersunk nut M6x20, washer A 6,4 and wing nut M6
for mounting installation unit
2x Hexagonal nut M10x40, washer A 10,5 for mounting
support frame
4x Countersunk screw M10x30, washer A 10,5 for fixing
columns
4x Cover cap
8x Cover cap
2x Sealing strip
Attention:
Do not brick in the shower tray until the Shower Temple is completely assembled and all water inlets and
outlets have been thoroughly tested for possible leaks.
The plug and the transformer must always be accessible.
The delivered connections should be positioned in such way that the flexible hose connecting thread is
pointing downwards. Pipes should be thoroughly flushed through to get rid of any debris.
After assembly, the Shower Temple should be adjusted to the local conditions by thermostat alignment/
motor alignment. Guidelines on how to do this is described in chapter “Operating and servicing“.

