background image

35


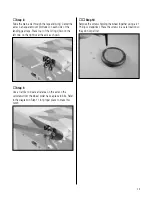
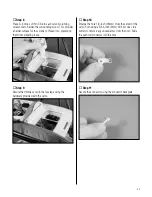
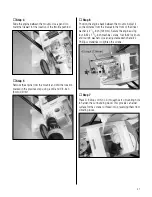
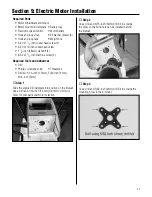
Step 16

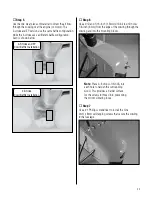
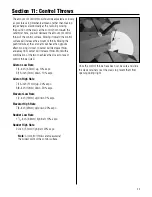
Slide the fuel tank into the fuselage. Position the fuel  

tank brace in the fuselage as shown and secure with 

medium CA.

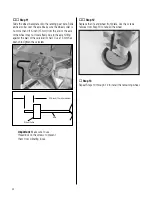
Important

: Make sure clunk line inside 

the fuel tank is not looped around the vent 

line which can occur during shipping. If 

the clunk does not move freely, you will 

have fuel delivery issues in flight.


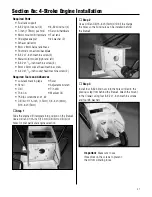
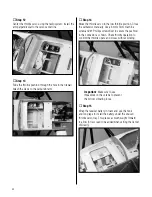
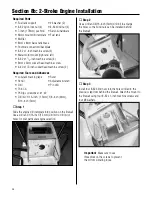
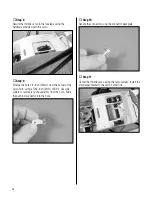
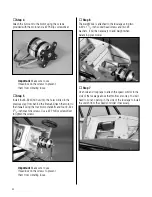
Step 17

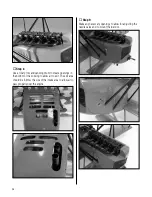
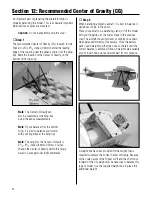
Attach a 90-degree adapter to the engine, then attach the 

muffler to the adapter. Connect the lines from the fuel tank 

to the carburetor and muffler. Use an exhaust deflector to 

direct the exhaust out the bottom of the fuselage.

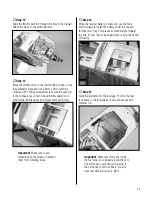
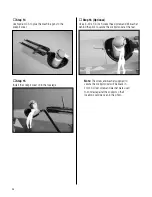
Note

: The red tube from the fuel tank attaches 

to the muffler, and the blue to the carburetor.

Note

: We used a fuel dot (HAN115) to allow 

fueling the tank from outside the cowling.

Hint

: Use a Remote Glow Plug Adapter 

(HAN3025) to allow starting the 

engine without cutting a hole in the 

dummy motor for the glow igniter.


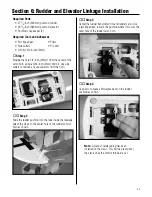
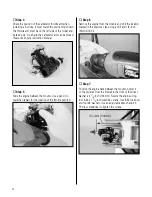
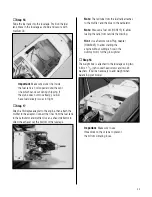
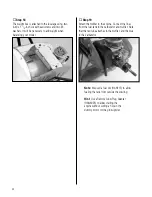
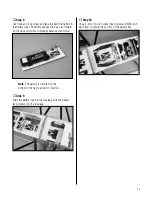
Step 18

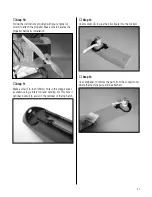
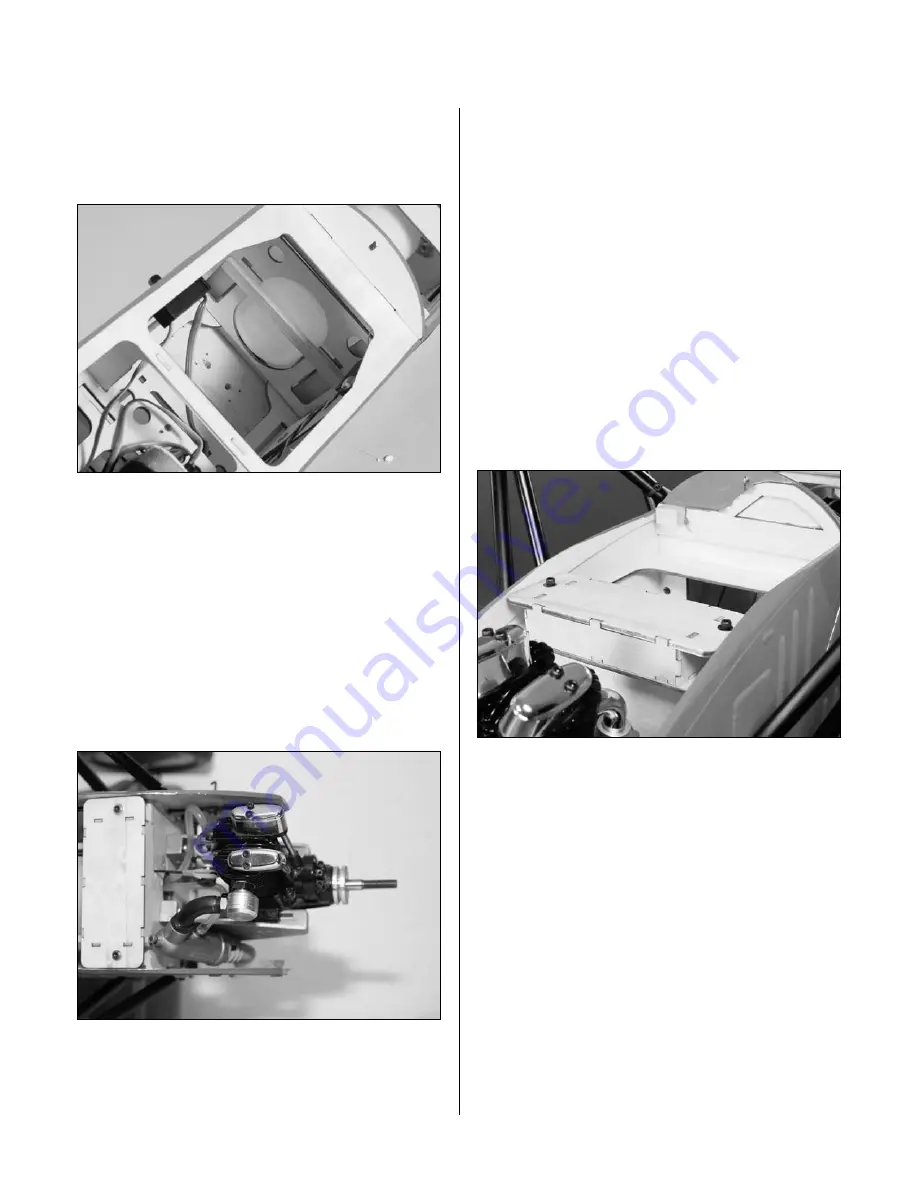
The weight box is attached to the fuselage using two  

4-40 x 1


1

/

4

-inch socket head screws and two #4 


washers. It will be necessary to add weight when 

balancing your model.

Important

: Make sure to use 

threadlock on the screws to prevent 

them from vibrating loose.

Summary of Contents for fokker D.VII

Page 1: ...Area Top Wing 689 sq in 44 sq dm Wing Area Bottom Wing 425 sq in 27 sq dm Wing Loading 17 5 oz sq ft Assembly manual Fokker D VII Flying Weight 8 5 9 5 lb 3 9 4 3 kg Engine Size 61 2 stroke 82 4 stroke Motor Size Power 60 Radio 4 channel Servos 5 servos 4 electric required Specifications ...

Page 2: ... Installation 11 Section 3 Joining the Wing Panels 16 Section 4 Wing Installation 19 Section 5 Tail installation 22 Section 6 Rudder and Elevator Linkage Installation 25 Section 7 Landing Gear Installation 27 Section 8a 4 Stroke Engine Installation 31 Section 8b 2 Stroke Engine Installation 36 Section 9 Electric Motor Installation 41 Section 10 Cowling and Cockpit Installation 44 Section 11 Contro...

Page 3: ...Hobby knife Hobby scissors Masking tape Mixing cups Paper towels Pencil Phillips screwdriver 1 2 Pin drill Pliers Rubbing alcohol Ruler Sandpaper Sealing Iron HAN101 Side cutters Square Threadlock Ball driver 3 32 inch 2 5mm Rotary tool w sanding drum Drill bit 1 16 inch 1 5mm 5 64 inch 2mm 3 32 inch 2 5mm 1 8 inch 3mm 3 16 inch 5mm Adhesives 30 minute Epoxy HAN8002 Medium CA MEUM300M1OZ Thin CA M...

Page 4: ...troke Glow Saito 82 AAC w Muffler SAIE082A or SAIE082AGK Saito 90 Degree Adapter SAI65140 Evolution Propeller 14 x 8 EVO14080 Remote Glow Plug Adapter HAN3025 Exhaust Deflector 35 to 91 Engines DUB697 Recommended Setup Electric E flite Power 60 BL Outrunner Motor EFLM4060A 60 Amp Pro Switch Mode BEC Brushless ESC EFLA1060 Thunder Power 6S 3850 5000mAh Li Po battery pack APC Propeller 16 x 8 APC160...

Page 5: ...to fly aircraft that are only available on FS One such as the T REX Blade CX2 Blade CP Pro Hangar 9 P 51 and F 22 PTS And as always with the Hangar Pack you still get all the same great features that you did with the original aircraft Instructions for Disposal of WEEE by Users in the European Union This product must not be disposed of with other waste Instead it is the user s responsibility to dis...

Page 6: ...on of or to any part of the Product This warranty does not cover damage due to improper installation operation maintenance or attempted repair by anyone other than Horizon Return of any goods by Purchaser must be approved in writing by Horizon before shipment Damage Limits HORIZON SHALL NOT BE LIABLE FOR SPECIAL INDIRECT OR CONSEQUENTIAL DAMAGES LOSS OF PROFITS OR PRODUCTION OR COMMERCIAL LOSS IN ...

Page 7: ...rranty Inspection and Repairs To receive warranty service you must include your original sales receipt verifying the proof of purchase date Provided warranty conditions have been met your Product will be repaired or replaced free of charge Repair or replacement decisions are at the sole discretion of Horizon Hobby Non Warranty Repairs Should your repair not be covered by warranty the repair will b...

Page 8: ...RF Wheels L HAN4687 Tail Skid M HAN4688 Spandau Machine Guns Pair N HAN4689 Cowl screws 12 pcs O HAN4690 Anodized Aluminum Wing Tube P HAN4692 Pushrod Set Q HAN4693 EP Standoffs 48mm 4Pcs R HAN8303 German Pilot Bust w Scarf S HAN4696 Weight Box Items available separately HAN4694 EP Battery Tray and Fuel Tank Support HAN4695 Lozenge Covering 1 Meter HAN1987 17 oz Fuel Tank 500cc HAN2033 Ultra Motor...

Page 9: ... elevator servo in the fuselage using the hardware provided with the servo Step 3 Repeat Steps 1 and 2 to install the rudder servo as shown Wrap the receiver in foam and secure it to the radio tray with a hook and loop strap Plug the rudder and elevator servos into the receiver as well as two 12 inch 302mm servo extensions for the aileron servos Note When installing a 72MHz receiver route the ante...

Page 10: ...the fuselage side Important When using a remote receiver mount so the antenna from the remote receiver are perpendicular to the antenna of the main receiver Refer to the owners manual for the radio This gives tremendous improvements in signal reception Essentially each receiver sees a different RF environment and this is the key to maintaining a solid RF link Step 4 Remove the covering for the swi...

Page 11: ...tep 1 Position the aileron servo on the servo hatch as shown Note that the servo will rest parallel to the opening for the servo arm not to the edge of the hatch itself o Step 2 Use a felt tipped pen to mark the locations for the servo mounting blocks on the hatch Note Make sure the blocks will not hang over the outside edges of the hatch when installed If so reposition the servo as necessary and ...

Page 12: ...sfer of vibrations through the hatch and into the servo o Step 5 Use a pin drill and 1 16 inch 1 5mm drill bit to drill the locations for the servo mounting screws o Step 6 Place 2 3 drops of thin CA into each hole to harden the surrounding wood This provides a harder surface for the screws to thread into preventing them from vibrating loose o Step 7 Secure the servo to the mounting block using th...

Page 13: ...s from the horn o Step 9 Secure a 6 inch 152mm servo extension to the aileron servo using string unwaxed dental floss or a commercially available connector o Step 10 Tie the string located inside the wing to the aileron servo extension o Step 11 Use a hobby knife with a 11 blade to remove the covering from the wing where the servo extension will exit ...

Page 14: ...f tapping screws and a 1 Phillips screwdriver o Step 14 Attach the clevis from the 6 inch 152mm pushrod to the inside hole of the aileron control horn A piece of safety tubing has been installed on the clevis This will be placed over the clevis once the control throws are set o Step 15 With the servo and aileron centered mark the pushrod where it crosses the outer hole of the servo arm using a fel...

Page 15: ...tep 17 Slide the pushrod through the outer hole of the servo arm Use a pushrod snap keeper to secure the connection between the pushrod and servo arm Use side cutters to trim any excess wire that extends beyond the keeper Step 18 Repeat Steps 1 through 17 to install and connect the remaining aileron servo ...

Page 16: ...ron Epoxy brush Step 1 Locate the front and rear wing spars Mark the spars and one wing panel so the spars can be repositioned as they are fit to the wing panels Step 2 Slide the front wing spar in to the pocket in the wing Use a pencil to draw a line on the spar flush against the wing Step 3 Slide the spar into the opposite wing panel It should fit into the panel up to or beyond the line drawn in...

Page 17: ...ire you to work quickly in order to complete them before the epoxy has a chance to begin the curing cycle Please read through these steps and familiarize yourself with the procedure before proceeding Step 6 Mix a batch of 30 minute epoxy Use an epoxy brush to apply the epoxy to ALL SIDES of the joiner Hint You can apply epoxy to the side that will be fit into the first wing panel The remaining epo...

Page 18: ... excess of epoxy that will ooze from between the two wing panels If not you have not used enough epoxy to join the wing panels Hint You can use paper towels soaked in rubbing alcohol to remove the excess epoxy from the wing before it can cure Step 10 Once the epoxy has fully cured apply the 1 x 12 inch 25mm x 305mm white covering to the joint made by the two wing panels You will need to use a cove...

Page 19: ...40 x 1 2 inch socket head screws and a 3 32 inch ball driver Note there is a right and left cabane as shown in the images Do not install the upper rear screw at this time Important Make sure to use threadlock on the screws to prevent them from vibrating loose Step 2 Attach the rear wing cabanes to the fuselage using two 4 40 x 1 2 inch socket head screws and a 3 32 inch ball driver Leave the screw...

Page 20: ...abs on the top wing The hooks from the strut enter from the side nearest the servo and face the wing tip Step 5 Use a hobby knife to remove the covering from the wing exposing the 4 40 blind nuts that have been installed inside the wing There are four total blind nuts to expose Step 6 Attach the top wing to the cabane struts using four 4 40 x 1 2 inch socket head screws and a 3 32 inch ball driver...

Page 21: ...ing a 4 40 x 1 2 inch socket head screw and 4 washer Use a 3 32 inch ball driver to tighten the screw o Step 10 Slide the wires from the N strut into the tabs of the bottom wing Use two 1 16 inch 1 5mm wheel collars and two 3mm x 5mm socket head screws to secure the struts in position You will need to use a 2 5mm ball driver to tighten the screws Important Make sure to use threadlock on the screws...

Page 22: ... of the stabilizer Step 3 Use a hobby knife with a new 11 blade to trim the covering slightly inside the lines drawn in the previous step Important Cutting into the underlying wood will weaken the stabilizer and it could fail in flight Hint Use a soldering iron or hot knife to cut the covering as they will melt it and require less pressure reducing the chances of cutting into the underlying wood S...

Page 23: ...on stabilizer parallel to the wings Step 6 Turn the fuselage over and trace the outline of the fuselage onto the bottom of the stabilizer Step 7 Use a hobby knife with a new 11 blade to trim the covering slightly inside the lines drawn in the previous step Important Cutting into the underlying wood will weaken the stabilizer and it could fail in flight Hint Use a soldering iron or hot knife to cut...

Page 24: ...er towel and rubbing alcohol to remove the lines made by the felt tipped pen before the fin installation Important There should be an excess of epoxy that will ooze from between the fuselage and stabilizer If not you have not used enough epoxy to attach the stabilizer Hint You can use paper towels soaked in rubbing alcohol to remove the excess epoxy from the fuselage and stabilizer before it can c...

Page 25: ...horn o Step 2 Slide the rudder pushrod into the tube inside the fuselage Attach the clevis to the center hole of the rudder control horn as shown o Step 3 Center the rudder transmitter trim and rudder servo Use a felt tipped pen to mark the pushrod where it crosses the outer hole of the rudder servo horn o Step 4 Use pliers to make a 90 degree bend in the rudder pushrod as shown Note A piece of sa...

Page 26: ...servo horn using a pushrod snap keeper Remove any excess wire extending beyond the keeper with side cutters Step 6 Repeat Steps 2 through 5 to install the elevator pushrod Connect the clevis to the center hole of the elevator control horn as shown ...

Page 27: ...ed Tools and Adhesives Drill File Hex wrench 1 5mm Drill bit 3 32 inch 2 5mm Phillips screwdriver 1 2 Step 1 Fit the end of the tail skid into the hole in the fuselage Step 2 Rotate the skid down and secure it using a landing gear strap and two 4 x 1 2 inch self tapping screws Tighten the two screws with a 2 Phillips screwdriver Step 3 Position one of the main landing gear legs on the fuselage as ...

Page 28: ...t Step 4 to attach the remaining landing gear leg to the fuselage as shown Step 6 Use a drill and 3 32 inch drill bit to drill the four holes for the screws that secure the landing gear spreader wing to the legs Dimples have been molded into the landing gear wing to locate these holes Step 7 Use four 4 x 1 2 inch self tapping screws and a 2 Phillips screwdriver to attach the wing to the legs ...

Page 29: ... left two on the right over the axle as shown Step 9 Use a flat file to create a flat area on the axle so the setscrews from the wheel collar have a place to bite Refer to the diagram in Step 11 for proper place to make this notch o Step 10 Remove the screws holding the wheel together using a 1 Phillips screwdriver Place the screws in a safe location so they do not get lost ...

Page 30: ...ely due to the axle hitting against the wall of the outside rim half Use a 1 5mm hex wrench to tighten the setscrew 9 16 inch 15mm maximum Axle Wheel Collar Important Make sure to use threadlock on the screws to prevent them from vibrating loose o Step 12 Replace the tire and wheel front plate Use the screws remove from Step 10 to rebuild the wheel Step 13 Repeat Steps 10 through 12 to install the...

Page 31: ...in drill Thin CA Medium CA Phillips screwdriver 1 2 Drill bit 1 16 inch 1 5mm 1 8 inch 3mm 3 16 inch 5mm Step 1 Slide the engine drill template into position on the firewall Use a drill and 1 16 inch 1 5mm drill bit to drill pilot holes for your particular engine selection Step 2 Use a drill and 3 16 inch 5mm drill bit to enlarge the holes so the blind nuts can be installed behind the firewall Ste...

Page 32: ... pencil to mark the firewall for the location of the throttle pushrod Step 6 Remove the engine from the mounts and drill the location marked in the previous step using a drill and 1 8 inch 3mm drill bit Step 7 Position the engine back between the mounts Adjust it so the distance from the firewall to the front of the driver washer is 47 8 inch 124mm Secure the engine using four 8 32 x 11 4 inch mac...

Page 33: ...hem from vibrating loose Step 9 Secure the throttle servo in the fuselage using the hardware provided with the servo Step 10 Enlarge the hole 1 2 inch 13mm from the center of the servo horn using a 5 64 inch 2mm drill bit Use side cutters to remove any unused arms from the horn Slide the pushrod connector into the hole Step 11 Secure the connector using the connector backplate ...

Page 34: ... Use a 3mm x 5mm machine screw and 1 Phillips screwdriver to secure the pushrod in the connector as shown Check throttle operation to confirm the throttle opens and closes without binding Important Make sure to use threadlock on the screws to prevent them from vibrating loose Step 15 Wrap the receiver battery in foam and use the hook and loop tape to install the battery under the unused throttle s...

Page 35: ...tor and muffler Use an exhaust deflector to direct the exhaust out the bottom of the fuselage Note The red tube from the fuel tank attaches to the muffler and the blue to the carburetor Note We used a fuel dot HAN115 to allow fueling the tank from outside the cowling Hint Use a Remote Glow Plug Adapter HAN3025 to allow starting the engine without cutting a hole in the dummy motor for the glow igni...

Page 36: ...hin CA Phillips screwdriver 1 2 Drill bit 1 16 inch 1 5mm 1 8 inch 3mm 3 16 inch 5mm Step 1 Slide the engine drill template into position on the firewall Use a drill and 1 16 inch 1 5mm drill bit to drill pilot holes for your particular engine selection Step 2 Use a drill and 3 16 inch 5mm drill bit to enlarge the holes so the blind nuts can be installed behind the firewall Step 3 Install four 8 3...

Page 37: ...ck between the mounts Adjust it so the distance from the firewall to the front of the driver washer is 47 8 inch 124mm Secure the engine using four 8 32 x 11 4 inch machine screws four 8 32 lock nuts and four 8 washers Use an adjustable wrench and 2 Phillips screwdriver to tighten the screws Step 7 Place 2 3 drops of thin CA into each servo mounting hole to harden the surrounding wood This provide...

Page 38: ...from the center of the servo horn using a 5 64 inch 2mm drill bit Use side cutters to remove any unused arms from the horn Slide the pushrod connector into the hole Step 10 Secure the connector using the connector backplate Step 11 Center the throttle servo using the radio system Install the arm perpendicular to the servo center line ...

Page 39: ...eadlock on the screws to prevent them from vibrating loose Step 14 Wrap the receiver battery in foam and use the hook and loop tape to install the battery under the unused throttle servo tray This places as much weight forward to allow for less lead to be added when setting the Center of Gravity Step 15 Slide the fuel tank into the fuselage Position the fuel tank brace in the fuselage as shown and...

Page 40: ...ach the muffler to the engine Connect the lines from the fuel tank to the carburetor and muffler Note that the red tube attaches to the muffler and the blue to the carburetor Note We used a fuel dot HAN115 to allow fueling the tank from outside the cowling Hint Use a Remote Glow Plug Adapter HAN3025 to allow starting the engine without cutting a hole in the dummy motor for the glow igniter ...

Page 41: ...ools and Adhesives Drill Phillips screwdriver 2 Threadlock Drill bit 1 16 inch 1 5mm 5 32 inch 4mm 3 16 inch 5mm Step 1 Slide the engine drill template into position on the firewall Use a drill and 1 16 inch 1 5mm drill bit to drill pilot holes for your particular motor selection Step 2 Use a drill and 3 16 inch 5mm drill bit to enlarge the holes so the blind nuts can be installed behind the firew...

Page 42: ... 32 x 21 2 inch machine screws Use a 2 Phillips screwdriver to tighten the screws Important Make sure to use threadlock on the screws to prevent them from vibrating loose Step 6 The weight box is attached to the fuselage using two 4 40 x 11 4 inch socket head screws and two 4 washers It will be necessary to add weight when balancing your model Step 7 Use hook and loop tape to attach the speed cont...

Page 43: ...tray as possible to properly balance your model Note The battery is installed on the bottom of the tray to allow for insertion Step 9 Slide the battery tray into the fuselage with the battery facing down into the fuselage Step 10 Use a 4 40 x 1 2 inch socket head screw and 3 32 inch ball driver to secure the position of the battery tray ...

Page 44: ...Sandpaper Thin CA Step 1 Place low tack tape on the fuselage in the locations of the cowl mounting blocks Use a felt tipped pen to draw lines on the tape indicating the center of the blocks Step 2 Use hobby scissors to remove the excess material from the dummy engine Lines have been molded into the engine to guide the trimming process Step 3 Use medium CA to attach the exhaust stack to the dummy e...

Page 45: ...on 4 Stroke Cowl Baffle Installation Step 6 Use a drill and 1 16 inch 1 5mm drill bit to drill holes 1 8 inch 3mm from the edge of the cowling through the cowling and into the mounting blocks Note Place 2 3 drops of thin CA into each hole to harden the surrounding wood This provides a harder surface for the screws to thread into preventing them from vibrating loose Step 7 Use a 1 Phillips screwdri...

Page 46: ...ings in the bottom of the cowling to allow air to exit The exit area should be 3 times the size of the intake area to allow air to pass properly over the engine Step 9 Make any necessary openings to allow for adjusting the needle valve and to mount the fuel dot ...

Page 47: ...ion Step 11 Make a small 1 2 inch 13mm hole in the cockpit cover as shown using a rotary tool and sanding bit This hole is optional but will to assist in the removal of the top hatch Step 12 Use medium CA to glue the pilot figure into the cockpit Step 13 Use sandpaper to remove the paint from the cockpit cover where the machine guns will be attached ...

Page 48: ...Step 16 Optional Use a 4 40 x 1 2 inch socket head screw and 4 washer behind the pilot to secure the cockpit cover at the rear Note The screw and washer supplied to secure the cockpit cover will be black in color A silver screw and washer were used to contrast against the cockpit so their location could be seen in the photo ...

Page 49: ... away from center will increase throw Work with a combination of the two to achieve the closest or exact control throws listed Aileron Low Rate 1 4 inch 6 5mm up 10 expo 3 16 inch 5mm down 10 expo Aileron High Rate 7 16 inch 11mm up 20 expo 3 8 inch 10mm down 20 expo Elevator Low Rate 1 2 inch 13mm up down 9 expo Elevator High Rate 7 8 inch 22mm up down 20 expo Rudder Low Rate 11 2 inch 38mm right...

Page 50: ... change the Center of Gravity within this range based on your personal flight preference Step 2 When balancing a biplane aircraft it is best to balance it upright as shown in the photo Place your aircraft on a balancing stand or lift the model with your fingertips at the marks made in the previous step The aircraft should rest level or slightly nose down when balanced correctly If necessary move t...

Page 51: ...stently and constantly at full throttle when adjusted Check all the control horns servo horns and clevises to make sure they are secure and in good condition Replace any items that would be considered questionable Failure of any of these components in flight would mean the loss of your aircraft Section 13 Pre Flight Section 14 Adjusting the Engine Step 1 Completely read the instructions included w...

Page 52: ...ause momentary loss of control so it is advisable to always keep a safe distance in all directions around your model as this margin will help to avoid collisions or injury Always operate your model in an open area away from cars traffic or people Avoid operating your model in the street where injury or damage can occur Never operate the model into the street or populated areas for any reason Never...

Page 53: ...53 Building and Flying Notes ...

Page 54: ...aft flown indoors 7 I will not operate model aircraft with metal blade propellers or with gaseous boosts other than air nor will I operate model aircraft with fuels containing tetranitromethane or hydrazine 8 I will not operate model aircraft carrying pyrotechnic devices which explode burn or propel a projectile of any kind Exceptions include Free Flight fuses or devices that burn producing smoke ...

Page 55: ...agreement may be an allocation of frequencies for each site a day use agreement between sites or testing which determines that no interference exists A frequency management agreement may exist between two or more AMA chartered clubs AMA clubs and individual AMA members or individual AMA members Frequency management agreements including an interference test report if the agreement indicates no inte...

Page 56: ... 2008 Horizon Hobby Inc 4105 Fieldstone Road Champaign Illinois 61822 877 504 0233 horizonhobby com 12404 ...

Reviews: