8 |
www.HandiQuilter.com
December, 2019
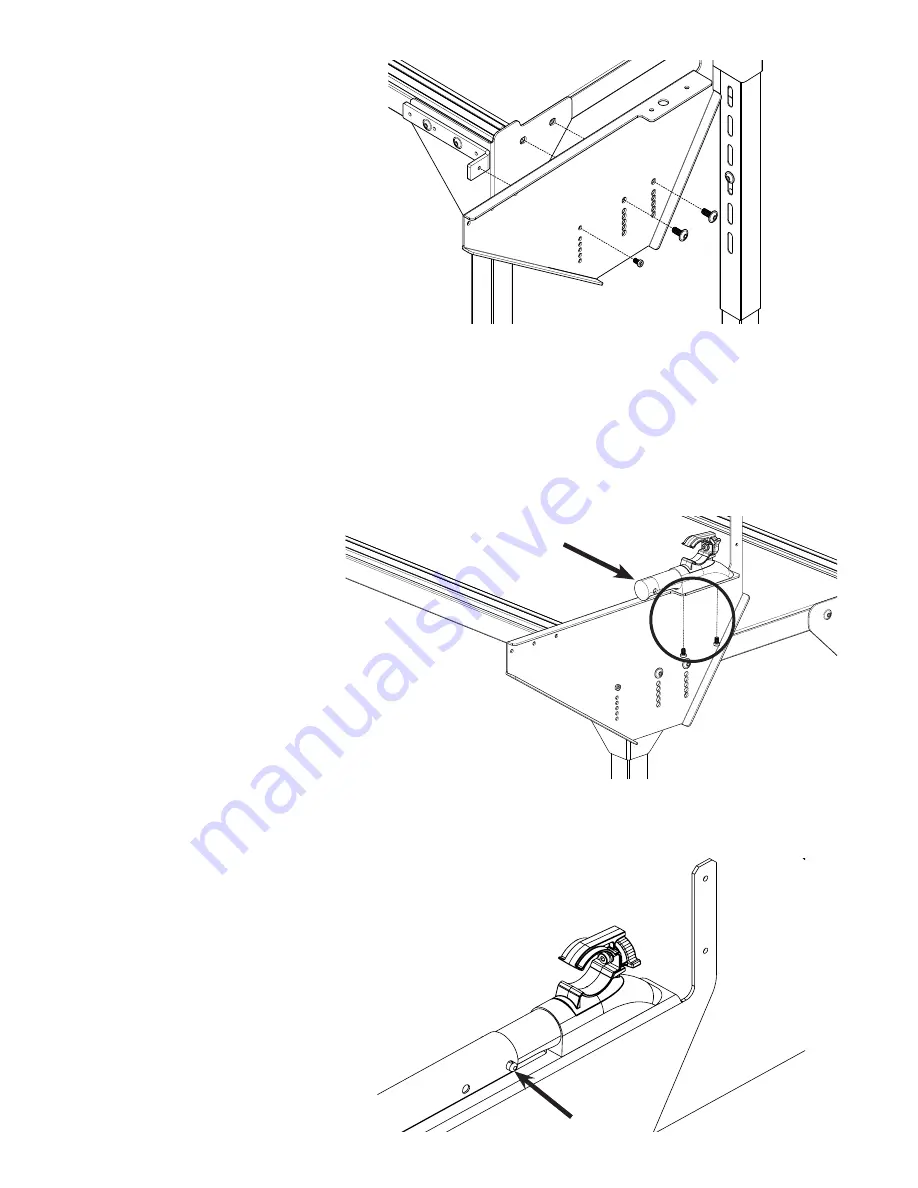
2. Use the 4 mm hex tool to screw
one of the M6 x 10mm socket cap
screws to secure the side arm to
the L-bracket.
3. With both large screws and the
small screw in place now tighten
fully all three screws.
NOTE
: If the L-bracket isn’t flush with the side arm, you will need to loosen the screws that hold it
to the front of the table and slide it until it is against the side arm. Then retighten the screws and
secure the side arm to the L-bracket as described in step 2.
4. Repeat steps 1, 2 and 3 for the left arm. Check that all screws are fully tightened connecting the side
arms to the frame.
5. Attach the left and right side arm
pole end assemblies: Use the 4
mm hex tool and two (2) M6 x
10mm socket cap screws to attach
the pole end assemblies to each
side arm.
NOTE
: Make sure you have identified the right and left pole end assemblies. When properly
installed, the silver push button on pole end assembly will face the center of the frame.
6. Press in the push button on the
pole end assembly and slide the
pole onto it.
18-inch machines:
If you are setting up the HQ
Little Foot frame for an 18-inch
machine, slide on the Side Arm
Poles such that the button snaps
into the first hole (see arrow).
Set up for an 18-inch machine
4mm
push button on inside


