background image

5

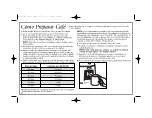
How to Make Coffee 

(cont.)

10.

The urn will automatically switch to the Keep Warm cycle,
and will maintain fresh, hot coffee until it is unplugged. 
If brewed coffee is to be kept warm for a long period of
time, the basket and stem should be removed as soon as
brewing is complete. This will prevent bitter oils in the 
coffee grounds from affecting the flavor of the coffee. 

WARNING! Burn Hazard. 

The urn will be hot. Use a pot

holder or oven mitt to remove the lid.

11.

After coffee has been dispensed, disconnect plug from
wall outlet then remove from the coffee urn and allow the
urn to cool before washing.

NOTES:
• To make additional coffee

, rinse the lid, coffee basket, stem,

and tank with cold water and repeat steps 1 through 7.

• To reheat coffee

, remove the basket and stem. Lock the lid

in place and plug in the unit and turn on for 20 to 60 min-
utes, depending on the amount of coffee remaining. Do not
reheat if less than 20 cups are left in the urn.

To Heat Water:

Use heated water to make instant coffee, hot cocoa, or tea.

1.

To heat water, remove lid, coffee basket and stem. 
Fill coffee urn with cold water to desired level as indicated
by numbered servings on inside of coffee urn.

2. 

Place stem into coffee basket then place large end of stem
into heating unit well. (Using the stem and basket will speed
heating time.) 

3. 

Place lid onto coffee urn and turn to lock. Plug in coffee urn

and let it complete a perk cycle. Water is hot when the
Ready light glows.

840172400 ENnv03.qxd  2/27/08  11:07 AM  Page 5

Summary of Contents for BrewStastion 40540

Page 1: ...851 8900 CAN 1 800 267 2826 MEX 01 800 71 16 100 Le invitamos a leer cuidadosamente este instructivo antes de usar su aparato Visit hamiltonbeach com for delicious recipes and to register your product...

Page 2: ...if cover is removed during brew cycle 14 Do not place coffee urn on or near a hot gas or electric burner or in a heated oven 15 WARNING To reduce the risk of fire or electric shock do not remove the...

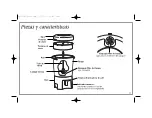
Page 3: ...ng Tabs Coffee Basket Stem Assembly Base Handles Heat Well Coffee Dispensing Bar Tank Ready Indicator Light Coffee Tank Seal Filter located inside tank Coffee Tank Seal Filter see inset 840172400 ENnv...

Page 4: ...er or urn may not percolate 5 Measure ground coffee into coffee basket Do not spill coffee grounds in the stem Spread coffee evenly in basket Always keep water and coffee amounts between minimum maxim...

Page 5: ...d coffee basket stem and tank with cold water and repeat steps 1 through 7 To reheat coffee remove the basket and stem Lock the lid in place and plug in the unit and turn on for 20 to 60 min utes depe...

Page 6: ...rasive cleaners or pads on any part of the coffee urn 7 Coffee Tank Seal Filter should be removed and cleaned frequently Unscrew seal from inside tank and wash in warm soapy water Replace seal and tig...

Page 7: ...k dispensing mechanism under Coffee Tank Seal Filter See How to Clean Mineral deposits have built up Clean the urn following instructions in How to Clean Water tank is empty Unit is unplugged Power ou...

Page 8: ...ners blades seals gaskets clutches motor brushes and or agitators etc This warranty extends only to the original consumer purchaser and does not cover a defect resulting from abuse misuse neglect incl...

Page 9: ...s de br lures peuvent survenir si le couvercle est retir pendant le cycle d infusion 14 Ne pas placer le percolateur sur ou pr s d une cuisini re lectrique ou gaz ou dans un four chaud 15 AVERTISSEMEN...

Page 10: ...eau Caf Assemblage de Tige Base Poign es Cuvette Barre de Distribution de Caf R servoir T moin Lumineux PR T Joint D tanch it du R servoir Filtre situ l int rieur du r servoir Joint D tanch it du R se...

Page 11: ...la quantit de caf moulu dans le plateau caf viter de verser le caf dans l assemblage de tige Disperser uniform ment le caf dans le plateau Toujours conserver les quantit s minimales et maximales d eau...

Page 12: ...l eau froide et r p ter les tapes 1 7 Pour r chauffer le caf retirer le plateau et la tige Positionner et verrouiller le couvercle brancher l appareil et faire fonctionner de 20 60 minutes selon la qu...

Page 13: ...eur 7 Le joint d tanch it du r servoir et le filtre doivent tre nettoy s fr quemment D visser le dispositif d tanch it l int rieur du r servoir et laver l eau ti de et savonneuse Repositionner le disp...

Page 14: ...bution sous le joint d tanch it ou du filtre Voir Nettoyage Des d p ts min raux se sont accumul s Nettoyer le percolateur en suivant les instructions au chapitre Nettoyage Le r servoir est vide L appa...

Page 15: ...e s tend qu l acheteur consommateur original et ne couvre aucune panne entra n e par un mauvais usage un usage abusif de la n gligence y compris une absence de nettoyer le produit r guli rement confor...

Page 16: ...ciclo de preparaci n del caf y al servirlo 14 Pueden ocurrir escaldaduras si se retira la tapa durante el ciclo de preparaci n 15 No coloque la cafetera sobre o cerca de un quemador el ctrico o a gas...

Page 17: ...a Base Asas Cavidad t rmica Palanca dispensadora de caf Tanque Indicador luminoso enciende cuando el ciclo de preparaci n se ha completado Empaque filtro del tanque ubicado en el interior del tanque E...

Page 18: ...a de lo contrario la cafetera podr a no filtrar 5 Mida el caf molido en el canasta de caf No derrame el caf molido dentro del tubo de subida Vierta uniformemente el caf en el canasta Mantenga siempre...

Page 19: ...a los pasos del 1 al 7 Para recalentar el caf extraiga la canasta y el tubo de subi da Cierre la tapa y conecte la unidad durante 20 a 60 minu tos seg n la cantidad de caf que quede No recaliente el c...

Page 20: ...ebe quitar y limpiar con frecuencia el empaque Filtro del Tanque de Caf Desenrosque el empaque del interior del dep sito y l velo con agua tibia y jabonosa Para Quitar Dep sitos Minerales y Sarro 1 Si...

Page 21: ...secci n C mo limpiar Se han acumulado dep sitos minerales Limpie la cafetera siguiendo las instrucciones en la secci n de C mo Limpiar El tanque de agua se encuentra vac o La unidad est desenchufada C...

Page 22: ...el consumidor Esta garant a incluye los gastos de transportaci n del producto que deriven de su cumplimiento dentro de su red de servicio LIMITACIONES Esta garant a no ampara el reemplazo de piezas de...

Page 23: ...paro de la garant a no es computable dentro del plazo de la misma Cuando el bien haya sido reparado se iniciar la garant a respecto de las piezas repuestas y continuar con relaci n al resto En el caso...

Page 24: ...Modelo Tipo Caracter sticas El ctricas 40540 A59 120 V 60Hz 1090 W Los n meros de modelo tambi n pueden estar seguidos del sufijo MX 2 08 840172400 840172400 SPnv01 qxd 2 27 08 11 18 AM Page 24...

Reviews: