


4
Note
The following requirements must be fulfilled for success-
ful startup and operation:
•
A functioning wireless home network (WiFi/WLAN)
that is turned on
•
Please note that only 2.4 GHz WiFi is currently
supported for the network integration. Check whether
your network is a 2.4 GHz network.
•
A mobile device (smartphone, tablet, etc.) that is WiFi/
WLAN-enabled and connected to your home network
•
The
Hama Smart Solution App
, installed on your
mobile device
*Does NOT affect the motion detector 00176554
3.1 Preparation
Loading the Hama Smart Solution app
•
Download the
Hama Smart Solution
app from the
Apple App Store or the Google Play Store using your
mobile device.
•
Open the
Hama Smart Solution
app.
•
If you’re using it for the first time, you’ll have to register
and create a new account. If you already have an
account, log in using your login details.
•
Click
Create family
.
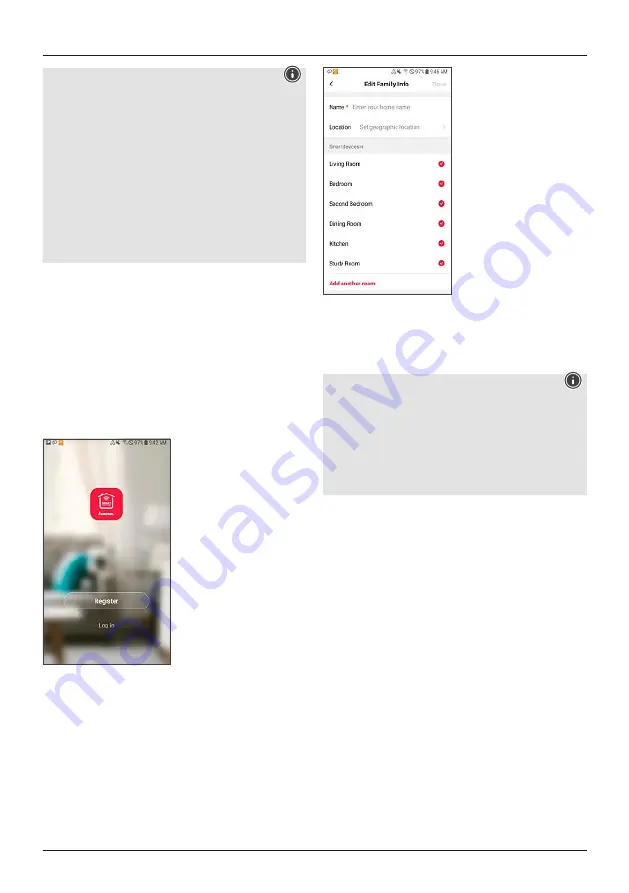
•
Enter a family name. After that, you can deactivate
rooms that are not being used by clicking the ticks. You
can add or remove rooms at any time; to do so, simply
click the cog wheel at the top right.
•
Click
Finish
.
Note - Family location
To complete a family, it is not necessary to define the
family location manually. Based on the IP address and
the time zone set on the smartphone, the app also works
without further information. Should you need more
precise location determination at a later time, you can
add the details previously omitted (under Profile/Family
Management).
3.2 Dual-band routers (2.4 GHz / 5 GHz)
Many of the current routers transmit on two different
frequency bands (sometimes even in parallel): 2.4 GHz and
5 GHz. The advantages of the 2.4 GHz frequency are the
longer range and compatibility with older terminal devices
that do not support 5 GHz. Please note that our smart
products currently only support 2.4 GHz. If you use a dual-
band router and this results in connection problems, there
are three possible ways to resolve them:
•
Deactivate 5 GHz frequency
You will find a control for both frequency bands in the
router settings (WLAN item), depending on model.
Select the 2.4 GHz frequency (or deactivate the 5 GHz
frequency) there. If necessary, consult the operating
instructions of your router.


