Attention:
Install the included software before connecting the USB 2.0 data transfer and network cable!
Installing Software for Windows XP:
Data transfer function:
After starting up your computer, place the included driver CD in the drive.
Select Start => Run... and enter “D:\USB 2.0 data link\PL2501_v1007ML.exe” (you may have to replace D:
with the letter of your CD-ROM drive) or click Browse... and select the “PL2501_v1007ML.exe” file.
Click OK => Next => Finish.
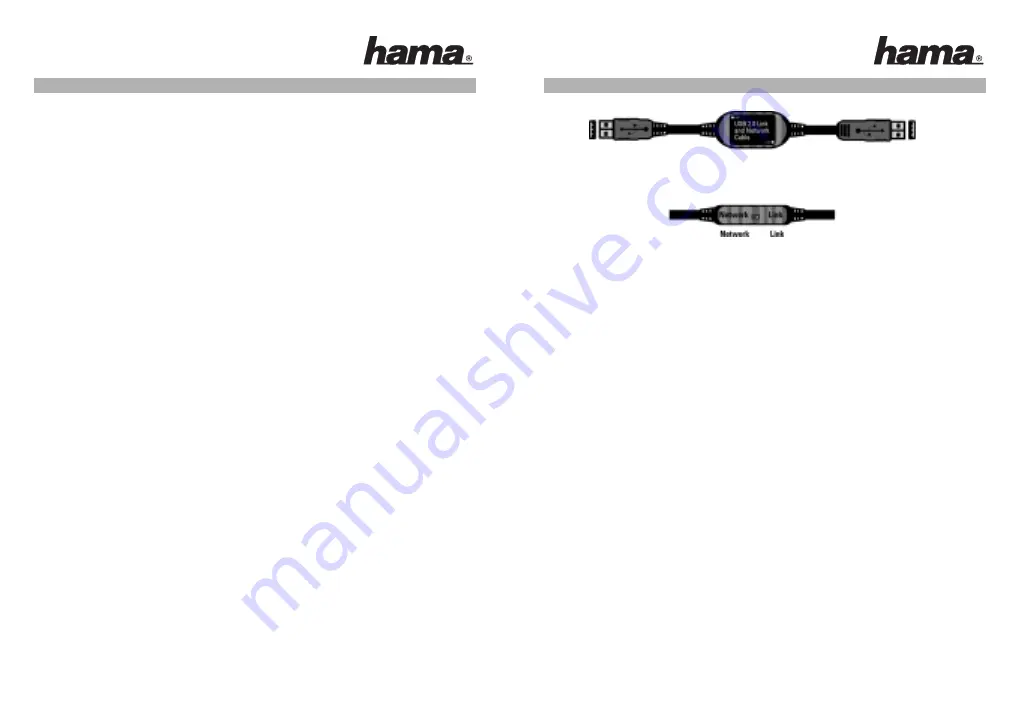
After installing the driver, remove the CD and restart your computer. Ensure that the switch (see image above) is
in the right position and connect the cable to a free USB port. The Found new hardware wizard identifies the
cable as a Hi-Speed USB Bridge Cable. Select Install the software automatically (recommended) => Next.
If information on the Windows Logo Test appears, click => Continue Installation Click => Finish.
In the Device Manager, you can check whether Windows connected the USB 2.0 data transfer and network
cable properly in your system (in this case the data transfer function only). To do so, click => Start => Control
Panel => Printers and Other Hardware, then System. In the System Properties window, select => Hardware =>
Device Manager. The entry “Hi-Speed USB Bridge Cable” must appear in the USB Controller section without a
yellow exclamation point.
Information:
Once you have repeated the installation process on the 2nd PC, you can click the “Pclinq2” icon to start the
data transmission software. The two LEDs in the lower right-hand corner of the Program window will be green if
both PCs are connected correctly.
Network function:
After starting up your computer, place the included driver CD in the drive. Select Start => Run... and enter
“D:\Networking\PL2501NV_v20044ML.exe” (D: may have to be replaced with the letter of your CD-ROM drive) or
click Browse... and select the “PL2501NW_v20044ML.exe” file. Click OK => Next => Finish.
After installing the driver, remove the CD and restart your computer. Ensure that the switch (see image above)
is in the right position and connect the cable to a free USB port. The Found new hardware wizard identifies the
cable as a “Hi-Speed USB-USB Network Adapter”. Select Install the software automatically (recommended)
=> Next. If information on the Windows Logo Test appears, click => Continue Installation Click => Finish.
In the Device Manager, you can check whether Windows connected the USB 2.0 data transfer and network
cable properly in your system (in this case the network function only). To do so, click Start => Control Panel =>
Printers and Other Hardware, then System. In the System Properties window, select => Hardware => Device
Manager. The entry “Hi-Speed USB-USB Network Adapter” must appear in the Network Adapter section
without a yellow exclamation point.
L
User manual
Ordner, Laufwerke oder Drucker freigeben:
Markieren Sie im Windows-Explorer den Ordner, das Laufwerk oder den Drucker und drücken Sie die rechte
Maustaste. Klicken Sie auf => Freigabe. Wählen Sie jetzt "Freigegeben als:" und geben einen Freigabenamen ein
und ändern evtl. den Zugriffstyp => Übernehmen => OK.
Die Freigabe der Ressource wird im Explorer anschließend durch eine Hand im Symbol angezeigt.
Zugriff auf freigegebene Ordner und Laufwerke:
Klicken Sie auf die Netzwerkumgebung im Windows-Explorer oder auf dem Desktop. Wählen Sie hier die
gewünschte freigegebene Ressource.
Freigegebene Drucker einrichten:
Klicken Sie auf => Start => Einstellungen => Drucker => Neuer Drucker => Weiter => Netzwerkdrucker =>
Weiter => Durchsuchen. Wählen Sie den PC, an den der Drucker angeschlossen ist, und dann den
entsprechenden Drucker => OK. Markieren Sie bei "Drucken Sie Dokumente mit Anwendungen für MS-DOS?"
je nach Bedarf Ja oder Nein => Weiter. Geben Sie einen Namen für den Drucker ein => Weiter. Wählen Sie, ob
Sie eine Testseite drucken möchten =>_Fertig stellen/Weiter. Jetzt wird der Drucker installiert. Je nach Modell
bzw. bei Verwendung verschiedener Windows-Versionen kann die Installation abweichen.
00049266bda 05.12.2005 15:37 Uhr Seite 10