Confidential
38
Screwing the side and upper brackets
•
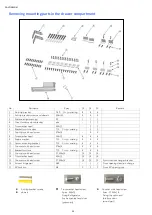
Fix the bracket furnitures (Item No12) to the unit, where 2 on the top, and 3 on every side.
Use the truss washer head screws (Item No14) to tighten.
WARNING:
Before starting to screw the Side and Upper brackets, please make sure that water is supplied to the product and
there is no water leakage.
Summary of Contents for HRBIAF18PR
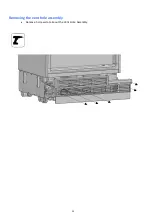
Page 25: ...25 Removing the vent hole assembly Remove 5 screws to take out the Vent Hole Assembly...
Page 49: ...Confidential 49 HRBIAF24PR HRBIAR24PR HRBIAR30PR TF 18BINFIA...
Page 54: ...Confidential 54 Installing the furniture door 1 Attach the furniture door to the door...
Page 58: ...Confidential 58 Clip the cover furniture door bracket HRBIAF24PR HRBIAR24PR HRBIAR30PR...
Page 59: ...Confidential 59 Attach and screw the upper lower decorationcover HRBIAF18PR...
Page 60: ...Confidential 60 Attach and screw the upper lower decorationcover HRBIAF24PR HRBIAR24PR...
Page 63: ...Confidential 63 Attach the Trim door side Item No3...
Page 68: ...Confidential 68 Remove the upper adjustment kits HRBIAF18PR...
Page 77: ...Confidential 77 Installing the door Place the door to the refrigerator and fix it with 4screws...
Page 91: ...Confidential 91 You can see previous pages for other installation procedures...
Page 92: ...Confidential 92...


