Confidential
29
Alternative anti-tip method
If the anti-tip brackets cannot be connected securely, you must use the alternative method below.
In this method, you can use wooden girders to avoid the risk of tipping over.
It must be installed as illustrated in the figure below.
There must be no clearance between the product and the wooden girder.
Minimum section dimensions of the wooden girder must be 3"x4" (75 mm x 100 mm). Width of the girder must be
equal to the clearance where it will be installed.
An additional girder must be used if the niche depth is more than anticipated. The wooden girder must contact the
product with a maximum size of 2" (50.8 mm).
To determine the location for the wooden girder, mark it on the rear wall, select suitable screws and connect safely.
WARNING:
Number and features of the screws to be used for the wooden girder must be determined so that there is no safe
connection.
Summary of Contents for HRBIAF18PR
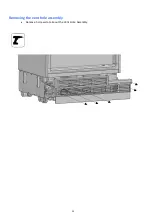
Page 25: ...25 Removing the vent hole assembly Remove 5 screws to take out the Vent Hole Assembly...
Page 49: ...Confidential 49 HRBIAF24PR HRBIAR24PR HRBIAR30PR TF 18BINFIA...
Page 54: ...Confidential 54 Installing the furniture door 1 Attach the furniture door to the door...
Page 58: ...Confidential 58 Clip the cover furniture door bracket HRBIAF24PR HRBIAR24PR HRBIAR30PR...
Page 59: ...Confidential 59 Attach and screw the upper lower decorationcover HRBIAF18PR...
Page 60: ...Confidential 60 Attach and screw the upper lower decorationcover HRBIAF24PR HRBIAR24PR...
Page 63: ...Confidential 63 Attach the Trim door side Item No3...
Page 68: ...Confidential 68 Remove the upper adjustment kits HRBIAF18PR...
Page 77: ...Confidential 77 Installing the door Place the door to the refrigerator and fix it with 4screws...
Page 91: ...Confidential 91 You can see previous pages for other installation procedures...
Page 92: ...Confidential 92...


