background image

Remote Control Function

TFT -LCD  television  Owner’s Manual 

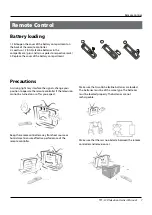
- The remote control cannot be operated unless the batteries are properly loaded.

- When using the remote control, aim it at the remote control sensor on the TV.

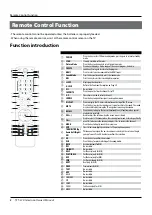
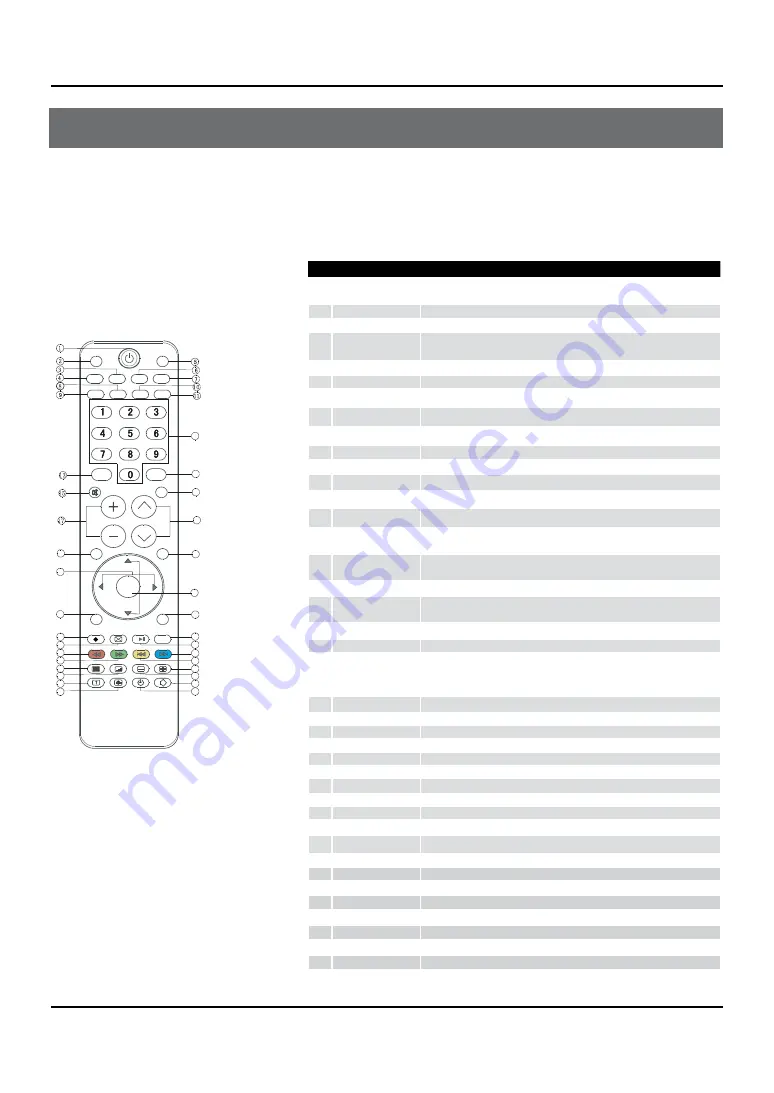
Function introduction

1

POWER

Press this key to start TV from standby mode, press it again to return to standby 
mode.

2

SCAN

It is only available in TV mode.

3

Picture Mode 

Press this key continuously to select the picture mode. 

4

FREEZE

Press once to display a frozen image of the current program, but audio 
continues. Press again to return to the program.

5

HDMI

Press to select a device connrcted to the HDMI input.

6

Sound Mode 

Press this key continuously to select  the sound mode.

7

ARC  

Press this key to select the screen display proportion.

8

SLEEP 

Displaying the sleep time.

9

H. LOCK

Refer to the Functional Description on Page 20

0

I/II

No available

A

FAVORITE 

Press to open the favorite channel list in TV.

B

0-9

These keys are used to select a channel.

C

SOURCE

Press this key to open/close signal source options menu.

D

DISPLAY

Press to display the TV status information on the top of the TV screen.

E

MUTE

Press this key to mute the sound, press it again to activate the sound. The sound 

may be activated by turning the TV on again or increasing the volume .

F

RECALL

Press this key to display the Special Function Menu (it functions when special 

modules are inserted).

G

VOL+ /- 

Used to adjust the volume when the screen menu is closed.

H

CH+/-

Used to select a TV channel when the screen options menu is closed, specifically, 

press CH- to decrease the channel and press CH+ to increase the channel.

I

MENU 

Press this key to display or exit the main menu.

J

EXIT 

Clears all on-screen displays and returns to TV viewing from any menu.

K

THUMBSTICK (Up/
Down/Left/Right/
OK) 

PAllows you to navigate the on-screen menus and adjust the system setting to 
your preference. Press OK buuton to confirm the selection.

L

OK

Press this key to confirm the selection

M

USB

Press this key for quick switching of streaming media.

N

BACK 

Back button(only for USB).

O

REC 

No available.

P

TIMESHIFT

No available.

Q

HELP

Fast Reverse (only for  USB)

R

PLAY/PAUSE  

Fast Reverse (only for  USB)

S

REV

Fast Reverse(only for USB).

T

FWD

Fast Forward(only for USB).

U

NEXT

Next(only for USB).

V

PREV 

Previous(only for USB)

W

TEXT

No available..

X

MIX 

No available.

Y

HOLD

No available.

Z

SUBCODE

No available.

[

PIP

No available.

\

SWAP

No available.

]

ZOOM

Fast Reverse(only for USB).

`

MOVE

No available.

SCAN

 H.LOCK

SLEEP

MUTE

RECALL

USB

REC

TEXT

PIP

SWAP

MOVE

ZOOM

MIX

HOLD

SUBCODE

TIMESHIFT PLAY/PAUSE

HELP

BACK

HDMI

FREEZE

P.MODE

S.MODE

ARC

FAVORITE

 SOURCE

 DISPLAY

VOL

CH

MENU

EXIT

INDEX

REV

FWD            PREV

NEXT

12

14

16

18

19

20

21

23

22

25

24

26

27

29

28

30

31
32

33
34
37

35
36

38

39
40

Ⅰ/Ⅱ

OK

Remote Control Function

Summary of Contents for L32K3

Page 1: ...Please READ this manual carefully before operating your TV and retain it for future reference O W N ER S M AN U AL TFT LCD TELEVISION L32K3...

Page 2: ...it 13 Auto search 14 Exchange 15 Watching TV Program 15 How to select the desired program 15 How to select the desired sound 15 Mute Setting 15 Quick program view 15 Picture Control Functions 15 How t...

Page 3: ...le Major part or accessory of which technical specifications must be followed if it is to be replaced RISK ELECTRIC SHOCK DO NOT OPEN WARNING To avoid fire or electric hazards never place your televis...

Page 4: ...Important Safety Instructions 4 TFT LCD television Owner s Manual Important Safety Instructions...

Page 5: ...Important Safety Instructions TFT LCD television Owner s Manual 5...

Page 6: ...N VIDEO AUDIO VGA AUDIO VIDEO L AUDIO R VIDEO L AUDIO R HDMI 3 VGA IN Y Pb Pr L R 1 COMPONENT In Connect a componentVideo Audio device to these jacks 2 VGA DVI AUDIO Connect aVGA DVI Audio device to t...

Page 7: ...s strong light may interfere the signals change your position to operate the remote controller if the television cannot be turned on or off as you expect Keep the remote controller away from heat sour...

Page 8: ...ALL Press this key to display the Special Function Menu it functions when special modules are inserted G VOL Used to adjust the volume when the screen menu is closed H CH Used to select aTV channel wh...

Page 9: ...xial cable to remove the disturbance caused by airwave Don t bind antenna cable and electric wire together To improve picture quality in a poor signal area purchase and install a signal amplifier If t...

Page 10: ...he TV as shown in the figue COMPONENT IN AV1 OUT Note If your DVD player dose not have component video output use S Video How to use Turn on the DVD player insert a DVD A Use the B SOURCE button on th...

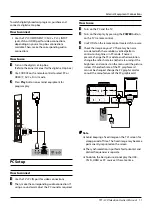
Page 11: ...t the PC sound as required How to use Turn on the PC and the TV A Turn on the display by pressing the B POWER button on the TV s remote control Use PC DVI on the remote control to select VGA source C...

Page 12: ...d use of headphones at a high volume R R may damage your hearing You will not receive sound from the speakers when R R you connect headphones to the system Power source TO USE AC POWER SOURCE Use the...

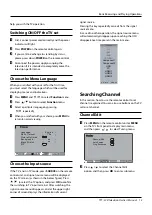
Page 13: ...ack Stretch PIP on on Choose the Input source If the TV is not in TV mode press SOURCE on the remote control unit and signal source menu will be displayed on the TV screen as shown in the below figure...

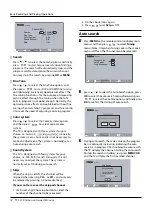
Page 14: ...s Auto during auto search Sound system The TV is designed with four systems for your choice i e D K M B G and I Generally it is not necessary to adjust the system The system is normally set as DK duri...

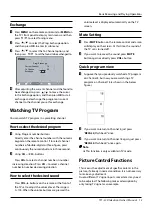
Page 15: ...ess CH to select a channel number in number increasing direction Press CH to select a channel number in number decreasing direction How to select the desired sound Press VOL buttons on the remote or t...

Page 16: ...adjust the light output of the complete picture which will mainly affect the darker areas of the picture Color This will adjust the saturation level of the colors to suit your personal preference Shar...

Page 17: ...0 sound of the right and left speakers becomes weaker and stronger Digital tone This select the modes for sound reproduction dependent on the broadcast signals or signals from external inputs received...

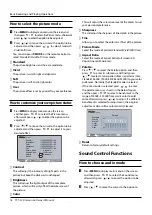
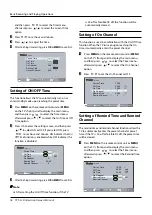
Page 18: ...ction if the TV R R is AC off or forcible DC off the function will be automatically cleared Setting of On Channel This function is used in combination with the On Off Time function When the TV turns o...

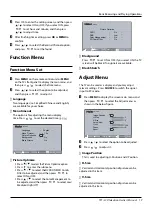
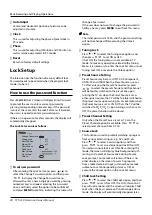
Page 19: ...Press 5 6to select the Picture Optimize option Press 4 to enter the submenu Press 5 6to select theDCDI DNR 3D Comb Filter to be adjusted and then press 3 4 to select ON or OFF Press 5 6to select the...

Page 20: ...elect the Tuning Lock option and then press 3 4 to set ON or OFF If set ON the Tuning Menu is not available in TV mode To make any operation related to the Tuning Menu it is necessary to enter the Loc...

Page 21: ...tal cameras If USB equipment could not be identified due to unsupported file system please format the equipment to the above mentioned file system The external card reader supports most of the digital...

Page 22: ...lay information while playing Press G BACK to stop playing or return to the previous menu and press BACK repeatedly to return to the main menu Playing a Picture After entering USB main interface press...

Page 23: ...MUSIC 1HUYHU VD JR E H US M C 2 I To exit music playing just press D BACK repeatedly Text After entering USB main interface press A 3 4 to select a harddisk partition and then press 5 6to select the T...

Page 24: ...nder before contacting the after sales service for technical assistance Problem Possible remedies No picture no sound Turn onthe power supply Properly plug theTV setto the powersocket Check to see if...

Page 25: ...irst lays the machine aside after in the operating temperature environment carries on restores 2 hours then electrifies the use again protects your television not to receive the damage Accessories Own...

Page 26: ...26 TFT LCD television Owner s Manual Sequence Number Format Refresh Frequency Hz 1 480i 480p 60 2 576i 576p 50 3 720p 50 60 4 1080i 50 60 Maintenance Troubleshooting Specification...

Page 27: ...TFT LCD television Owner s Manual 27 Specification Format...

Reviews: