19
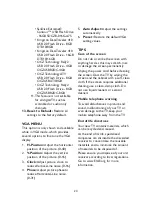
Speaker:
8.
Choose to turn on / off
the TV internal speaker. The digital
audio output signals and earphone
output signals will not be turned off
even though the TV speaker is off.
The default setting is On.
AVL:
9.
Choose On or Off to
adjust volume to be consistent
across programs and channels
automatically.
Preset:
10.
Restore the default audio
settings.
FEATURE MENU
The Feature menu is shown below.
This menu contains options to set
the language, time, and other settings.
Depending on the current mode (TV,
HDMI, etc.), some options may not be
available.
ENTER
Exit
Menu
FEATURE
Move
Select
Return
Exit
Time
Transparency
1
Menu Language
English
Parental Control
Password Setting
Closed Captions
Analog Captions
CC1
Off
Menu Language:
1.
Select the menu
display language. (English / Français /
Español)
Time:
2.
Set current time. The sub-
menu includes Time Mode, Time
Zone, and Daylight Savings.
[Time Mode]
– Choose from
Auto or Manual. When choose the
Time Mode at Manual, you can set
the Year, Month, Date, and, Time
manually.
ENTER
Exit
Menu
FEATURE
Time
Time Mode
Time Zone
Daylight Savings
Month
Day
Time
Year
Auto
HST
On
2010
Jan
1
12:02 AM
Move
Select
Return
Exit
Enter Old Password
Enter New Password
Confirm New Password
hsi
l
g
n
E
– Set current time
zone.(This item is available once
Time Mode is Auto.)
– Set to On
or Off.(This item is available once
Time Mode is Auto.)
3.
Adjust the
transparency of the on-screen
menu from range 0 to 10.
4.
Change
the 4-numeral parental control
password. Three steps are required
for changing the password: Enter
Old Password –> Enter New
Password –> Confirm New
Password. Note: This item is only
available in TV, Composite and
S-Video source modes. The default
password is
ό
0 0 0 0
ύ
.
Summary of Contents for HL22XLTW2a
Page 2: ......
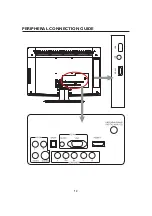
Page 14: ...12 PERIPHERAL CONNECTION GUIDE USB HDMI 2 ...
Page 33: ......
Page 34: ...R 01 0090506421A ...
Page 36: ......
Page 48: ...12 GUIDE DE CONNEXION DES PÉRIPHÉRIQUES USB HDMI 2 ...
Page 69: ......
Page 70: ...R ...
Page 72: ......
Page 84: ...12 GUÍA DE CONEXIÓN DE PERIFÉRICOS USB HDMI 2 ...
Page 105: ......
Page 106: ......
Page 107: ......
Page 108: ...R Q41G19MV672 3B ...

