


– 25 –
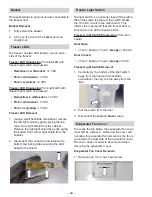
2.
:LWK D ÀDW EODGH VFUHZGULYHU SU\ RXW RQ HDFK
corner of the cover to allow the cover to be
pushed down over the tabs.
3. Once the cover is push down past the tabs,
WKH FRYHU FDQ EH SXOOHG Rႇ WKH HYDSRUDWRU
cover.
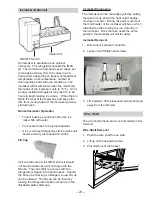
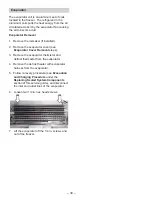
Evaporator Cover
Removing the evaporator cover is required
to access the evaporator fan and evaporator
components.
Evaporator Cover Removal
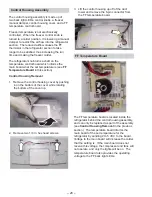
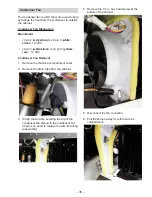
1. Remove icemaker if one is installed.
2. Remove one 1/4 in. hex head screw for the
evaporator fan connector cover.
3. Slide up the evaporator fan connector cover
and set the cover aside.
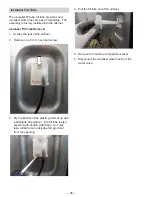
4. Disconnect the fan connector.
5. Remove two 1/4 in. hex head screws.
6. Pull the evaporator cover out of the freezer.
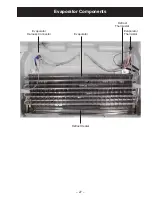
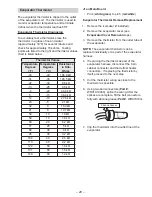
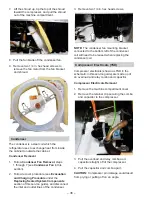
Evaporator Fan
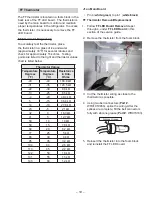
The main board operates the evaporator fan at a
target speed of 2,200 RPMs. The fan provides
530 IHHGEDFN WR WKH PDLQ ERDUG WR FRQ¿UP IDQ
speed.
Evaporator Fan Diagnosing
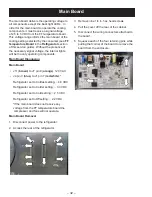
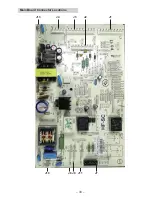
Main Board
:
J4 pin 2 (
red
/
yellow
) to J2 pin 3 (
white
/
silver
): 12 VDC (constant supply)
J2 pin 1 (
blue
) to J2 pin 3 (
white
/
silver
): ~5
VDC (speed voltage)
J2 pin 3 (
white
/
silver
) to J2 pin 4 (
yellow
/
black
): ~9 VDC (feedback voltage)
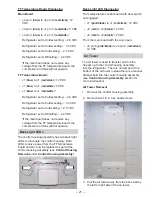
Evaporator Fan Removal
1. Follow steps 1 through 6 of
Evaporator
Cover Removal
under
Evaporator Cover
.
2. Remove two 1/4 in. hex head screws from the
backside of the evaporator cover.
3. Remove the fan blade from the motor shaft.
4. Disconnect the 6-pin connector.
Summary of Contents for GE ABE21D
Page 11: ... 11 LUÀRZ ...
Page 33: ... 33 Main Board Connector Locations J10 J8 J11 J13 J4 J3 J1 J2 J7 J9 ...
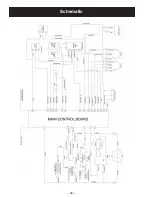
Page 40: ... 40 Schematic ...