


42
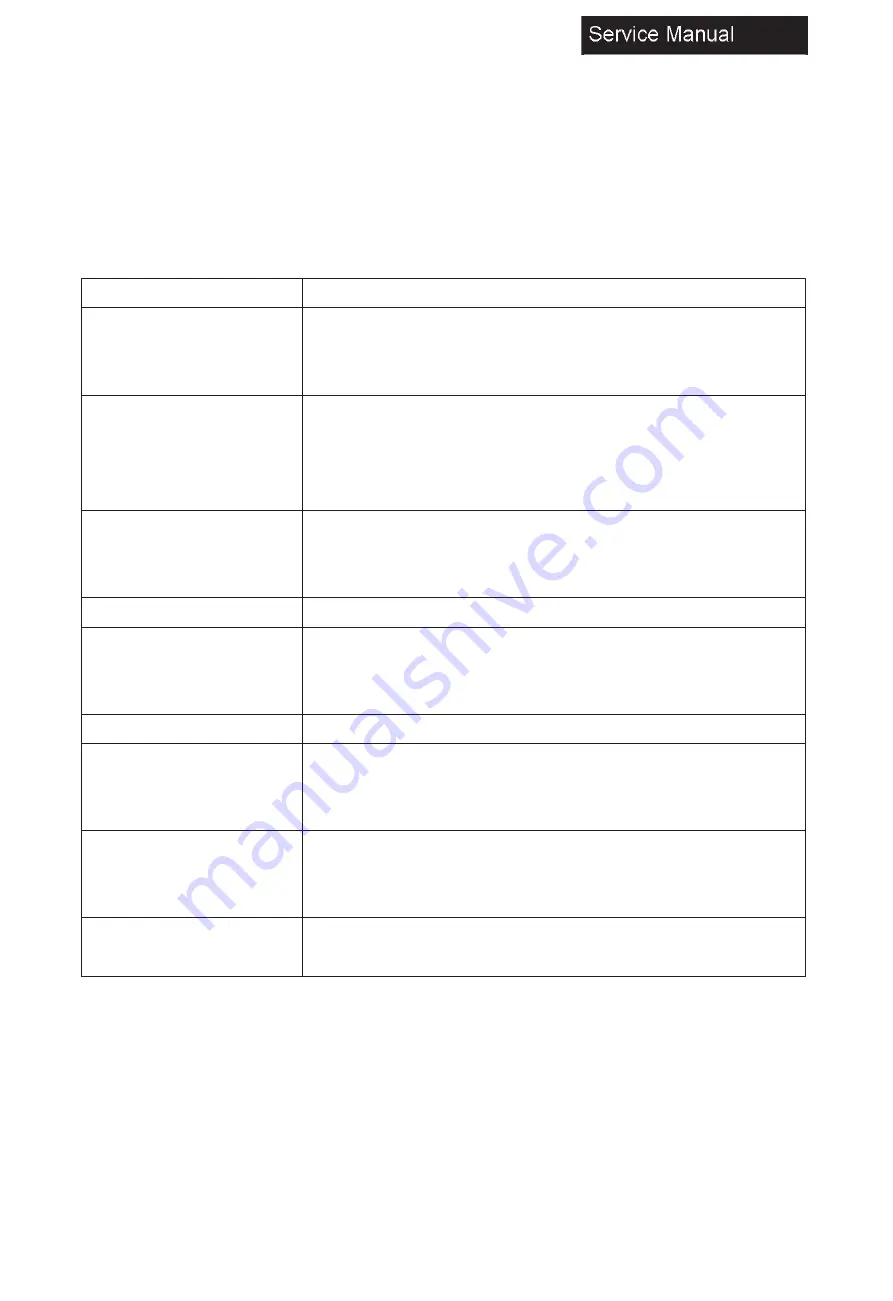
10. Troubleshooting 10-1 Simple Check
Please make these simple checks before calling service. These tips may save you time and money since charges for receiver
installation and adjustments of customer controls are not covered under your warranty.
Symptoms
Items to Check and Actions to Follow
No power
•
Check if the TV
’
s AC power cord is plugged into a working power
outlet.
•
Unplug the TV, and wait 60 seconds. Then reinsert plug
into the working power outlet and turn on the TV again.
No picture
•
Make sure correct input source is selected.
•
Check antenna
connection on the back of the TV to see if it is properly connected.
•
Possible broadcast station trouble. Try another channel.
•
Adjust
the picture contrast and brightness settings.
Good picture but no sound
•
Increase the volume level by pr button on the remote
control or VOL+ button on TV side control panel.
•
Press button on
the remote control to ensure mute is off.
Good sound but poor color
•
Adjust the contrast, color and brightness settings.
Poor picture
•
Poor picture quality may occur when an activated S-VHS camera
or camcorder is connected to your TV and the other peripheral at
the same time. Switch off one of the peripherals.
Snowy picture and noise
•
Check the antenna connection.
TV not responding to
remote control
•
Check whether the batteries are working. Replace if necessary.
•
Make sure the remote control batteries are installed correctly.
•
You can still use the control buttons on the side of your TV.
TV not working
•
Disconnect the TV from the power supply for 10 seconds, then
reconnect the TV. If the problem persists, contact authorised
service personnel for technical assistance.
No file displayed in USB
mode
•
Make sure you select correct media type.
•
Make sure the stored
files are in supported format.
Summary of Contents for 24E2000
Page 13: ...12 3 Remove all tapes on the cables 5 Disconnect the cables and remove them from the unit ...
Page 15: ...14 Manual 4 Accessories Remote Control 2 x AAA Batteries User Manual ...
Page 18: ...17 Connecting a PC VGA Supported timing ...
Page 19: ...18 Service Manual Connecting AV Equipment COMPONENT OUT ...
Page 21: ...20 Cable Sample Note The cables are not included in the package ...
Page 22: ...21 7 Operation Instructions 7 1 Side Control ...
Page 23: ...22 7 2 Rear Terminals Connector Descriptions Ser 9 P r e s s t o o p e n t h e ...
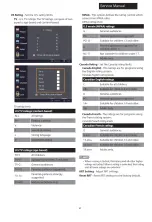
Page 24: ...23 t e l e t e x t C C 7 3 Using Remote Control ...
Page 25: ...24 8 Electrical Parts 8 1 System Block Diagram ...
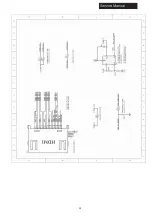
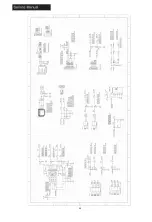
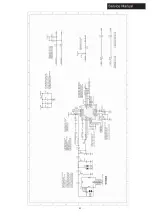
Page 26: ...25 8 2 Circuit Diagram ...
Page 27: ...26 ...
Page 28: ...27 ...
Page 29: ...28 ...
Page 30: ...29 ...
Page 31: ...30 ...
Page 32: ...31 2 2 0 ...
Page 34: ...33 9 Measurements and Adjustment 9 1 Operation Guide ...
Page 35: ...34 ...
Page 36: ...35 ...
Page 37: ...36 ...
Page 38: ...37 ...
Page 39: ...38 ...
Page 40: ...39 ...
Page 44: ...43 10 2 System Power Check ...
Page 45: ...44 10 3 No Sound No Picture ...
Page 46: ...45 10 4 Audio Problem ...


