


17
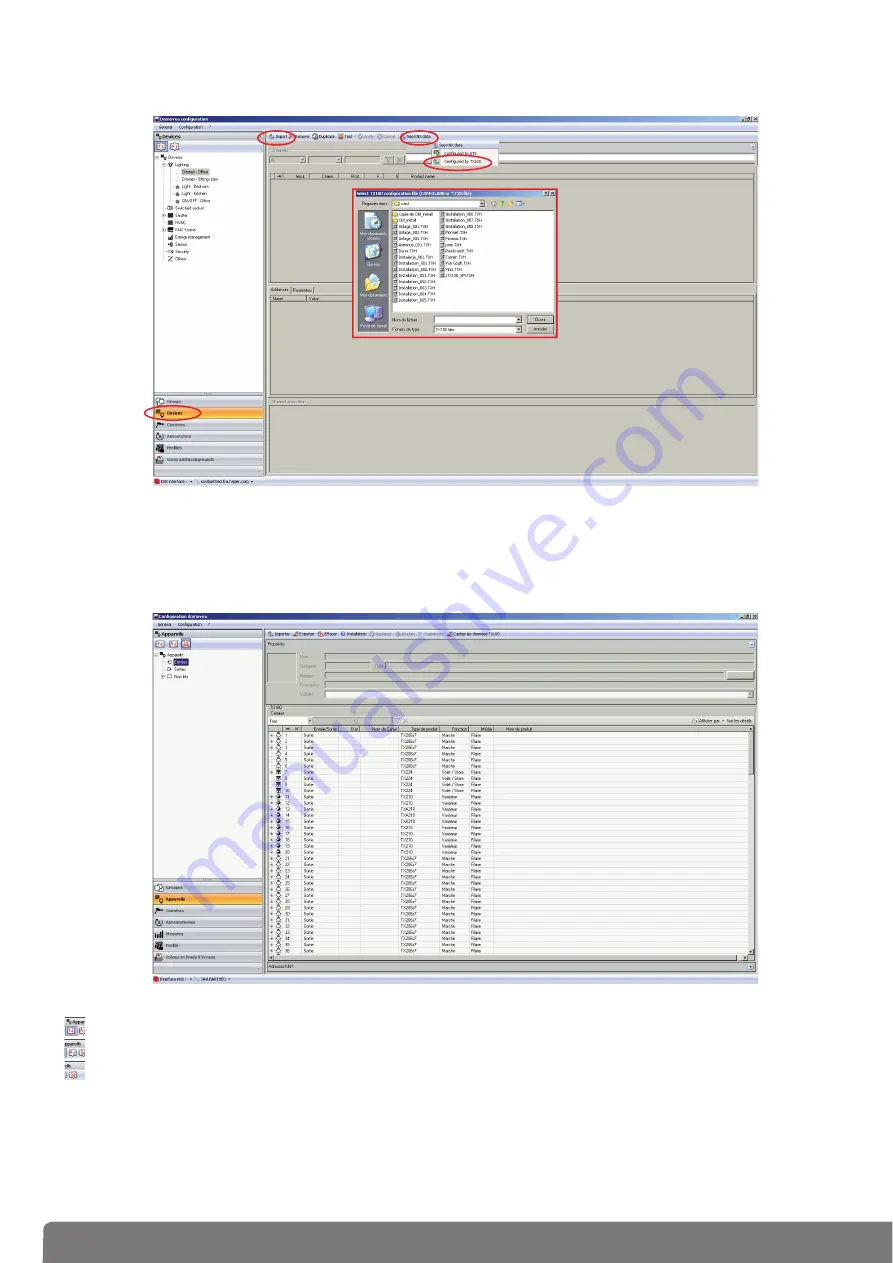
• Select
Devices
on the menu
(
1
), click on
See KNX data
(
2
) and choose
Configured by TX100
(
3
).
• Click Import
(
4
) then select the
txh
file of TX100 programming
(
5
).
• The installation (inputs or outputs or both) appears on the screen.
• If you select each device, you can check the group addresses given by the TX100 that will be used by
the domovea software to manage the KNX installation.
1
2
3
5
4
The tool bar of the Devices window allows to display all devices according to various criteria:
-
: Allows to sort the devices based on type (Light, shutter, scene, meter,...)
-
: Allows to sort the devices alphabetically
-
: Allows to sort the devices according to whether they are linked or not with the TX100 project
and according to TX100 inputs and outputs
You have 2 options available:
-
Associating the group addresses linked with TX100 installation's input or output of an existing
device in domovea configuration
-
Creating a new device in domovea configuration based on TX100 installation input or output


