background image

KIT PARTS LIST

Minor variations may sometimes be encountered in value

or appearance. These will not affect performance.

Part No.

Fuse Envelope

6

 Fuse, 

ampere

Fuse, 2 ampere

1 Fuse, 7 ampere, Slo-Blo
1 Additional fuse, 4 ampere, Slo-Blo

(International use only)

1
1

2
2

1

4
2

1

2

2

1

2

2
2

1

1
1
1

1
1

1

1

1

Chassis
Cover
Capacitor. 

10,000

 mfd, 75V

Bracket, round, for capacitor
Diode rectifier block
Feet, rubber
Fuse holder, round
Fuse clip, single
Fuse clip, dual
Input socket
Line cord, with plug

Output module assembly

(1 each, left & right)

Output terminal, black, with hardware
Output terminal, red, with hardware
Power switch
Strain relief, plastic
Terminal strip, 5 lug
Additional 2 lug terminal strip

(International use only)

Power transformer
Alternate transformer

MS149
MS152

CL121

HZ125

QDll1

HR149

XA013
XA012
XA014

XPO14

WA016

AH326

XKOll
XK012

SLlll

HR144
XK018

XK016
TA123

Hardware Envelope

1 Lug, solder type, internal tooth, #6

4 Lug, solder type, #lO
3 Lug, spade, l/4”

12 Nut, #4-40  KEP
11 Nut, #6-32 KEP

4 Nut, #l0-32 KEP
2 Nut, l/2”, for fuse holder

12 Screw, machine, #4  x 5/ 16”
10 Screw, machine, #6  x l/2”

4 Screw, machine, #l0 x l/2”
4 Screw, #l0 x l/4”, SEMS

16 Screw, sheet metal, #6  x l/2”

1 Screw, machine, #6  x 3/4”

4 Washer, flat, 7/8”
2 Washer, locking, internal tooth,

l/2” for fuse holder

2 Washer, rubber, l/2”,  for fuse holder

Small Parts Envelope

1 Capacitor, .0l mfd, disc (103M)
1 Capacitor, .005  mfd, disc (502M)
1 Capacitor, .39 mfd

(International use only)

Wire, white, #18
Wire, green, #18
Registration card

TA124

WS024 1 Diode
wso22 1 Label, serial number

LM016 1 Resistor, 

1

 megohm

- - o , *


Part No.

SF012
SF01 1
SF02 1

SF026

Part No.

HZ1 15
HZ1 16
xzo14

HKlll
HK112
HK113
HK118

HA1 13
HA1 16
HA1 19
HA1 18

HP1 18

HA1 15

HW114

HW116

HRll7

Part No.

CZ112
CZ113
CEl l7

QD115

LR015

RDl13

VIEWED FROM
COMPONENT

SIDE

Summary of Contents for DH-200

Page 1: ...SEMBLY CAUTION IF THE SPEAKER FUSES BLOW SOME DISTORTED SOUND CAN BE HEARD THEREFORE IF AMPLIFIER MALFUNCTIONS ALWAYS CHECK FOR BLOWN FUSES FIRST serial number in all communications THE DAVID HAFLER COMPANY 5910 Crescent Boulevard Pennsauken New Jersey 08109 ...

Page 2: ...e made a better choice The oversized power transformer and bridge rectifier the massive heat sinks the conservative operating levels of the MOSFET output devices all are evidence of the design efforts to achieve exceptional reliability simultaneously with state of the art sonics and specifications And this circuit is convertible to a high power monophonic amplifier with comparable stability and sp...

Page 3: ...l content such as oscillation Failing evidence of this the amplifier may have malfunctioned Because of the very large heat sinks it is highly unlikely that any normal signal will cause the amplifier to overheat Loudspeaker Fuse Selection The DH 220 power amplifier is supplied with 2 amp fuses in the speaker lines Experience has shown that since an overload must exist for a few seconds for a fuse t...

Page 4: ...s been internally modified for monophonic bridged operation the output is taken from the two red terminals only Then the black terminals are left unconnected Headphones are normally operated from the loudspeaker outputs but are usually connected through a junction box which provides switching from phones to speakers Such a box usually provides some added resistance to reduce the sensitivity of the...

Page 5: ...bond When cool check the con nection by wiggling the wire If in doubt or if the connection is not shiny re heat the joint Excess solder may be removed from a connection by heating it and allowing the solder to flow onto the iron which is then wiped on the sponge ALL SOLDER USED MUST BE ROSIN CORE Never use acid core solder or any separate flux in electronic work Silver solder is also not suitable ...

Page 6: ...lements is left to the builder Take the time to be accurate and neat and you can be sure that your completed amplifier will meet the performance of a factory assembled unit and can con tinue to perform properly for years to come Check your work and make sure the entire step has been completed before plac ing a check mark in the space provided and continuing on to the next step KEP nuts have been s...

Page 7: ...front The switch snaps into chassis hole PS from the outside 13 q Select the AC line cord and the plastic strain relief Separate the two conductors for 2 Cut 1 off one of the two leads and strip 1 4 of insulation from each lead Twist the strands tightly and tin each end Make a sharp V in the cord 81 2 from the longest cut end by bending it back on itself Install the relief with the small end neare...

Page 8: ...uter tabs while the wire does not protrude into the spade clamp area Tin the bare wire end Bend the shorter middle set of tabs tightly around the bare wire and then bend the longer tabs around the insulation Then flow solder into the joint around the bare wire keeping the solder away from the spade section 29 Prepare a 2 white wire Connect one end to FC lug 2 S Select another spade lug and solder ...

Page 9: ...dered You will be making con nections from the top side to holes 3 5 6 7 8 and 10 Make sure the proper connection point is clear at each of these If it is filled with solder running the iron along the underside will uncover the hole and it may be cleared with a wooden toothpick Now position the right module with the breaker at the front when the long bottom row of eyelets is next to the chassis wi...

Page 10: ...terminals and the ground lug should be brought together through most of their length 68 Check all your soldered connections especially those on the fuse clip lugs which are sometines difficult to solder to Clip off any excess bare wire which could short to adjacent lugs or the chassis Pay particular attention to the stranded wires from the transformer and line cord and check the power switch conne...

Page 11: ...lp you locate the source of a prob lem may be obtained by calling the Technical Services Depart ment at 609 662 6084 8 a m 4 30 p m E T It is helpful to know the serial number of the unit and the results of any tests you have performed SERVICING AN AMPLIFIER MODULE If you are certain that the problem is confined to one of the amplifier modules comprising the circuit board heat sink and output tran...

Page 12: ...uired when the multi voltage transformer is used This is supplied in kits which include the special transformer If the amplifier is operated with 200 to 240 volt tines the 7 amp line fuse which is supplied should be replaced with a 4 amp Slo Blo type fuse n VOLTAGE CHART measured with 120 volt line no signal with respect to the ground buss between the two capacitors in the power supply E B c E B c...

Page 13: ...3 XA012 XA014 XPO14 WA016 AH326 XKOll XK012 SLlll HR144 XK018 XK016 TA123 Hardware Envelope 1 Lug solder type internal tooth 6 4 Lug solder type lO 3 Lug spade l 4 12 Nut 4 40 KEP 11 Nut 6 32 KEP 4 Nut l0 32 KEP 2 Nut l 2 for fuse holder 12 Screw machine 4 x 5 16 10 Screw machine 6 x l 2 4 Screw machine l0 x l 2 4 Screw l0 x l 4 SEMS 16 Screw sheet metal 6 x l 2 1 Screw machine 6 x 3 4 4 Washer fl...

Page 14: ......

Page 15: ...36 RZo13 RMo21 RM013 RC023 RC053 RZOll RZOll RD114 RDl15 RC013 RW012 RW013 RM053 RDll7 RDI 17 RDll4 RDl14 RDI 13 CP115 CP134 CP135 CP136 CP136 CC125 CC125 CN113 CP133 CP134 CP135 CL122 CP135 CL122 CP135 CP135 CP133 CP135 CP135 CC125 C22 C23 C40 1 C402 C403 C404 C405 C406 C407 C408 Dl D2 D3 D4 D5 D6 D7 D8 D9 DlO Dll D12 D13 D14 D15 D16 D40 1 0 1 mfd lOOV Film 0 1 mfd lOOV Film OOl mfd 25OV Film 680...

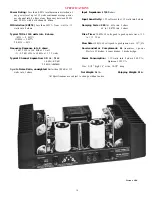
Page 16: ... IO kHz 0 007 20 kHz 0 012 Frequency Response into 8 ohms 3 dB 2 Hz to 160 kHz at 1 watt O 0 5 dB 6 Hz to 60 kHz at 1 15 watts Rise Time 10 kHz 60 volts peak to peak square wave 10 to 9 0 2 5 us Slew Rate 10 kHz 60 volts peak to peak square wave 30 VI s Semiconductor Complement 26 transistors 8 power Mosfets 29 diodes 4 zener diodes 1 diode bridge Typical Channel Separation 20 Hz 75 dB 1 kHz 85 dB...

Page 17: ......

Page 18: ......

Page 19: ......

Page 20: ...The amplifier circuit can safely accommodate lower impedance loads of course The conversion which takes less than an hour involves only changes to the input wiring and installation of the switch with its mounting bracket and one resistor These instructions assume familiarity with the usual kit building descriptions and reminders For more details in this regard see the con struction section of your...

Page 21: ...tal screws Select the switch and its 2 nuts lockwasher and indexing flat washer and the switch mounting bracket Install one nut all the way onto the switch collar and follow it with the indexing washer with its lugprojecting towards the handle lever Mount the switch on the bracket so that the lever points in the direc tion of the bracket flange and the indexing lug engages the locating hole in the...

Reviews: