User interface and navigation
Display overview
N O T I C E
Do not use writing tips of pens or pencils or other sharp objects to make selections on the screen or damage to
the screen will occur.
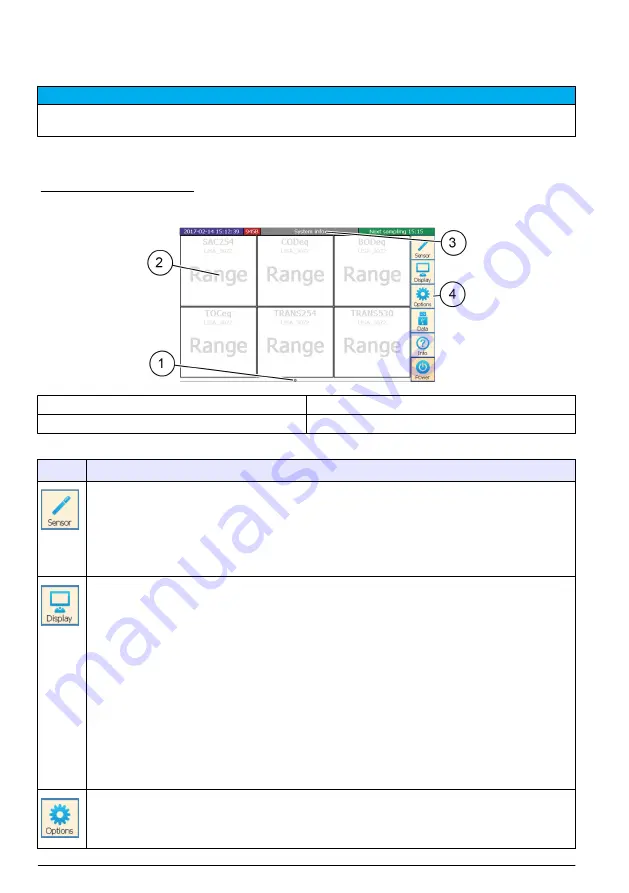
Use fingers or a touch screen pen to operate the touch screen of the CD500 controller. The main
screen and the control elements can be configured individually. Refer to
.
Figure 9 Display overview
1
Display of available pages
3
Menu page
2
Individually configurable display area
4
Navigation bar (refer to
Table 7 Navigation bar description
Icon
Description
Shows the four COM ports, including the connected sensors and parameters.
• COM ports have a turquoise label
• Sensors have a blue label
• Parameters have a red label
Push
Scan for Sensors
to show the connected sensors.
Shows and makes pages. Select the pages with the arrow keys. To make a new page, do the steps
that follow:
1.
Push
New page
.
2.
Select a page layout.
3.
Select the type of display.
• Current value
• Time variation curve
• Spectrum
4.
Select the sensor and the parameter.
5.
Push
OK
to confirm.
6.
Push
Rename
to enter a page name.
7.
Push
Delete
to delete the page.
8.
Use the arrow keys to change the sequence of the pages.
Sets the general settings, measurements and cleaning intervals. Refer to
on page 18.
Push
Service mode
to stop measurement and cleaning. All values and analog outputs are held the
last measured value until the Service mode is exit.
16
English


