


3-8
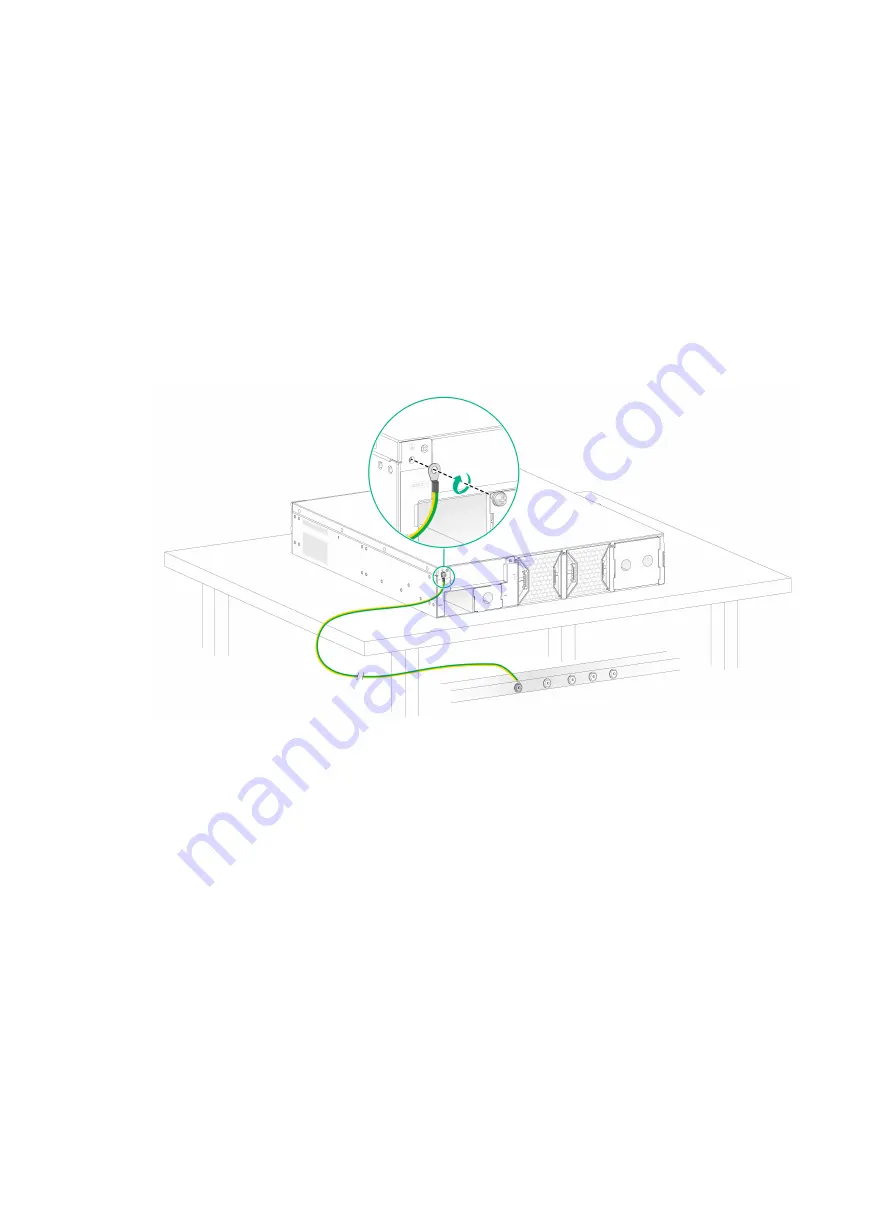
Grounding the device installed on a workbench
If a grounding strip is available at the installation site, you can connect the grounding cable of the
device to the grounding strip.
To ground the device installed on a workbench by using a grounding strip:
1.
Use a Phillips screwdriver to remove the grounding screw from the device chassis.
2.
Attach the grounding screw to the ring terminal of the grounding cable.
3.
Use a Phillips screwdriver to fasten the grounding screw into the grounding hole on the device.
4.
Remove the hex nut from a grounding terminal on the grounding strip.
5.
Use the needle-nose pliers to bend a hook at the other end of the grounding cable. Attach the
hook to the grounding post, and secure the hook with the nut.
Figure3-12 Grounding the device mounted on a workbench
Grounding the device installed in a rack
If the device is installed in a rack, you can connect the grounding cable of the device to a grounding
terminal on the rack.
To ground the device by using a grounding terminal on the rack:
1.
Make sure the rack is reliably grounded.
2.
Remove the grounding screw from the device chassis.
3.
Attach the grounding screw to the ring terminal of the grounding cable.
4.
Use a Phillips screwdriver to fasten the grounding screw into the grounding hole on the device.
5.
Remove the nut from a grounding terminal on the rack.
6.
Use a needle-nose pliers to bend a hook at the other end of the grounding cable. Attach the
hook to the grounding post, and secure the hook with the nut.