background image

17

GB8.0 EXERCISE BIKE

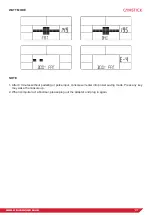
WATT MODE

NOTE

1. After 4 minutes without pedaling or pulse input, console will enter into power saving mode. Press any key  

    may wake the console up.

2. When computer act abnormal, please plug out the adaptor and plug in again.

Summary of Contents for GB8.0

Page 1: ...USER MANUAL IMPORTANT Read all instructions carefully before using this product Retain this owner s manual for future reference The specifications of this product may vary from this photo subject to c...

Page 2: ...tter look better and enjoy life to its fullest TABLE OF CONTENT 1 SAFETY INSTRUCTIONS 3 2 PARTS LIST 4 3 HARDWARE PACKING LIST 5 4 EXPLODED DRAWING 6 5 ASSEMBLY INSTRUCTION 7 6 COMPUTER OPERATION INST...

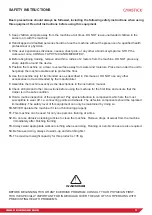
Page 3: ...not recommended by the manufacturer 7 Assemble the machine exactly as the descriptions in the instruction manual 8 Check all bolts and other connections before using the machine for the first time an...

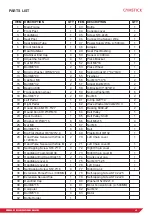
Page 4: ...20 Right Pedal 1 62 Wave Washer 20x 24 0 3 1 21 Round Knob M16 1 5 27 1 63 Bearing 6004 2Z 2 22 Round Knob 19 56 M10 1 64 Belt Pulley 1 23 Seat Cushion 1 65 Belt Pulley Shaft 1 24 Washer 16 8 1 5 8 66...

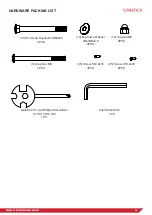
Page 5: ...LIST 13 Pan Head Square Bolt M8x90 2PCS 14 Cap Nut M8 2PCS Multi Hex Tool wit Phillips Screwdriver S10 S13 S14 S15 1 PC Allen Wrench S6 1PC 12 Big Curve Washer 8x 20x2 0 4PCS 14 Cap Nut M8 2PCS 35 Scr...

Page 6: ...6 GB8 0 EXERCISE BIKE EXPLODED DRAWING...

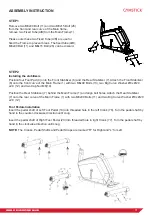
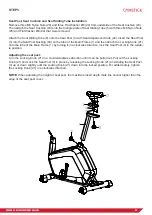
Page 7: ...Frame 1 with two M8x90 Bolts 13 two Big Curve Washer 8x 20 x2 0 12 and two Cap Nut M8 14 Position the Rear Stabilizer 7 behind the Main Frame 1 and align bolt holes Attach the Rear Stabilizer 7 onto...

Page 8: ...Frame 1 and then attach the Locking Knob 21 onto the tube of the Main Frame 1 by turning it in a clockwise direction lock the Seat Post 4 in the suitab le position Adjusting the seat post Turn the Loc...

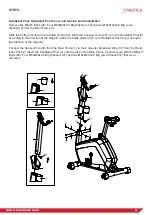
Page 9: ...cover 44 up to the handlebar Post 2 according to the direction of the diagram Slide the bottle holder 42 up to Handlebar Post 2 according to the direction of the diagram Connect the Sensor Wire 46 fr...

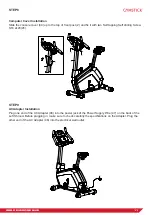
Page 10: ...d handlebar cover B 34 onto the handlebar 3 with three screw ST2 9x16 35 STEP 6 Computer Installation Remove four M5x10 Bolts 41 from the Computer 40 Attach the Computer 40 onto the top end of the Fro...

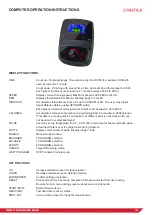
Page 11: ...g Self drilling Screw ST4 2x20 45 STEP 8 AC Adapter Installation Plug one end of the AC Adapter 48 into the power jack of the Power Supply Wire 47 on the back of the Left Shroud Before plugging in mak...

Page 12: ...mum 9999 calories This data is a rough guide for comparison of different exercise sessions which can not be used in medical treatment PULSE User may set up target pulse from 0 30 to 230 and computer b...

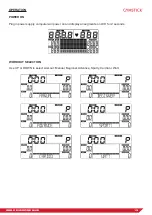
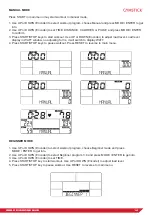
Page 13: ...ISE BIKE OPERATION POWER ON Plug in power supply computer will power on and display all segments on LCD for 2 seconds WORKOUT SELECTION Use UP or DOWN to select workout Manual Beginner Advance Sporty...

Page 14: ...vel Load level display in WATT window no adjusting for 3s it will switch to display WATT 4 Press START STOP keys to pause workout Press RESET to reverse to main menu BEGINNER MODE 1 Use UP or DOWN Enc...

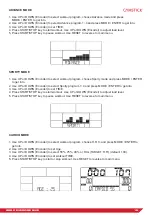
Page 15: ...am choose Sporty mode and press MODE ENTER to get into 2 Use UP or DOWN Encoder to select Sporty program 1 4 and press MODE ENTER to get into 3 Use UP or DOWN Encoder to set TIME 4 Press START STOP ke...

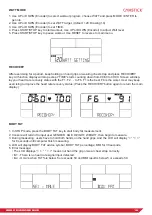
Page 16: ...our heart rate recovery status with the F1 F2 to F6 F1 is the best F6 is the worst User may keep exercising to improve the heart rate recovery status Press the RECOVERY button again to return the main...

Page 17: ...E WATT MODE NOTE 1 After 4 minutes without pedaling or pulse input console will enter into power saving mode Press any key may wake the console up 2 When computer act abnormal please plug out the adap...

Page 18: ...here is no display on the computer console 1 Remove the computer console and verify the wires that come from the computer console are properly connected to the wires that come from the handlebar post...

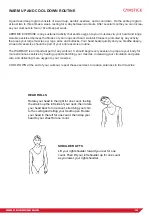
Page 19: ...ld be part of your entire exercise routine The WARM UP is an important part of any workout It should begin every session to prepare your body for more strenuous exercise by heating up and stretching y...

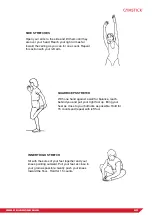
Page 20: ...ft arm QUADRICEPS STRETCH With one hand against a wall for balance reach behind you and pull your right foot up Bring your heel as close to your buttocks as possible Hold for 15 counts and repeat with...

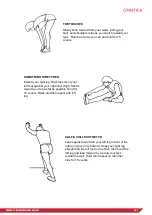
Page 21: ...STRETCH Lean against a wall with your left leg in front of the right and your arms forward Keep your right leg straight and the left foot on the floor then bend the left leg and lean forward by moving...

Page 22: ...following parts as far as included in the scope of delivery frame electronic devices wheels foot straps and pedals The guarantee does not cover Damage effected by outer force Intervention by unauthor...

Reviews: