- 7 -
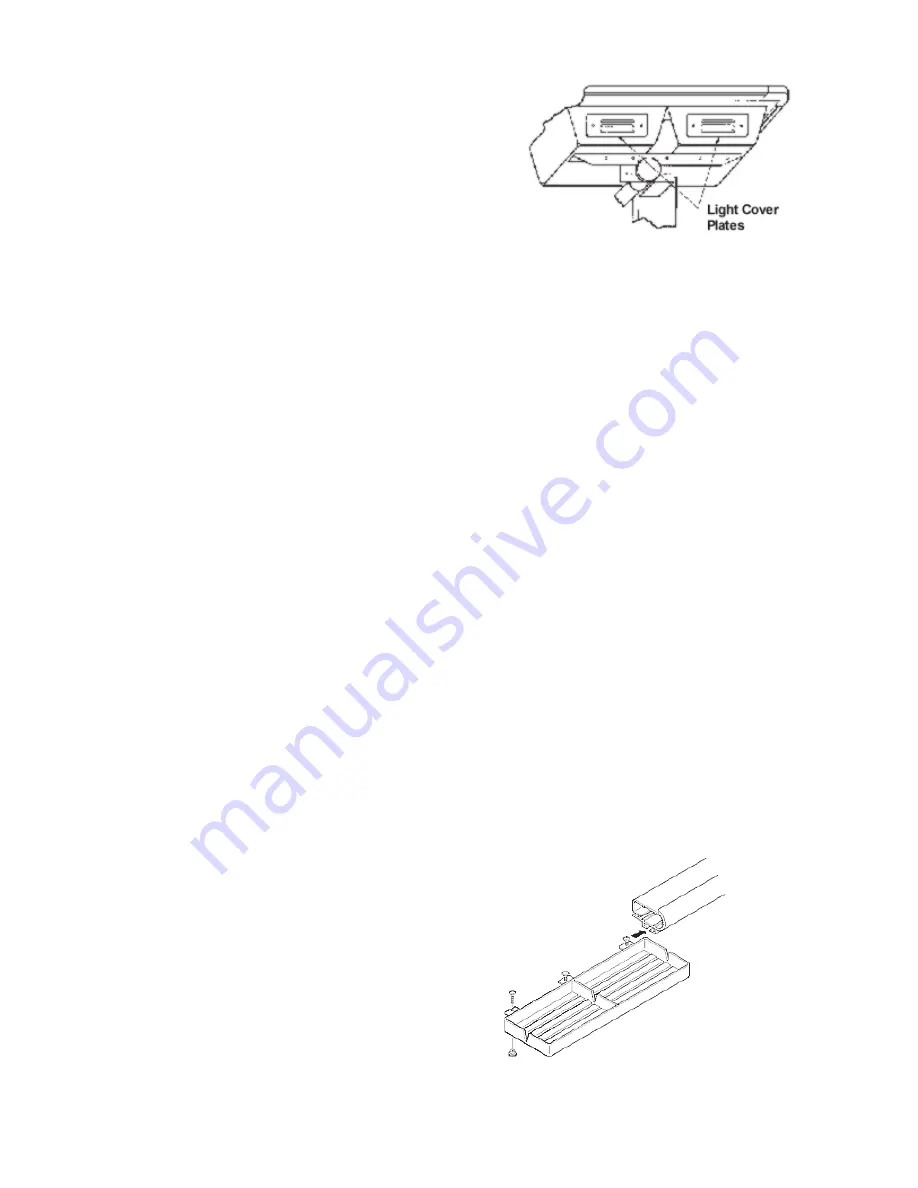
4. Install the light bulbs (backlit tablets only)
a
Turn the power switches off and remove the
light cover plates from the light pan below the
tablet surface as shown.
b
Slide a bulb through the light pan opening, then
insert the prongs into the far socket.
c
Insert the remaining prongs into the near
socket.
d
Twist the bulb approximately 90° until the
prongs seat.
e
After all bulbs have been installed, reinstall the
light cover plates.
f
Using the long power cord supplied, connect the
power plug to a wall outlet then connect the free
end to the light pan.
WARNING:
Do not alter the factory-defined voltage of your tablet. If your voltage requirements change, contact
Technical Support at 480-443-2214 in the U.S. and Canada, or your local GTCO CalComp office outside the U.S. and
Canada.
If you are using a cordless pointing tool, turn it on by pressing any button on the tool. The power light will glow
steadily if the pointing tool is inside the drawing area of the tablet. If the pointing tool is outside the drawing area,
the power light will blink.
5. Turn on your computer and tablet.
The tablet power switch is located at the rear of the tablet on small format models. On large format models, the
switch is located either 1) at the rear of the tablet, or 2) on the left side, near the bottom of the tablet. The power
light will turn on.
Backlit tablets
The tablet and light pan power up separately. The tablet power switch is found on the lower left side of the tablet.
The light pan power switch is located on the light pan below the lower right corner of the tablet.
Backlit tablets are available with a variable intensity option. This option allows you to control the brightness level
of the tablet lights through a dimmer switch that is located on the light pan below the lower right corner of the
tablet.
Note:
Variable intensity backlit tablets are for 120V/60Hz operation only.
6. Attach the pen holder (optional)
Pens come with a holder that you can mount to your desk, monitor or anywhere that’s convenient. Remove the
backing to the adhesive strip on the pen holder then firmly press the adhesive strip to any surface.
7. Mount the accessory tray (optional for large
format)
The large format tablets come with an accessory tray
that you can mount at any position around the tablet. To
mount the accessory tray:
a
Insert the carriage bolts provided into the three tabs
on the side of the tray as shown.
b
Loosely attach the black knobs to the bottom of the
carriage bolts.
c
Slide the bolts into one of the grooves on the underside of the tablet.
d
Position the tray then tighten the knobs securely.


