


-20-
G1023S/G1023S110 Heavy-Duty 10'' Table Saw
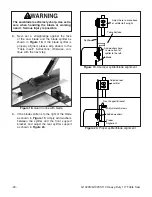
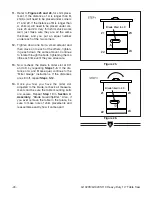
4. If the blade splitter is to the right of the blade
as shown in
Figure 19, simply add washers
between the splitter and the front support
bracket, and adjust the rear splitter support
as shown in
Figure 20.
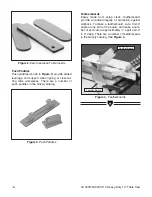
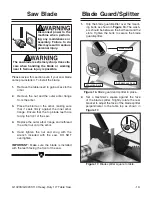
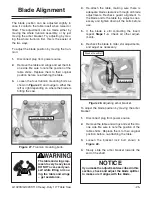
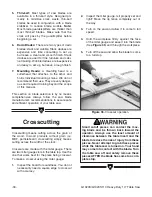
3. Next, set a straightedge against the face
of the saw blade and the blade splitter as
shown in
Figure 18. If the blade splitter is
properly aligned, please skip ahead to the
“Table Insert” instructions; otherwise, con-
tinue with the next step.
Figure 18. Guard in line with blade.
Figure 19. Improper splitter/blade alignment.
Add washers here
to move front of
splitter to the left.
Adjust here to move back
of splitter left or right.
Blade
Splitter
Table Surface
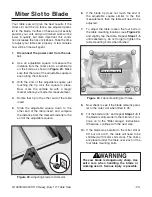
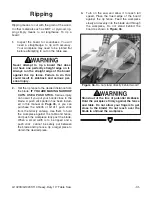
The saw blade is extremely sharp. Use extra
care when handling the blade or working
near it. Serious injury is possible.
Figure 20. Proper splitter/blade alignment.
Adjusted rear
splitter
Added washers
Proper
Alignment
Front Support Bracket
Adjustment Screws
Summary of Contents for G1023S
Page 39: ...G1023S G1023S110 Heavy Duty 10 Table Saw 37 1 1 2...
Page 40: ...38 G1023S G1023S110 Heavy Duty 10 Table Saw...
Page 51: ......
Page 52: ......