


G1023S/G1023S110 Heavy-Duty 10'' Table Saw
-19-
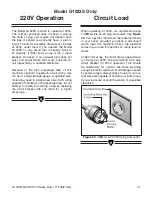
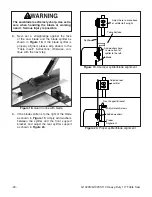
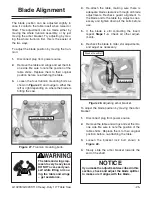
2. Set a machinist’s square against the face
of the blade splitter. Slightly rotate the rear
bracket to adjust the face of the blade splitter
perpendicular to the table top as shown in
Figure 17.
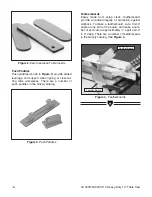
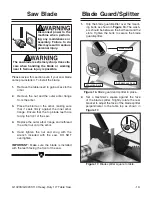
Figure 16. Blade guard and splitter in place.
Figure 17. Blade splitter square to table.
Blade Guard/Splitter
1. Slip the blade guard/splitter over the mount-
ing bolts as shown in
Figure 16. The wash-
ers should be between the bolt head and the
slots. Tighten the bolts to secure the blade
guard/splitter.
Anti-kickback Pawl
Blade Guard
Saw Blade
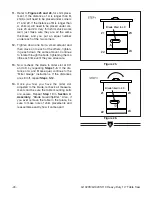
Please review this section even if your saw blade
came pre-installed. To install the blade:
1.
Remove the table insert to gain access to the
arbor.
2.
Remove the nut and the outer arbor flange
from the arbor.
3. Place the blade on the arbor, making sure
that it seats firmly against the inner arbor
flange. Ensure that the top blade teeth are
facing the front of the saw.
4. Replace the outer arbor flange and rethread
the arbor nut onto the arbor.
5. Hand tighten the nut and snug with the
wrench included with the saw. DO NOT
overtighten.
IMPORTANT: Make sure the blade is installed
with the teeth facing the front of the saw.
The saw blade is extremely sharp. Use extra
care when handling the blade or working
near it. Serious injury is possible.
Mounting Bolts
Disconnect power to the
machine when perform-
ing any maintenance or
assembly. Failure to do
this may result in serious
personal injury.
Summary of Contents for G1023S
Page 39: ...G1023S G1023S110 Heavy Duty 10 Table Saw 37 1 1 2...
Page 40: ...38 G1023S G1023S110 Heavy Duty 10 Table Saw...
Page 51: ......
Page 52: ......