g0679 stroke/Edge sander
-25-
2.
slide the workstop up as far as it will go. it will
extend approximately
3
⁄
8
" above the surface
of the table, providing a lip for the workpiece
to rest against during use.
3.
to lower the table workstop, loosen the flange
bolts that hold the workstop to the table, lower
the work stop so that it is below the surface
of the table, then tighten the flange bolts to
prevent them from rattling loose during use.
Auxiliary Workstops
1.
loosen the workstop knobs, rotate the work-
stops so the knob is facing down, then posi-
tion the workstops in the location needed to
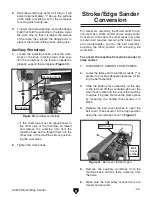
properly support the workpiece (
figure 40
).
figure 40.
Auxiliary workstops.
—if the workstops must be repositioned to
the other side of the machine, un-thread
and remove the workstop rods from the
machine base and re-thread them into the
other side of the machine before position-
ing the workstops.
2.
tighten the work knobs.
Workstops
Workstop rods
Stroke/Edge Sander
conversion
For maximum versatility, the Model g0679 func-
tions both as a stroke sander and an edge sander.
Conversion from one to the other takes only a few
minutes and requires removing the platen press
and counterweight, pivoting the belt assembly,
adjusting the table position, and relocating the
workstops.
To convert the machine from stroke sander to
edge sander:
1.
disConnECt sandEr FroM poWEr!
2.
lower the table until the indicator reads 7" or
greater to provide adequate clearance for tilt-
ing the belt assembly.
3.
slide the platen press assembly all the way
to the left and lift the counterweight over the
small hook located on the rear of the machine
to secure it in place. remove the platen press
by loosening the handle that secures it in
place.
4.
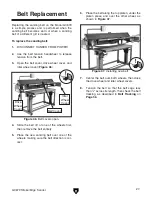
release the belt cover latches to open the
belt cover, then secure it in the open position
using the two latches shown in
figure 41
.
figure 41.
Belt cover latched open.
5.
remove the auxiliary workstops from the
machine base and the table workstop from
the table.
6.
Make sure the belt pulley access doors are
closed and secured.
Belt Cover
Belt
Cover
latches
Summary of Contents for G0679
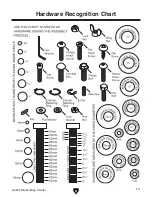
Page 15: ...G0679 Stroke Edge Sander 13 Hardware Recognition Chart...
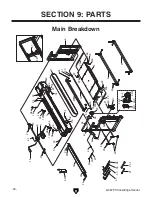
Page 42: ...40 G0679 Stroke Edge Sander Main Breakdown SECTION 9 PARTS...
Page 44: ...42 G0679 Stroke Edge Sander Belt Idler Wheel Assembly Breakdown...
Page 47: ...G0679 Stroke Edge Sander 45 Right Upright Assembly Breakdown...
Page 49: ...G0679 Stroke Edge Sander 47 Left Upright Assembly Breakdown...


