background image

21

GB

In order to get the most out of your 

barbecue, you can � nd plenty of good 

barbecuing tips and tricks to enrich your 

barbecuing experience on the internet and 

in books.

NOTE:

 Parts of the barbecue become very 

hot when in use. Keep children at a safe 

distance from the barbecue. Do not move 

the barbecue whilst it is lit or hot. Never use 

it indoors.
The maximum temperature of the barbecue 

may be reduced if it is positioned in a very 

windy location, or if you barbecue in the 

winter, when it may be both cold and windy.
Stainless steel, aluminium and heatproof 

paint are available in many diff erent grades. 

Common to them all is that the surroundings 

and use aff ect the metal in the long term, 

resulting in colour changes, peeling, etc.
Stainless steel does not mean that the metal 

cannot rust, but is more an indication of how 

fast the metal rusts. Rust and peeling that 

occur with time due to use and being left 

outside are not covered by the warranty.

WARNING! 

Keep children and pets at a safe 

distance from the barbecue.
Position the gas hose so that it does not 

come into contact with hot parts of the 

barbecue and keep it straight. 
Only use gas hoses approved by the relevant 

national authorities. The gas hose must be a 

maximum of 150 cm long and must be � tted 

with an approved regulator.
Check regularly that the gas hose is 

not cracked or crumbling and replace if 

necessary.
The gas barbecue is approved for a 5 kg 

gas bottle, which must stand under the 

barbecue. Larger gas bottles must be placed 

outside the barbecue.

The gas bottle must be changed outside at 

a safe distance from naked � ames and other 

sources of ignition.
If you discover a leak, turn off  the gas supply 

at the regulator immediately and avoid 

naked � ames and other sources of ignition. 

Wait a few minutes until the area has aired.
Carry out a leak test when you connect a new 

gas bottle or if the barbecue has not been 

used for a prolonged period. Do not carry out 

the leak test using a naked � ame! See ‘Leak 

test’.
Turn off  the gas supply using the regulator 

after use.
Do not attempt to modify the barbecue, 

including the regulator and the burners. Do 

not try to open parts that have been sealed 

at the factory.

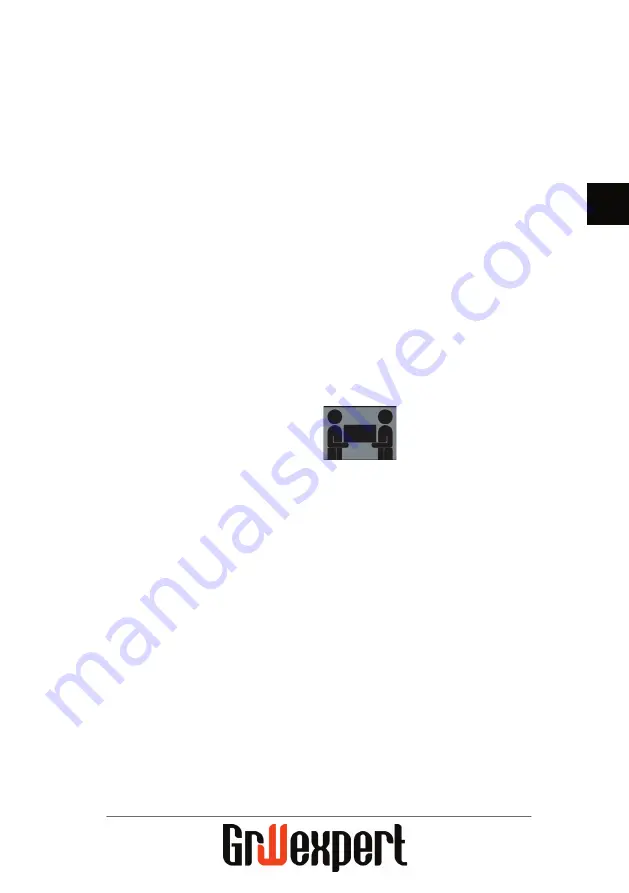
Assembly

Please refer to the illustrations 

at the back of the user 

instructions. It takes 2 people 

to assemble the barbecue.

Before assembly, you must unpack all 

parts (including those inside the � re box 

and lay them out in a clear manner. Where 

appropriate, place them on the packaging 

or a rug so that the barbecue and its parts 

do not get scratched while you assemble the 

barbecue.
Wait until the end to tighten all screws, 

bolts and nuts. All the barbecue parts are 

manufactured very accurately relative to 

� t, and if you tighten something slightly 

askew or too tight, it can aff ect the assembly 

elsewhere on the barbecue.

Summary of Contents for 90774

Page 1: ...DK NO SE GB Brugsanvisning Bruksanvisning Bruksanvisning Instruction manual Brugsanvisning Model 90774...

Page 2: ...al bent Grillen m ikke uds ttes for nedb r og skal st i l under brug og opbevaring Grillen skal placeres p et plant og stabilt underlag inden den t ndes Underlaget skal v re ikke br ndbart f eks udend...

Page 3: ...ller m r og udskift den om n dvendigt Gasgrillen er godkendt til en 5 kg gas aske der m st under grillen St rre gas asker skal placeres uden for gasgrillen Udskiftning af gas aske skal ske udend rs p...

Page 4: ...j derefter alle betjeningsknapper p apparatet med uret til positionen PUSH Advarsel Hvis en br nder ikke kan t ndes skal betjeningsknappen drejes til slukket position med uret og regulatoren skal lukk...

Page 5: ...n der g ild i fedt og madrester hvilket kan g re skade p grillen og omgivelser VI ANBEFALER DIG P DET KRAFTIGESTE AT ANSKAFFE ET OVERTR K TIL GRILLEN Det vil beskytte grillen i det daglige mod vejr og...

Page 6: ...ten p gas asken n r den er frakoblet Gas asken skal opbevares udend rs i oprejst stilling og utilg ngeligt for b rn Gas asken m aldrig opbevares p steder hvor temperaturen kan overstige 50 C Opbevar i...

Page 7: ...servedelene p vores webportal www schou com Hvis du ikke kan nde de n dvendige reservedele er du velkommen til at kontakte vores servicecenter Servicecenter Bem rk Produktets modelnummer skal altid op...

Page 8: ...av veggens areal pent Grillen m ikke utsettes for nedb r og skal st i le under bruk og oppbevaring Grillen skal plasseres p et plant og stabilt underlag f r den tas i bruk Underlaget m v re ikke bren...

Page 9: ...ut om n dvendig Gassgrillen er godkjent for en 5 kg gass aske som m st under grillen St rre gass asker m plasseres utenfor gassgrillen Gass asken m skiftes utend rs p trygg avstand fra pen amme og an...

Page 10: ...pr ver tenne p nytt ved f lge tenningsprosedyren Advarsel V r oppmerksom p at deler av grillens h ndtak blir varme under bruk Rengj ring VIKTIG Matrester og fett kan lett bli antent hvis de utsettes...

Page 11: ...den holder seg pen lengre Rengj ring av brennerne Hullene i brennerne kan bli blokkert av insekter som bygger rede i dem og de b r derfor rengj res regelmessig Steng regulatoren og ta den av gass aske...

Page 12: ...eshetten p gass asken n r den er frakoblet Gass asken skal oppbevares utend rs i st ende stilling og utenfor barns rekkevidde Gass asken m ikke oppbevares p steder der temperaturen kan overstige 50 C...

Page 13: ...edelene p v r nettportal www schou com Hvis du ikke nner de n dvendige reservedelene er det bare kontakte v rt servicesenter Produsert i Kina Produsent jem x A S Skomagervej 12 DK 7100 Vejle 2018 Scho...

Page 14: ...nas areal ppen Grillen f r inte uts ttas f r nederb rd och b r st i l under anv ndning och f rvaring Grillen ska placeras p ett plant och stabilt underlag innan den t nds Underlaget ska vara icke br n...

Page 15: ...te r sprucken eller spr d och byt ut den om det beh vs Gasolgrillen r godk nd f r en gasol aska p 5 kg som m ste st under grillen St rre gasol askor ska placeras utanf r gasolgrillen Byte av gasol ask...

Page 16: ...f rs ker t nda igen genom att f lja t ndproceduren Varning Var uppm rksam p att delar av grillens handtag blir varma under anv ndning Reng ring VIKTIGT Fett och matrester kan b rja brinna om de uts tt...

Page 17: ...nder l ngre tid Reng ring av br nnarna H len i br nnarna kan bli igensatta av insekter som bygger bo i dem och d rf r b r de reng ras regelbundet St ng regulatorn och lossa den fr n gasol askan Lyft b...

Page 18: ...n r den r fr nkopplad Gasol askan ska f rvaras utomhus i uppr tt l ge och utom r ckh ll f r barn gasol askan f r aldrig f rvaras p platser d r temperaturen kan verstiga 50 C F rvara inte gasol askan i...

Page 19: ...a p v r webbsida www schou com Om du inte hittar de reservdelar som kr vs r du v lkommen att kontakta v rt servicecenter Tillverkad i Folkrepubliken Kina PRC Tillverkare jem x A S Skomagervej 12 DK 71...

Page 20: ...east 25 of the wall area open The barbecue must not be exposed to precipitation and must be protected from the elements during use and storage The barbecue should be placed on a rm level surface befor...

Page 21: ...regularly that the gas hose is not cracked or crumbling and replace if necessary The gas barbecue is approved for a 5 kg gas bottle which must stand under the barbecue Larger gas bottles must be plac...

Page 22: ...d Wait ve minutes before you try to light it again by following the ignition procedure Warning Please be aware that parts of the barbecue handle can get hot during use Cleaning IMPORTANT Food residues...

Page 23: ...p it looking attractive for longer Cleaning the burners The holes in the burners can get blocked by insects that build nests in them and so they should be cleaned regularly Turn o the regulator and de...

Page 24: ...on the gas bottle once it has been disconnected Gas bottles must be stored outdoors in an upright position and out of reach of children Do not store gas bottles in locations where the temperature may...

Page 25: ...f can replace and thus extend the life of your grill You can nd and buy spare parts through our portal www schou com If you cannot nd the necessary spare parts you are welcome to contact our service c...

Page 26: ...26...

Page 27: ...27 NO SE GB DK...

Page 28: ...28...

Page 29: ...g av hjul och fot Skruva ihop med skruvar A och muttrar K FI Yhdist jalat 30 19 ja poikittaistuki 20 kiinnikkeill 21 25 Varmista ett kiinnikkeet 25 ja poikittaistuki 20 on kiinnitetty oikein jotta py...

Page 30: ...och dra ner dem ver det stativ som utg r framsidan FI Kiinnit py r t 18 molempiin yhdistettyihin osiin ruuveilla 17 muttereilla E ja aluslevyill D piirroksessa n kyv ll tavalla Asenna jalka 24 ruuvil...

Page 31: ...Montera bottenplattan 22 p stativet med skruvar C FI Kokoa sivulevyt 33 27 ja 27 28 ruuveilla C Kaasupullon kiinnike 16 asennetaan samalle puolelle kuin pohjalevy 22 Varmista ett puoli 28 jossa on au...

Page 32: ...dan 33 27 och 27 28 och bottenplattan 22 med skruvar C enligt bilden FI Kiinnit rungon toinen osa vastakkaisille puolille 33 27 ja 27 28 sek pohjalevyyn 22 ruuveilla C piirustuksessa esitetyll tavalla...

Page 33: ...skruvar H p det ihopmonterade stativet Ta hj lp av en annan person f r denna uppgift s att inte delarna kommer till skada FI Asenna grilliosa 11 koottuun runkoon ruuveilla H Toimi varovaisesti jotta o...

Page 34: ...uvar 4 och muttrar I Ta hj lp av en annan person f r denna uppgift s att inte delarna kommer till skada FI Asenna kansi ruuveilla 4 ja mutterilla I Toimi varovaisesti jotta osat eiv t vaurioidu GB The...

Page 35: ...a h llaren 23 f r gasol askan med skruvar C Montera t ckpl ten 15 med skruvar C FI Asenna tippakaukalon 31 pidin 32 grilliosan alle ruuveilla J Kiinnit kaasupullon pidin 23 ruuveilla C Asenna peitelev...

Page 36: ...h rt eftersom den kan f rst ras Montera de f llbara sidoborden 12 med skruvar G FI Kiinnit kahvan 10 molemmat p dyt Asenna l mp suojus 9 kannen takaosaan kiinnitt m ll ruuveilla F takaap in Aseta v li...

Page 37: ...ruvar C enligt bilden Skjut f rsiktigt p knapparna 14 i f rh llande till passform FI Asenna grillausv lineiden pitimet 13 sivup ytiin ruuveilla C piirustuksessa esitetyll tavalla Paina painikkeet 14 v...

Page 38: ...Placera f rsiktigt amh mmarna i grillen 1 ver gasolbr nnarna och gallren 2 3 FI Aseta l mm njakolevyt grilliin 1 varovasti kaasupoltinten ja ritil iden 2 3 p lle GB Carefully place the ame shields 1...

Page 39: ...plassering av en gass aske p maks 5 kg SE Observera Grillen r godk nd f r placering av gasol aska p max 5 kg FI Grilliin saa asettaa enint n 5 kg n kaasupullon GB Note that the barbecue is approved fo...

Page 40: ...Grillen er nu klar til brug NO Grillen er n klar til bruk SE Grillen r nu f rdig att anv ndas FI Grilli on nyt valmis k ytt varten GB The barbecue is now ready for use DE Der Grill kann jetzt benutzt...

Reviews: