❏
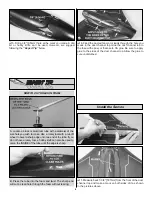
2. Measure 6" [152mm] from the front of the duct channel
top and stick the hook side of the hook and loop material to
the channel top.
❏
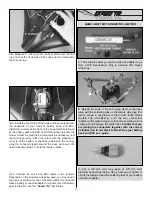
3. Install the “loop” side of the hook and loop material onto
the underside of your receiver, battery pack, and ESC.
Install the receiver at the front of the hook material followed
by the battery pack and ESC. Test fit the canopy top onto the
model. Adjust the electronic components as necessary until
the canopy securely “clicks” into place with the magnets. In
order to fit the battery connectors underneath the canopy,
wrap the connector leads around the pack as shown. We
used transparent tape to hold the leads in place.
❏
4. Connect the servo and ESC leads to the receiver.
Depending on the model servos being used, you may need a
short servo extension for one of the servo leads. If you need to
make a battery connector adapter to connect your LiPo battery
pack to the ESC, see the
“Expert Tip” that follows.
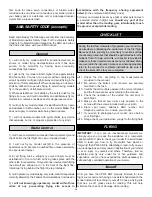
C. Cut a 3/8" [9.5 mm] long piece of 3/8" [9.5 mm]
diameter heat-shrink tubing. Use a heat gun or lighter to
shrink the tubing around the soldering tabs of your battery
connector adapter.
B. Spread the ends of the micro plug apart so that they
align with the soldering tabs on the female ultra plug (the
device shown in the picture is the X-Acto
®
Extra Hands
Double Clip, XACR4214). Join the two connectors
together with solder, being sure that excess solder will not
create a short between the solder tabs. Confirm that you
are joining the connectors together with the correct
polarities (red to red, black to black)! Use your battery
pack and ESC as a guide.
A. The example shows you how to make an adapter to go
from a W.S. Deans Micro Plug to a female W.S. Deans
Ultra Plug.
MAKE A BATTERY CONNECTOR ADAPTER
11


